
The physics of the porcelain glaze
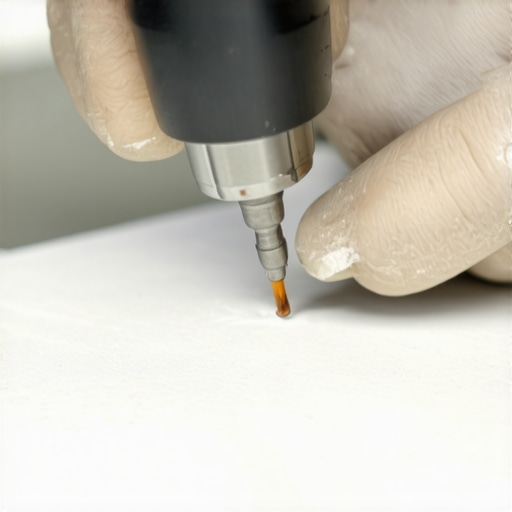
Drilling through porcelain requires diamond-tipped bits, constant water lubrication, and a slow, steady RPM to prevent thermal shock. Unlike ceramic, porcelain is fired at extreme temperatures, resulting in a dense, glass-like structure that cracks if localized heat expands the material too quickly. Successful drilling depends on managing friction.
I once walked into a luxury bathroom renovation where a plumber had just shattered three slabs of custom-imported Italian porcelain. He was using a standard carbide masonry bit, trying to force his way through to install a shower bar. The heat buildup was so intense that the tile didn’t just crack, it exploded into a spiderweb of shards. He looked at me, sweating and defeated, and asked why the tile was so stubborn. I told him it wasn’t the tile that was stubborn, it was his refusal to respect the physics of the material. I spent the next four hours carefully replacing those tiles and drilling the remaining holes using the wet-drill method I have perfected over twenty-five years. Porcelain is not just a hard surface, it is a high-density engineered stone with a moisture absorption rate of less than 0.5 percent. This density is its strength, but it is also its greatest weakness when a drill bit introduces high-frequency vibrations and thermal stress. When you are working on showers that wow modern designs for 2025, you cannot afford a single mistake. The cost of the tile alone often exceeds the labor for the entire day. You have to treat every hole as a surgical procedure.
“A floor is only as good as the subfloor beneath it; deflection is the enemy of every joint.” – Master Flooring Axiom
Why your standard masonry bit will fail
Standard masonry bits use a spade-shaped carbide tip designed for impact rather than abrasion. Porcelain is too dense for impact drilling, which often leads to the tip skating across the surface or creating micro-fractures. You must use diamond grit hole saws or specialized vacuum-brazed diamond bits for success.
The molecular structure of porcelain is nearly identical to glass. When you use a hammer drill or a standard bit, you are essentially trying to punch through a window with a blunt object. The resistance generates heat upwards of 800 degrees Fahrenheit in a matter of seconds. This heat has nowhere to go because porcelain is an excellent insulator. The resulting thermal expansion causes the area immediately surrounding the bit to grow while the rest of the tile remains cool and rigid. This tension is what causes the crack. Instead of cutting, you need to grind. Diamond bits work by grinding away the material at a microscopic level. This process is slower but far more precise. If you are integrating eco-friendly tile solutions for sustainable homes in 2025, you likely have even denser materials to deal with. These recycled-content tiles are often even more brittle than traditional porcelain, making the choice of bit even more significant. I have seen guys try to save ten dollars on a bit only to lose five hundred dollars in ruined materials. It is a fool’s errand.
The water cooling mandate for diamond bits
Lubrication is not optional when drilling porcelain because it keeps the diamond grit from burning up and prevents the tile from reaching its thermal breaking point. A steady stream of water or a saturated sponge held against the bit acts as a heat sink, extending the life of the tool.
In the world of professional installation, we call this wet-cutting. Friction is the enemy of the installer. When the drill bit spins at 2,000 RPM, the friction between the diamond grit and the porcelain generates immense energy. Without water, that energy turns into heat. Water serves two purposes. First, it cools the bit and the tile. Second, it flushes out the porcelain dust. This dust is actually abrasive and, if left in the hole, will act like sandpaper on the bit, dulling it prematurely. I prefer using a small spray bottle or a dedicated water feed system. If you are working alone, you can use a plumber’s putty dam. You build a small ring of putty around the drill site and fill it with water. This creates a miniature lake that keeps the bit submerged throughout the process. This is especially useful when you are working on tile cleaning tips for a sparkling bathroom in 2025 and notice a loose fixture that needs re-anchoring. Keeping the surface cool ensures the structural integrity of the glaze remains intact. If the glaze discolors during drilling, you have already failed the temperature test.
The masking tape method for bit stabilization
Applying a piece of masking tape over the intended drill site prevents the bit from wandering across the polished surface of the tile. This provides enough initial traction for the diamond grit to bite into the glaze and begin the grinding process without scratching the surrounding area.
Porcelain glazes are notoriously slippery. If you start a drill on a bare tile, the bit will dance across the surface like a hockey puck on ice. One small slip and you have a permanent scar on the tile that no amount of how to refresh grout without replacing it techniques can fix. I always use a heavy-duty blue painter’s tape. I mark my center point on the tape with a sharp pencil. When I start the drill, I hold it at a 45-degree angle. This allows the edge of the hole saw to catch the tile and create a small crescent-shaped groove. Once that groove is established, I slowly pivot the drill to a 90-degree angle. This technique is standard for anyone doing professional grout restoration secrets for long-lasting results because it ensures that all hardware is centered perfectly within the grout lines or the tile body. Stability is everything. If the drill vibrates too much, you are likely to chip the edges of the hole, which can lead to a larger fracture later when the wall expands and contracts.
| Bit Type | Ideal Material | Heat Tolerance | Longevity |
|---|---|---|---|
| Diamond Hole Saw | Porcelain, Glass | Very High | Medium |
| Vacuum Brazed Diamond | Hard Stone, Tile | High | High |
| Carbide Tipped | Ceramic, Brick | Low | Low |
| Steel Masonry | Soft Concrete | Very Low | Very Low |
Managing the void behind the tile
Hollow spots in the mortar bed are the primary cause of cracking during the drilling process because they lack the support to resist the downward pressure of the drill. Ensuring at least 95 percent mortar coverage during installation is the only way to guarantee a safe drilling surface.
You can have the best bit in the world, but if the installer who came before you left a “dead spot” or a hollow pocket of air behind the tile, it will crack as soon as you apply pressure. This is why I am a stickler for back-buttering every single tile. When you hear a hollow sound when tapping the tile, you are in danger. If I suspect a void, I reduce my pressure to almost zero and let the weight of the drill do the work. This is the same care we take when installing chic baseboard designs that transform rooms in 2025 near tiled areas. You have to know what is behind the wall. If you are drilling through a shower wall to hit a stud, you are passing through multiple layers: the porcelain, the thin-set, the waterproofing membrane, and the cement board. Each layer has a different density. The transition between the tile and the cement board is where most bit breakages occur because the user expects the resistance to drop, but the friction actually changes frequency. Always maintain a steady hand through the transition.
- Select a diamond-tipped bit sized exactly to your anchor.
- Apply masking tape to the drill site to prevent skating.
- Keep a constant supply of cool water on the bit.
- Start the drill at a 45-degree angle to establish a pilot groove.
- Maintain low RPM and avoid using the hammer function.
- Clear dust frequently to prevent bit overheating.
Finishing the hole without blowout
Reducing pressure as you approach the back of the tile prevents the bit from punching through and creating a blowout. A blowout occurs when the last millimeter of porcelain shatters under pressure rather than being ground away, which can weaken the entire tile.
The last few seconds of drilling are the most dangerous. You can feel the resistance change as the bit starts to find the back of the tile. This is when most people get impatient and push harder. Don’t do it. If you push, the backside of the tile will flake off in a cone shape. While this might be hidden by a flange or an escutcheon plate, it creates a point of structural weakness. I have seen entire bathroom walls develop cracks years later because a blowout at a mounting point finally decided to travel across the face of the tile. Once you are through the porcelain, you often need to switch to a standard bit if you are going into wood studs or a different type of masonry bit for the backing board. This prevents the diamond bit from being ruined by materials it wasn’t designed to cut. When you finish, clean the area thoroughly. Leftover slurry from the drilling process can stain your grout if it’s not sealed. Check your baseboards makeover ideas to elevate your space to ensure no water has seeped behind the trim during your wet-drilling. Proper cleanup is the mark of a pro.
“Porcelain is a deceptive medium; it mimics the beauty of stone but requires the precision of a watchmaker to master.” – Master Flooring Axiom
While most people want the thickest underlayment, too much cushion actually causes the locking mechanisms on LVP to snap under pressure. The same logic applies to tile. You want a solid, unyielding bed. When you drill into a tile that is properly bonded to its substrate, the vibration is absorbed by the entire wall or floor assembly. When the tile is poorly bonded, it vibrates independently, leading to catastrophic failure. If you ever find yourself struggling, stop. Pull the bit out. Check for heat. If the bit is too hot to touch, you are moving too fast. Speed is the enemy of porcelain. Slow, methodical grinding is the only way to ensure that your showers with a style trendy ideas for small bathrooms remain beautiful for decades. If you have questions about specific installations or need professional guidance, you can always contact us for expert advice. We have spent decades mastering these techniques so you don’t have to learn the hard way. Remember to always check your local building codes regarding waterproofing around drilled holes in wet areas. A dab of 100 percent silicone in the hole before inserting the anchor is a cheap insurance policy against mold and water damage. Refer to our privacy policy for more information on how we handle your data when you reach out for consultations.