
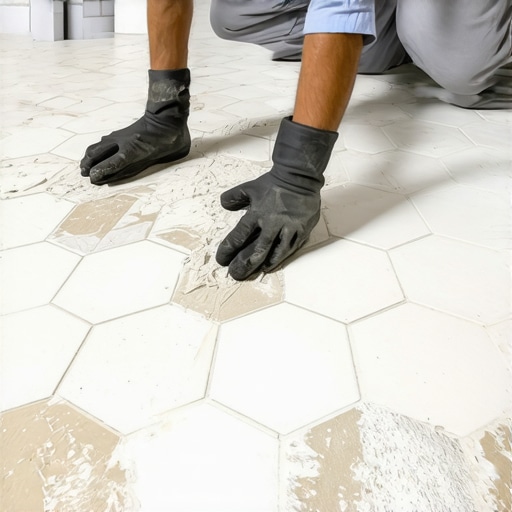
Most guys skip the leveling compound. They think the underlayment will hide the dip. It won’t. I spent three days grinding concrete on a job last month just so the floor wouldn’t click like a castanet. That is the reality of professional flooring. If your subfloor has a 1/8 inch dip over ten feet, your tile is going to lip, and your grout is going to crack. Hexagon tiles are particularly unforgiving. Unlike a standard subway tile, a hexagon has six sides and three 120-degree angles meeting at every single junction. If that subfloor is not perfectly flat, those three points will never meet on the same plane. You end up with a structural nightmare that no amount of fancy stone can fix. I have seen fifteen thousand dollar installs ruined because the installer was too lazy to pull a straight edge across the room. We are not just laying pretty patterns. We are engineering a walking surface that must withstand thousands of pounds of pressure over its lifetime. Every time you step on a tile that has a void beneath it, the air compresses, the tile flexes, and the grout joint fails. It is simple physics, yet I see it ignored on half the job sites I visit. If you want a floor that lasts, you start with the grinder and the moisture meter, not the tile saw.
The geometric trap of the 120 degree angle
Hexagon tiles create a unique challenge because of their multifaceted edges which require a specific approach to grout application to avoid air pockets. When you are working with a square tile, the grout travels in a straight line. With a hexagon, the grout must navigate three separate directions at every intersection. This creates a vortex where air frequently gets trapped. If you just swipe the float across the top, you are merely skimming the surface. The air trapped underneath will eventually cause the grout to sink as it cures, leaving a pinhole or a void. This is where most DIY projects and cheap labor fail. They look for visual coverage rather than structural density. You need to understand the slump of your grout. If it is too thick, it will not flow into the corners. If it is too thin, the water will evaporate and leave the grout brittle. We are looking for the consistency of peanut butter, something that holds its shape but still flows under the pressure of a hard rubber float. The geometry of the hexagon demands a diagonal approach that is constantly changing as you move across the field. You cannot just pull the float in one direction and expect a solid fill. You have to work the material into those three-way junctions from multiple angles to ensure the air is displaced by the solids.
“A floor is only as good as the subfloor beneath it; deflection is the enemy of every joint.” – Master Flooring Axiom
Why your subfloor is lying to you
Before you even open a bag of grout, you have to verify the integrity of the substrate because any movement will telegraph through the tile. Wood subfloors are notorious for seasonal expansion and contraction. In high humidity environments, the wood fibers swell, pushing against the tile. In dry climates, the wood shrinks, pulling away. This is why a proper uncoupling membrane is non-negotiable for hexagon installs. You need that layer of protection to allow the subfloor and the tile to move independently. If you bond tile directly to plywood, you are asking for a disaster. The bond strength of the thin-set is often stronger than the internal layers of the plywood, leading to delamination. I always check the L/360 deflection rating. If the joists are spaced too far apart, the floor will bounce. No grout in the world can survive a bouncing floor. You will see hairline cracks within months. To get a perfect grout job, the tile must be rock solid. This means checking for high spots and grinding them down until the floor is within 1/8 inch of level over a ten-foot span. Anything less is just a temporary decoration that will fail under the first heavy appliance you drag across it.
| Grout Type | Chemical Base | Water Resistance | Best Application |
|---|---|---|---|
| Sanded Grout | Portland Cement | Moderate | Joints wider than 1/8 inch |
| Unsanded Grout | Portland Cement | Low | Narrow joints and wall tile |
| Epoxy Grout | Resin and Hardener | High | Showers and high-traffic areas |
| High-Performance | Calcium Aluminate | High | Rapid set and color consistency |
The chemical bond of modern polymers
The transition from traditional cement grout to polymer-modified formulas has changed the way we handle the curing process on modern job sites. Traditional grout relies on a simple hydration reaction. Polymer-modified grouts incorporate powdered latex or acrylic resins that create a flexible bridge between the tiles. This is vital for hexagons because of the increased number of joints per square foot. More joints mean more opportunities for failure. When you mix your grout, you are initiating a chemical reaction. If you over-mix it with a high-speed drill, you introduce millions of microscopic air bubbles. These bubbles weaken the structure. You should always mix by hand or at very low RPM. Let the grout slake for ten minutes. This allows the chemicals to fully hydrate before you do the final stir. If you skip the slake, the grout will be