
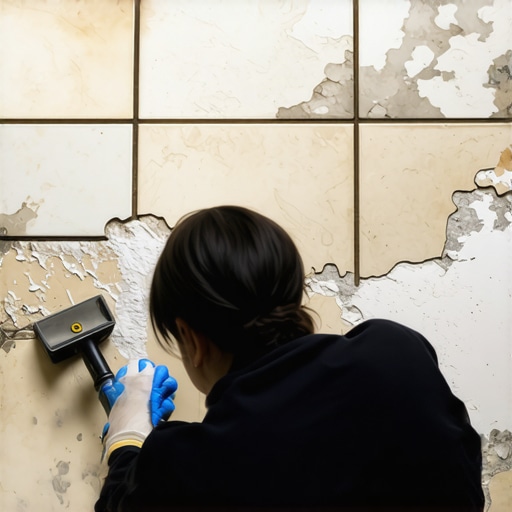
The physics of grout bond failure and how to prevent it
Most homeowners assume they can simply smear a fresh layer of grout over the old, dusty lines in their shower and call it a day. That is a recipe for a catastrophic failure. I have spent twenty five years fixing the mistakes of DIY enthusiasts and cheap contractors who thought they could bypass the laws of physics. Grout is not paint. It does not just dry on top of a surface. It requires a mechanical bond to the edges of the tile and the crystalline structure of the substrate. If you do not prep the surface correctly, the new grout will crack and flake away within months, leaving you with a bigger mess than you started with. I once spent three days grinding concrete on a job last month just so the floor would not click like a castanet, and grout prep requires that same level of obsessive focus on the sub-surface conditions. If the surface is contaminated with soap scum or hard water minerals, nothing you put on top will stay.
The depth requirement for structural grout integrity
To successfully apply a new layer of grout, you must remove at least two thirds of the existing material depth to create a stable channel for the new mixture. This **mechanical bond** is dependent on the surface area of the **tile edges** and the **porosity** of the remaining **cementitious grout**. Simply scratching the surface is insufficient for long term durability. I recommend using an oscillating tool with a diamond grit blade or a manual carbide tipped scraper to evacuate the old joints. You are looking for a clean, deep furrow where the new grout can seat itself. When you skimp on depth, you create a thin veneer that lacks the compressive strength to withstand the thermal expansion and contraction of the room. This is especially true in showers where heat and moisture cause materials to move at different rates. If you want to avoid a full replacement, check out how to refresh grout without replacing it for specific techniques on localized repairs. However, for a full room, you have to do the heavy lifting of excavation.
“A floor is only as good as the subfloor beneath it; deflection is the enemy of every joint.” – Master Flooring Axiom
Why your old grout is a chemical minefield
Old grout is a sponge for surfactants, skin oils, and fatty acids from soaps that create a microscopic barrier between the old material and the new layer. These **organic contaminants** prevent the **polymer chains** in modern grout from anchoring to the **silica** and **calcium carbonate** in the old mixture. You cannot simply vacuum the dust and expect a bond. You need a high pH cleaner or a dedicated phosphoric acid solution to strip the minerals and oils away. This is the part where most people fail. They use a generic floor cleaner that leaves behind its own residue. You need to neutralize the surface after cleaning with plenty of fresh water. I have seen epoxy grouts fail because the installer didn’t realize the homeowner had been using a wax based cleaner on the tile for years. That wax penetrates deep into the pores. If you do not reach the raw, clean material, the new grout is essentially floating on a layer of grease. For those looking for long term maintenance after the job is done, grout restoration secrets for long lasting results provides a roadmap for keeping that bond intact.
| Grout Type | Minimum Depth Required | Best Application | Bonding Strength |
|---|---|---|---|
| Sanded Grout | 2/3 of tile thickness | Joints wider than 1/8 inch | High Mechanical |
| Unsanded Grout | 2/3 of tile thickness | Thin joints in showers | Moderate |
| Epoxy Grout | Full joint depth | High moisture areas | Chemical and Mechanical |
The ghost in the expansion gap
One of the biggest mistakes in tile work is grouting where you should be caulking, specifically at the change of plane where walls meet floors or where baseboards meet the tile. These areas are subject to different rates of movement. If you pack grout into a corner, it will crack. The preparation phase is the perfect time to identify these movement joints and clear them out entirely. You want a clean gap that can be filled with a 100 percent silicone sealant that matches your grout color. This prevents the grout from shearing off when the house settles or the humidity changes. In bathroom environments, the interaction between the tile and the wall is vital. You might even consider chic baseboard designs that transform rooms in 2025 to hide those necessary expansion gaps while adding a modern aesthetic. I always tell my apprentices that the gap is not an error; it is an engineering requirement. Without it, the pressure will crush your new grout lines from the inside out.
- Remove 2/3 of old grout depth with a diamond blade.
- Vacuum all dust using a HEPA filter to prevent airborne silica.
- Scrub the tile edges with a stiff nylon brush and a pH neutral cleaner.
- Rinse the joints three times with distilled water to remove all surfactants.
- Allow the substrate to dry for 24 hours before applying new grout.
The molecular reality of moisture levels
Before you push new grout into those clean channels, you must verify the moisture content of the subfloor and the tile edges. If the substrate is saturated, the water will try to escape through the new grout as it cures, creating pinholes and weakening the structure. This is known as outgassing. In a bathroom, this is often caused by a failing waterproof membrane behind the tile. If you notice the old grout was mushy or damp even after several days of non use, you have a bigger problem than just ugly grout. You have a moisture intrusion issue. For those planning a full redesign to fix these underlying issues, exploring showers with a style trendy ideas for small bathrooms can help you integrate proper waterproofing with modern aesthetics. You have to ensure the environment is dry enough for the new grout to hydrate correctly. Grout doesn’t dry; it cures through a chemical reaction with water. If there is too much or too little water in the environment, that reaction fails, and you end up with a soft, chalky mess that will wash away the first time you use the shower. Use a pinless moisture meter to check the surrounding area. If the levels are above 15 percent, you need to set up a dehumidifier and wait. I have waited a week on jobs just for a slab to dry out before I would even touch a grout bag. It is that important.
“Grout is the most misunderstood component of a tile assembly; it is the bridge between rigid units.” – TCNA Installation Standards
The 1/8 inch that ruins everything
Precision is the difference between a floor that lasts thirty years and one that fails in three. When you are prepping the old surface, you must ensure the tile edges are perfectly clean. Even a 1/8 inch bit of old, crusty grout sticking to the side of a porcelain tile will create a weak point. The new grout needs a clean, vertical surface to grip. I use a small dental pick or a utility knife to scrape the sides of the tiles individually. It is tedious work, but it is the only way to guarantee a professional result. While you are down there on your knees, take a look at your baseboards. If they are showing signs of rot or swelling, it is because moisture has been migrating through the old, cracked grout. You can find inspiration for replacing them at baseboards makeover ideas to elevate your space. A fresh set of baseboards paired with a perfectly prepped grout job can make a twenty year old bathroom look brand new. Don’t forget that cleaning the surface is a continuous process. As you work, you will create more dust. Keep the vacuum running. If you grout over dust, you are essentially grouting over a layer of ball bearings. The grout will never touch the tile, and it will pop out as soon as someone walks on it. It is a game of millimeters and molecules. If you aren’t willing to get the joints perfectly clean, don’t bother starting the job. You are just wasting money on materials that will fail. For the final cleaning phase before the new grout goes in, follow tile cleaning tips for a sparkling bathroom in 2025 to ensure every microscopic bit of debris is gone. Preparation is 90 percent of the work. The actual grouting is just the victory lap.