
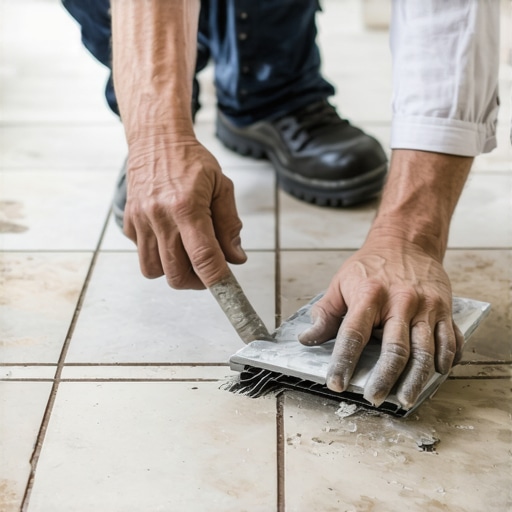
The microscopic appetite of natural stone
Natural stone contains a network of interconnected pores that act as capillaries. These openings absorb the liquids in grout, leading to permanent staining or picture framing. Managing this requires physical barriers like grout release agents or high-quality sealers to block pigment entry into the stone matrix. I spent three days grinding concrete on a job last month just so the floor wouldn’t click like a castanet, but even a level subfloor won’t save you if you fail to understand the chemistry of the stone itself. People walk into my shop and pick out a beautiful Carrara or a rustic Travertine, then they ask for a charcoal grout. That is when I have to stop them. If you put dark, pigmented grout on a light, porous stone without a plan, you are not installing a floor, you are painting a disaster. The stone will pull the moisture and the fine pigments into its surface, creating a permanent dark halo around every tile. This is not a surface stain that you can just scrub away later. It is a molecular intrusion. I once saw a $40,000 bathroom floor ruined because the installer thought he could just wipe it clean. He could not. The stone absorbed the dye within minutes. To prevent this, you must treat the stone as a biological entity that wants to drink whatever you put on top of it. This is why we use grout release or pre-sealing techniques before a single ounce of grout touches the joint. The physics of the installation demand that we block the pores before we fill the gaps.
The physics of the grout float
Properly applying grout to natural stone requires a delicate balance of pressure and timing to ensure the material enters the joints without being forced into the stone pores. Using a soft rubber float and working in small sections prevents the grout from drying on the surface. When you are working with material like Slate or Tumbled Marble, the surface texture is your biggest enemy. Those tiny pits and valleys are perfect traps for cementitious particles. If you use a hard float, you risk scratching the delicate surface of stones like Onyx or soft Marble. You need a float with enough give to contour to the stone but enough rigidity to pack the joint tight. Deflection in the subfloor is the enemy of every joint, but poor packing is the enemy of every homeowner. If the grout is not packed to the full depth of the stone, it will eventually crack and fall out, especially in high-traffic areas. This leads people to look for grout restoration secrets for long lasting results later on, but the best restoration is a correct initial installation. You have to push the grout at a 45-degree angle to the joint to ensure it fills from the bottom up. Any air pockets left behind will eventually collapse under the weight of furniture or foot traffic. This is a structural engineering challenge, not just a cleaning task. The chemistry of the grout also matters. High-polymer grouts offer better flexibility but can be even more aggressive in their staining potential because the polymers act as a carrier for the pigment, dragging it deeper into the stone than water alone would.
“A floor is only as good as the subfloor beneath it; deflection is the enemy of every joint.” – Master Flooring Axiom
Why pre-sealing is not an option
Pre-sealing natural stone before grouting is a mandatory step that creates a temporary or permanent shield against pigment absorption and water damage. This process ensures that the grout slides off the surface while remaining firmly stuck within the side walls of the tile. I have seen guys try to skip this by using more water during the cleanup. That is a massive mistake. Excessive water during the grout cleanup phase dilutes the grout, leads to color shading issues, and can cause the grout to become brittle. It also pushes more water into the stone, which can lead to efflorescence, those white salty deposits that bloom on the surface weeks later. A high-quality penetrating sealer should be applied to the face of the stone, and in some cases the edges, at least 24 hours before grouting. This gives the sealer time to cure and form its hydrophobic barrier. If you are dealing with a particularly stubborn stone like a high-honed Basalt, you might even need a grout release agent. This is a sacrificial layer that you wash away after the job is done. It ensures that even the tiniest particles of pigment cannot find a home in the stone. When planning showers that wow modern designs for 2025, this step is what separates a professional finish from a DIY mess. Without it, your beautiful white stone will look muddy and aged before the house is even finished. It is about the integrity of the material.
| Stone Type | Porosity Level | Janka Hardness | Grout Recommendation |
|---|---|---|---|
| Carrara Marble | High | High (relative) | Unsanded / High-Performance |
| Travertine | Extreme | Medium | Sanded (to fill pits) |
| Slate | Medium | Varies | Sanded / Polymer Modified |
| Granite | Low | Very High | Sanded or Epoxy |
| Limestone | Extreme | Low | Pre-sealed Unsanded |
The 1/8 inch that ruins everything
Expansion gaps at the perimeter of a stone floor are vital for preventing tenting and cracking as the house shifts and temperatures fluctuate. A gap of at least 1/8 to 1/4 inch must be maintained at all walls and vertical obstructions. I see it all the time. An installer runs the stone tight against the wall, then covers it with baseboards. When the summer humidity hits, the subfloor expands, the stone has nowhere to go, and the grout joints start popping like gunshots. Or worse, the stone itself buckles. This is why chic baseboard designs that transform rooms in 2025 are not just for looks. They are there to hide the necessary structural gap that allows your floor to breathe. You should never fill that perimeter gap with hard grout. It must be a flexible 100 percent silicone caulk that matches the grout color. This allows for movement. If you are working in a climate like the swampy humidity of Houston or the damp winters of the Pacific Northwest, this gap is even more important. The wood subfloor will move significantly more than the stone, and if they are locked together, the weaker material will fail. Usually, that is the grout joint or the bond between the stone and the thin-set. I always tell people to check their baseboards makeover ideas to elevate your space and ensure the installer didn’t just cram grout back there to save time. It is a lazy habit that causes expensive repairs down the road.
The moisture trap in modern showers
Shower installations involving natural stone require a sophisticated waterproofing system behind the stone to prevent water from dwelling in the mud bed or the stone itself. Natural stone is not waterproof; it is a sponge that eventually lets water through. This is why the TCNA has such strict rules about liners and membranes. If you are building showers with a style trendy ideas for small bathrooms, you have to be even more careful because the water concentration is higher in a smaller area. When you grout a stone shower, you are not just making it look good. You are creating the first line of defense. However, if water gets behind that stone because of a pinhole in the grout or a failed seal at the drain, it will sit there. This leads to stone discoloration, mold, and eventually structural rot. I always recommend a high-performance, cement-based grout with antimicrobial properties for showers. Some people swear by epoxy, but epoxy is difficult to work with on porous stone because it can leave a resin haze that is nearly impossible to remove without damaging the stone surface. If you do go the epoxy route, your pre-sealing game has to be perfect. You are basically performing surgery on the floor. One wrong move and the stone is stained forever. I also advise clients to look into tile cleaning tips for a sparkling bathroom in 2025 to maintain that sealer. A sealer is not a permanent shield. It is a sacrificial barrier that needs to be replenished.
“Natural stone breathes and moves; if you treat it like plastic, it will fail like glass.” – Master Flooring Axiom
The chemistry of grout selection
Selecting between sanded and unsanded grout depends entirely on the width of the joint and the scratch-resistance of the stone surface. Using the wrong type will lead to either structural failure of the joint or physical damage to the stone. For joints wider than 1/8 inch, you generally need sanded grout. The sand acts as a bridge, giving the grout strength and preventing it from shrinking as it cures. But if you are working with a soft, polished marble, that sand will act like sandpaper under your float and ruin the finish. In those cases, you need a high-performance unsanded grout or a specialty grout with fine aggregates that won’t scratch. I see many DIYers get confused by this and end up with cracked joints because they used unsanded grout in a 1/4 inch gap. It will shrink, it will crack, and it will fail. If you have existing issues, you might want to learn how to refresh grout without replacing it, but understand that if the structural integrity is gone, a refresh is just a band-aid. You also need to consider the water-to-powder ratio. Measuring by eye is for amateurs. If you add too much water, you are weakening the polymer bonds and guaranteed to have color inconsistencies. I use a scale. It sounds obsessive, but when you are responsible for a stone floor that costs more than a mid-sized sedan, you measure everything. You also have to consider the environmental impact, which is why eco-friendly tile solutions for sustainable homes in 2025 are becoming more popular. These new grouts use recycled materials and low-VOC chemicals, which is better for the installer and the homeowner alike.
A checklist for stone grouting success
- Acclimate the stone to the room temperature and humidity for at least 48 hours before installation.
- Verify the subfloor meets deflection standards (L/720 for natural stone is the target).
- Clean the stone surface with a pH-neutral cleaner to remove any dust or quarry residue.
- Apply a high-quality penetrating sealer or grout release agent to the face of the tile.
- Mix the grout using a low-speed drill to avoid introducing air bubbles into the mixture.
- Test a small, inconspicuous area first to check for pigment migration or staining.
- Use a clean, damp sponge for cleanup, changing the water frequently to avoid haze.
- Buff the stone with a dry microfiber cloth once the grout has hazed over to remove residue.
- Wait the full manufacturer-recommended time before applying a final post-grout seal.
- Ensure all perimeter joints are filled with 100 percent silicone caulk rather than hard grout.
If you follow these steps, you avoid the heartbreak of a stained floor. It is about patience and respecting the material. Natural stone has been around for millions of years. It doesn’t care about your project timeline. If you rush the drying process or skip the sealing phase, the stone will react according to the laws of physics, not your schedule. I have spent 25 years on my knees learning these lessons the hard way so you don’t have to. If you ever have doubts about your specific stone or the subfloor requirements, you can always contact us for professional guidance. Every stone is different. Every house is different. But the chemistry of a good grout job remains the same. It is a combination of clean surfaces, proper barriers, and the right timing. Don’t let a $15 bag of grout ruin a $5,000 stone shipment. Take the time to do it right. Check your moisture levels, seal your surfaces, and respect the expansion gaps. Your floor will thank you for it by lasting a lifetime. If you want more details on our policies, feel free to visit our privacy policy page. Now get out there and build something that lasts.