
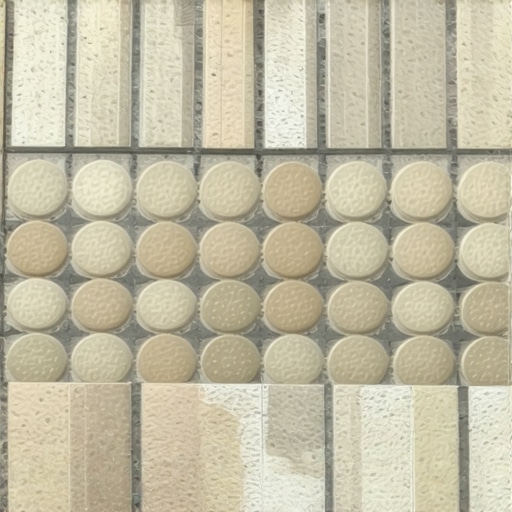
Most guys skip the leveling compound. They think the underlayment will hide the dip. It won’t. I spent three days grinding concrete on a job last month just so the floor wouldn’t click like a castanet. When you are dealing with penny tiles, that subfloor needs to be flatter than a sheet of glass. If there is a 1/8 inch dip over ten feet, your penny tiles will follow that curve and create a shadow line that makes the whole room look like a funhouse mirror. I have spent 25 years on my knees with a straightedge and a grinder. I know when a floor is lying to me. Penny tiles are the ultimate truth tellers. They reveal every mistake, every shortcut, and every ounce of laziness in the prep work. If you think you can just slap these down and grout them in an afternoon, you are in for a very expensive lesson in physics and chemistry.
The geometric trap of the circle
Penny tiles create a geometric challenge because their circular shape results in a massive increase in grout surface area compared to square or rectangular tiles. This layout requires perfect spacing between sheets to avoid visible grid lines. The sheer volume of grout means that any inconsistency in the mixing process or the application technique will be amplified across the entire surface. You are not just filling gaps, you are creating a structural matrix that holds hundreds of individual ceramic or glass circles in place. The surface tension of the grout must be managed perfectly to ensure it sits flush with the radius of each tile edge.
When you work with a standard 12 by 24 inch tile, you have very few linear feet of grout. With penny tiles, you have miles of it. Every one of those circles has a perimeter that needs to be packed tight. If you leave a void, water will find it. If you over-wash the joint, you weaken the chemical bond. It is a delicate balance. The physics of the circle means the grout is the star of the show, whether you want it to be or not. You are looking at nearly 300 percent more grout than a standard installation. That is a lot of room for error. If the grout is too thin, it slumps. If it is too thick, you will never get it into the tight radiuses between the pennies.
“A floor is only as good as the subfloor beneath it; deflection is the enemy of every joint.” – Master Flooring Axiom
Why your subfloor is lying to you
Subfloor deflection and planarity are the primary reasons penny tile installations fail during the grouting phase or shortly after. A subfloor that feels solid under a large format tile may actually have micro-bends that cause penny tiles to pop or the grout to crack. You must achieve a floor flatness rating of 1/8 inch in 10 feet to ensure the sheets of penny tile do not show a visible break at the seams. Using a high quality self leveling underlayment is not an option, it is a requirement for a professional result.
I have seen it a thousand times. A guy thinks he can use a thicker bed of thin-set to level the floor as he goes. That is a recipe for disaster. Thin-set is meant for bonding, not for leveling. As the water evaporates from the mortar, it shrinks. When it shrinks, it pulls the tile down. Since penny tiles are so small, they follow every microscopic movement of the mortar. You end up with a finished surface that looks like the surface of the moon. Then, when you go to grout, the squeegee hits every high spot and skips over every low spot. You spend the whole day fighting the floor instead of finishing it. You have to get the substrate right before the first sheet of tile even touches the floor.
The chemistry of the bond
Grout chemistry involves a complex hydration process where water molecules react with portland cement to create a rigid crystalline structure. When grouting penny tiles, the high ratio of grout to tile means that evaporation happens faster than on larger tiles. This can lead to flash drying and pigment mottling if the ambient temperature and humidity are not controlled. Using a polymer modified grout is essential for the flexibility and bond strength required to keep those small circles from dislodging under foot traffic. The chemical bond must be strong enough to resist the shear forces that occur when a person walks across the floor.
If you are working in showers that wow, the chemistry becomes even more vital. You are dealing with constant moisture and temperature fluctuations. The grout needs to be dense. If it is porous, mold will move in and set up shop in all those circular crevices. I prefer high performance cement grouts or epoxies for this. Epoxy is a nightmare to work with on penny tiles because it is sticky and sets fast, but the chemical resistance is unmatched. You have to be fast. You have to be precise. You cannot leave a film on the tile or it will be there forever. It is like working with liquid plastic that wants to ruin your life if you give it half a chance.
| Grout Type | Bond Strength | Moisture Resistance | Difficulty Level |
|---|---|---|---|
| Standard Cement | Moderate | Low | Easy |
| Polymer Modified | High | Moderate | Medium |
| Epoxy Grout | Very High | Excellent | Expert |
| Premixed Urethane | High | High | Medium |
The nightmare of vertical surfaces and gravity
Installing penny tiles on vertical surfaces like shower walls or backsplashes introduces gravity as a constant antagonist during the grouting process. The grout wants to slump out of the circular joints before it sets, which can lead to uneven depths and a messy finish. You must mix the grout to a slightly stiffer consistency for walls than you would for floors. This ensures the material stays packed into the joints while you perform the initial wash. Timing is everything when gravity is working against you.
I always tell my crew that walls are for the patient. You can’t rush a penny tile wall. If you start washing too soon, you pull the grout right out of the joints. If you wait too long, you are scrubbing until your arms fall off. And don’t get me started on the transition to the baseboards makeover ideas. If your wall tile isn’t perfectly plumb, your baseboards will show a gap that no amount of caulk can hide. Everything is connected. A mistake at the bottom of the wall translates to a disaster at the top. You have to maintain that perfect spacing all the way up, or the grout lines will start to look like a staircase instead of a smooth field of color.
“Proper coverage for small format tile requires at least 95 percent mortar contact in wet areas.” – TCNA Handbook Standards
Why epoxy changes the game
Epoxy grout offers a non-porous finish that is immune to staining and water penetration, making it the technical gold standard for penny tile installations. Unlike cementitious grout, epoxy does not rely on water for its curing process, but rather a chemical reaction between a resin and a hardener. This results in a joint that is as hard as the tile itself. However, the short working time and the need for specialized cleaning surfactants make it a challenge for the inexperienced. You have to work in small sections and have a dedicated team for washing behind the applicator.
When you use epoxy on penny tiles, you are essentially creating a monolithic surface. It is incredibly durable. But if you leave a haze, you are in big trouble. That haze is basically a layer of plastic glued to your tile. You need to use the right sponges and plenty of clean water. Change your water every 20 square feet. It sounds like overkill, but it is the only way to ensure the pennies stay bright and the grout lines stay crisp. For anyone looking at eco-friendly tile solutions for sustainable homes in 2025, epoxy is a great choice because it lasts forever and doesn’t require harsh chemical cleaners later in its life cycle.
The baseboard transition problem
The transition between penny tiles and baseboards is a critical detail that determines the visual success of the entire flooring project. Because penny tiles have a thin profile, standard baseboards may leave a gap that requires a shoe molding or a scribe to the floor. You must ensure the floor is perfectly level at the perimeter so the baseboard sits tight against the tile. If the grout is too high at the edges, the baseboard will wobble and create an amateur look. Detail work at the edges is what separates a master from a tinkerer.
Check out chic baseboard designs that transform rooms in 2025 to see how a clean transition can make a small bathroom look twice as big. I always recommend installing the tile first, then the baseboard. Never tile up to an existing baseboard. It looks cheap and it doesn’t allow for the proper expansion gap. Even though these tiles are small, the whole floor system still expands and contracts with the seasons. You need that 1/4 inch gap hidden under the wood. If you grout tight to the wall, the floor will eventually buckle or the grout will turn to powder as the house moves.
Penny tile pre-flight checklist
- Verify substrate flatness to within 1/8 inch over 10 feet.
- Check moisture content of the concrete or wood subfloor.
- Ensure all tile sheets are from the same dye lot to avoid shading.
- Dry lay at least three sheets to check for consistent spacing between sheets.
- Use a 3/16 inch V-notch trowel to avoid thin-set squeeze-through.
- Clean any excess mortar from the joints before it cures.
- Mix grout with a low-speed drill to avoid entraining air bubbles.
- Have a bucket of clean water and fresh sponges ready before you start.
If you follow those steps, you might stand a chance. If you cut corners, the floor will punish you. Maintenance is the next hurdle. Once the grout is in, you need to know how to refresh grout without replacing it because even the best job needs a touch-up eventually. Keeping those miles of grout clean requires a strategy. I tell people to look at tile cleaning tips for a sparkling bathroom in 2025 to keep things looking sharp. If the grout gets dingy, the whole floor looks old. Don’t let your hard work go to waste by using the wrong cleaners. Acidic cleaners will eat cement grout for breakfast. Use pH neutral cleaners and a soft brush. Your knees will thank you later when you aren’t out there scrubbing the floor for the third time in a month.