
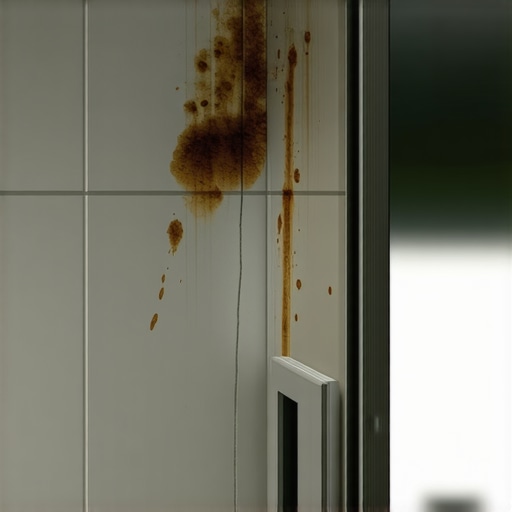
Most guys skip the leveling compound. They think the underlayment will hide the dip. It won’t. I spent three days grinding concrete on a job last month just so the floor wouldn’t click like a castanet. That same laziness is why your bathroom is falling apart. People think a mirror cabinet sits on the wall in a vacuum. It doesn’t. It sits in a localized weather system of your own making. I can smell the damp drywall and the metallic tang of oxidation the moment I walk into these rooms. It smells like failure and a lack of proper ventilation. If your cabinet is rusting, you have a structural engineering problem masked as a cleaning issue. Let’s look at the physics of why your hardware is turning to orange dust while your tile looks perfectly fine.
The hidden science of bathroom oxidation
Bathroom oxidation occurs when high relative humidity and condensation interact with metallic surfaces near tile and grout. These surfaces lack protective coatings. Moisture trapped in porous grout lines accelerates the electrochemical process. This leads to the structural degradation and rusting of mirror cabinets through a process called galvanic corrosion. The mirror cabinet is often the first victim because it sits at the intersection of the warmest air and the coldest surfaces. When you take a hot shower, the steam rises and hits the cooler metal of the cabinet. If that metal is cheap chrome plated steel rather than high grade stainless steel, the chromium oxide layer fails. Once that protective barrier is breached, the iron in the steel reacts with oxygen and water to create iron oxide. This is not just a surface stain. It is the metal literally returning to its base mineral state. You need to understand that your tile is an island, but your grout is a bridge for moisture to travel directly into the wall cavity where your cabinet is anchored.
Why your grout is a sponge
Grout is a cementitious material that is naturally porous and acts as a capillary system for water. Without a high quality penetrating sealer, grout absorbs liquid water and water vapor. This moisture stays trapped behind the tile surface for days or weeks. This creates a perpetual humidity zone. I have seen installers slap down tile without a second thought for the permeability of the grout. If you are using standard sanded grout, you are basically installing a hard sponge. This sponge holds onto the humidity from your morning shower and slowly releases it right behind your mirror cabinet. If you want to stop the rot, you have to address the porosity. You might want to look at how to refresh grout without replacing it to ensure your seals are actually doing their job. A floor or wall is only as good as its water resistance. Most homeowners think tile is waterproof. It is not. The tile is waterproof, but the assembly is a sieve. If the water gets behind the tile, it travels up the wall through capillary action, eventually reaching the mounting screws of your cabinet.
“A floor is only as good as the subfloor beneath it; deflection is the enemy of every joint.” – Master Flooring Axiom
The physics of the shower microclimate
The microclimate in a bathroom is defined by the dew point and the rate of air exchange. When the air reaches 100 percent humidity, the water vapor must condense on the coolest surfaces available. This is usually the mirror and the metal frame of the cabinet. If your exhaust fan is moving less than 50 cubic feet per minute, or if it is clogged with dust, the moisture hangs in the air. This is where the 1/8 inch rule comes in. If there is a 1/8 inch gap between your tile and the bottom of your cabinet, that gap becomes a vacuum for moist air. The water gets in, but the lack of airflow means it never gets out. This is the same reason why tile cleaning tips for a sparkling bathroom in 2025 always emphasize drying the surfaces after use. You are fighting the second law of thermodynamics. You are trying to keep a high energy state, warm wet air, from moving toward a low energy state, your cold metal cabinet. Without a thermal break or a high quality vapor barrier, the metal loses every time.
The 1/8 inch that ruins everything
Precision in installation is the difference between a cabinet that lasts thirty years and one that lasts three. A gap that is too small prevents airflow, while a gap that is too large allows excessive moisture accumulation. When I install baseboards, I make sure they are sealed against the floor to prevent water from wicking up. The same logic applies to your mirror cabinet. If it is sitting directly on a tile ledge or a backsplash without a silicone transition, it is sitting in a puddle. You need a 100 percent silicone sealant, not a cheap latex caulk. Latex will shrink and crack, creating a highway for water. Here is a contrarian point for you. While most people want the thickest underlayment or the heaviest grout lines, too much material creates more surface area for moisture to cling to. You want tight, dense joints and minimal gaps.
Moisture movement across materials
Understanding how different materials react to the bathroom environment is fundamental to preventing rust. Here is a breakdown of what you are dealing with when you mix tile, grout, and metal cabinets.
| Material | Water Absorption % | Corrosion Risk | Maintenance Cycle || :— | :— | :— | :— || Ceramic Tile | 0.5 to 3.0 | Low | Annual Sealing || Porcelain Tile | < 0.5 | Very Low | Bi-annual Sealing || Cement Grout | 10.0+ | Very High | Quarterly Sealing || 304 Stainless | N/A | Low | Monthly Cleaning || Chrome Steel | N/A | High | Weekly Cleaning |
As you can see from the data, cement grout is the weak link in your bathroom. It absorbs over ten percent of its weight in water. That water has to go somewhere. It usually goes into the drywall or the cabinet frame. If you are struggling with old, stained grout that is letting moisture through, you should check out grout restoration secrets for long-lasting results. If you do not fix the grout, you are just throwing money away on a new cabinet that will rust in twelve months anyway.
The ghost in the expansion gap
Expansion gaps are required for all hard surfaces to accommodate the movement of the building. However, these gaps are often left open behind cabinets, allowing humid air to circulate around the untreated back of the furniture. Most mirror cabinets are made of particle board with a thin veneer or a metal shell. The backs are rarely finished. When you leave an expansion gap open at the tile line, you are inviting the ghost of humidity to live behind your mirror. I always tell my clients that if they can’t see it, they should still seal it. This is the mechanic’s approach. You don’t just fix the spark plugs; you look at the fuel line. In this case, the fuel for the rust is the air coming through the wall cavity. You need to use a moisture-rated adhesive or a mechanical fastener that is coated in zinc or ceramic to prevent the screws from rusting out and dropping the cabinet on your sink.
“Water does not follow rules; it follows the path of least resistance through every unsealed pore.” – Master Installer Observation
The chemistry of cabinet finishes
The quality of the cabinet finish determines its resistance to the acidic nature of bathroom cleaners and the alkaline nature of soap residue. When these chemicals mix with water on the surface of the metal, they create an electrolyte solution. This solution speeds up the movement of ions from the metal, leading to rapid pitting and rust. I have seen guys use bleach on their tile and then wonder why their cabinet is rusting. The bleach fumes alone are enough to eat through a cheap chrome finish. You have to use pH neutral cleaners. If you are looking for better options, consider eco-friendly tile solutions for sustainable homes in 2025 that focus on materials that don’t require harsh chemicals. A clean floor should not come at the cost of a ruined cabinet.
Structural checklist for rust prevention
To stop the oxidation cycle, you need to follow a strict protocol. This isn’t about aesthetics. It is about the survival of your fixtures.
- Verify that your exhaust fan is rated for the square footage of the room.
- Apply a high quality penetrating sealer to all grout lines near the cabinet.
- Install a 100 percent silicone bead at the junction where the tile meets the cabinet.
- Check for any leaks behind the wall using a non-invasive moisture meter.
- Replace any rusted mounting hardware with stainless steel screws.
- Ensure a minimum of 2 inches of clearance between the faucet and the bottom of the cabinet.
If you follow these steps, you are treating the cause rather than the symptom. I have been in this game too long to watch people replace cabinets every few years. It is a waste of time and money. Look at your chic baseboard designs and your beautiful tile, and then realize they are part of a larger system. If one part of the system fails, the whole thing goes. Take care of your grout, manage your humidity, and stop buying builder grade junk that can’t handle a little steam. That is the only way you get a bathroom that lasts. I’m going back to my saw now. There is more dust to make and more floors to level correctly.