
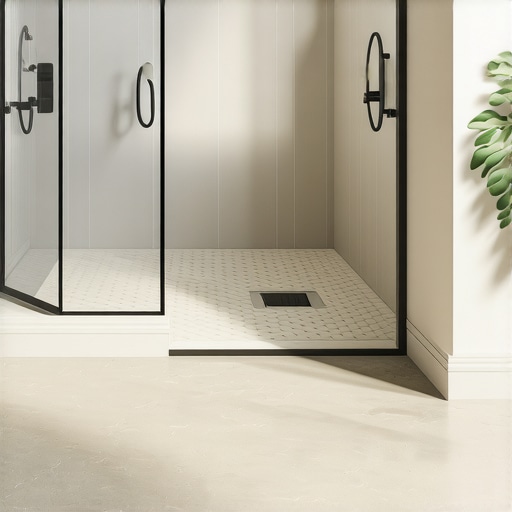
Most guys skip the leveling compound. They think the underlayment will hide the dip. It won’t. I spent three days grinding concrete on a job last month just so the floor wouldn’t click like a castanet. That same philosophy applies double to curbless showers. If the subfloor is off by even an eighth of an inch, your bathroom becomes a pond. You can’t just eyeball a zero-entry transition. You have to understand the mechanical bond of the thin-set and the hydrostatic pressure of the water. I have been doing this for 25 years. I smell like portland cement and cured epoxy most days. A floor is not a decoration. It is a structural engineering challenge that starts three inches below the tile you actually see. This is why curbless systems fail. People want the look but they do not want the labor. They want the aesthetic of showers that wow modern designs for 2025 but they use a standard drain and pray to the gods of surface tension. It does not work that way. Physics does not care about your design Pinterest board.
The physics of the invisible slope
A curbless shower requires a minimum slope of one quarter inch per foot toward the drain to ensure water does not migrate into the dry zone. This geometric requirement is non-negotiable because water follows the path of least resistance. When you remove the curb, you remove the physical barrier that compensates for poor drainage. You are now relying entirely on the pitch of the tile and the capillary action of the water. If your slope is too shallow, the surface tension of the water will allow it to crawl across the grout lines and onto your bathroom floor. This is where most installers fail. They try to create the slope in the thin-set. That is a recipe for disaster. Thin-set is an adhesive, not a structural filler. You must build the slope into the subfloor or the mud bed itself. This often involves recessing the floor joists in a wood-framed house or chipping out a structural slab in a basement. It is dirty, loud, and expensive work. But it is the only way to avoid a flood. You have to think about the flow rate of the showerhead. A high-pressure rain head can dump five gallons per minute. Your drain must be capable of evacuating that volume faster than it accumulates. If the drain is centered, you need a four-way pitch. If you use a linear drain, you can achieve a single-plane slope. This is the secret to showers with a style trendy ideas for small bathrooms because it allows for larger tiles without the need for complex envelope cuts.
[IMAGE_PLACEHOLDER]
Why your subfloor is lying to you
The structural integrity of the substrate determines the lifespan of the waterproof membrane and prevents the grout from cracking under foot traffic. Wood subfloors flex. Concrete slabs crack. Neither of these states is acceptable for a curbless entry. When we talk about deflection, we are talking about the L/360 standard for ceramic tile and L/720 for natural stone. If your joists are too thin or spaced too far apart, the floor will bounce. That bounce breaks the bond between the tile and the substrate. In a curbless shower, that break is an entry point for water. I have seen guys try to sister joists with scrap wood. That is a joke. You need structural LVLs or properly engineered blocking. If you are working on concrete, you have to deal with moisture vapor transmission. A slab might look dry, but it is breathing. If you trap that moisture under a non-breathable membrane without the right adhesive, you get osmotic blistering. I always use a moisture meter. If the slab is over 4 percent moisture, I am not laying a single square foot until we mitigate. You can look into eco-friendly tile solutions for sustainable homes in 2025 to find materials that handle these stresses better, but the physics of the subfloor remains the same. You cannot build a skyscraper on a swamp, and you cannot build a curbless shower on a bouncy subfloor.
“A floor is only as good as the subfloor beneath it; deflection is the enemy of every joint.” – Master Flooring Axiom
The mechanical bond of modern membranes
Waterproofing a curbless shower requires a continuous tanking system that extends at least six feet beyond the splash zone to prevent lateral moisture migration. We used to use copper pans and thick mortar beds. Now we have high-performance polyethylene membranes and liquid-applied elastomers. These materials are incredible, but they are only as good as the guy applying them. You have to check the mil thickness. If you are using a liquid membrane like RedGard or Hydro Ban, you need a wet film gauge. Too thin and it will pinhole. Too thick and it won’t cure properly. I prefer sheet membranes for curbless applications. They provide a consistent thickness and a mechanical bond that is hard to beat. You have to overlap the seams by at least two inches and use a dedicated waterproof sealant at the corners. The transition from the shower area to the rest of the room is the danger zone. I always extend the waterproofing out into the main bathroom area. This protects the baseboards and the subfloor if someone splashes or if the drain gets slightly clogged. If you are looking to upgrade, consider baseboards makeover ideas to elevate your space, but make sure they are installed after the floor is fully sealed. I have seen moisture wick up into MDF baseboards and turn them into mushrooms in six months. Use PVC or solid wood with a back-primed seal.
The math of linear drainage
Linear drains allow for a single-slope floor which simplifies the installation of large format tiles and improves water evacuation at the entry point. When you use a traditional center drain, you have to cut the tile into triangles to create a bowl shape. This creates dozens of grout lines. Every grout line is a potential failure point and a place for mold to grow. A linear drain placed at the entrance or the back wall allows you to slope the entire floor in one direction. This is the professional way to do it. It looks better and it performs better. You need to calculate the GPM (gallons per minute) of your fixtures. If you have a multi-jet system, a single two-inch drain will not cut it. You might need a double-drain setup or a high-capacity trough. I always tell homeowners that the drain is the most expensive part of the shower for a reason. It is the engine. You wouldn’t put a lawnmower engine in a Ferrari. Don’t put a cheap big-box store drain in a custom curbless shower.
| Drain Type | Slope Requirement | Tile Compatibility | Flood Risk |
|---|---|---|---|
| Center Drain | 4-Way Pitch | Small Format Only | Moderate |
| Linear Entrance | Single Pitch | Large Format | Low |
| Linear Wall | Single Pitch | Any Size | Very Low |
The chemistry of grout and tile
Using epoxy or high-performance cementitious grout is mandatory in curbless showers to resist water penetration and maintain structural bond strength. Standard grout is porous. It is basically a hard sponge. In a curbless setup, water sits on the surface longer because the slope is gentler. If you use cheap grout, it will saturate. Once it saturates, the water starts attacking the thin-set underneath. I always advocate for epoxy grout. It is a pain to install. It is sticky, it has a short pot life, and it will ruin your tools if you aren’t fast. But it is waterproof. It does not stain. It does not crack. If you have old grout, you can learn how to refresh grout without replacing it, but for a new curbless build, you do it right the first time. You also have to think about the DCOF (Dynamic Coefficient of Friction) of the tile. Since there is no curb, the floor outside the shower will get wet. You need a tile with a DCOF rating of at least 0.42. Anything less is a skating rink. I have seen people install polished marble in a curbless shower. It looks beautiful until someone slips and ends up in the emergency room. Safety is part of the engineering.
- Verify subfloor deflection meets L/720 standards.
- Recess floor joists by 3/4 inch minimum for wood frames.
- Install a pre-sloped mortar bed or foam tray.
- Apply sheet waterproofing membrane with 2-inch overlaps.
- Perform a 24-hour flood test before tiling.
- Use a high-flow linear drain rated for shower output.
- Select tile with a DCOF rating of 0.42 or higher.
The ghost in the expansion gap
Leaving a proper expansion gap at the perimeter of the room prevents the tile from tenting or cracking due to seasonal thermal expansion. Even in a wet environment, materials expand and contract. If you butt the tile tight against the wall studs, the floor has nowhere to go. It will heave. I have seen entire bathroom floors pop up like a tent because the installer forgot to leave a quarter-inch gap. This gap is hidden by the baseboards or a bead of 100 percent silicone. Never fill the perimeter gap with grout. Grout is rigid. Silicone is flexible. You can explore chic baseboard designs that transform rooms in 2025 to find a style that covers these necessary gaps while maintaining a clean look. If you are worried about the aesthetics, use a color-matched sealant. This is also why grout restoration secrets for long lasting results always involve checking the movement joints. If the joints are locked solid, the grout will inevitably crumble. Every change of plane and every change of material needs a flexible joint.
The 1/8 inch that ruins everything
Precision in the transition between the shower floor and the bathroom floor is the difference between a high-end installation and a flooded hallway. This is the moment of truth. The transition must be perfectly flush. If the shower side is higher, you have a trip hazard. If the bathroom side is higher, water will pool at the edge. I use a laser level for the entire process. I don’t trust bubble levels for curbless work. A bubble can look centered while you are still off by a sixteenth over four feet. Over twelve feet, that becomes a disaster. You have to account for the thickness of the tile and the thickness of the thin-set. This is why I back-butter every tile. It ensures 95 percent coverage and allows me to beat the tile down to the exact height needed. If you mess this up, there is no easy fix. You are ripping out tile and starting over. For more specific advice on maintaining these surfaces, check out tile cleaning tips for a sparkling bathroom in 2025. Keeping the grout clean prevents buildup that can actually redirect water flow and cause minor flooding over time. Maintenance is the final stage of engineering. If you need professional help, you can always contact us to get the job done right. A curbless shower is a luxury, but only if it stays in the bathroom. If you have questions about our data handling, see our privacy policy. Done correctly, a zero-entry shower is the pinnacle of bathroom design. Done poorly, it is the most expensive mistake you will ever make. Article Schema: { “@context”: “https://schema.org”, “@type”: “HowTo”, “name”: “How to install a curbless shower without flooding”, “step”: [ { “@type”: “HowToStep”, “text”: “Assess and prepare the subfloor for a 1/4 inch per foot slope.” }, { “@type”: “HowToStep”, “text”: “Install a waterproofing membrane system with proper overlaps.” }, { “@type”: “HowToStep”, “text”: “Set a high-capacity linear drain at the low point of the slope.” }, { “@type”: “HowToStep”, “text”: “Lay tile using a high-performance epoxy grout and 100% silicone at joints.” } ] }