
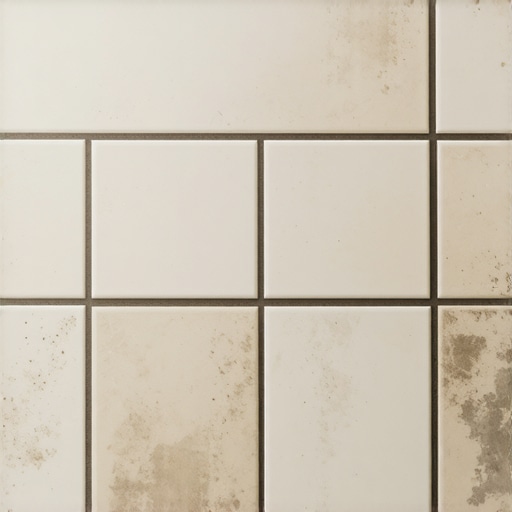
I spent three days grinding concrete on a job last month just so the floor wouldn’t click like a castanet, and that experience is exactly why I tell people that the subfloor is the foundation of your aesthetic. Most guys skip the leveling compound because they think the underlayment or the tile will hide the dip. It won’t. When that subfloor is uneven, your thin-set mortar ends up thicker in the valleys and thinner on the peaks. This uneven bed of mortar holds different amounts of moisture, which eventually wicks up through your grout. Two weeks after the check clears, you are left looking at a floor that looks like a Dalmatian’s coat, with dark splotches where the mortar is still damp and white patches where it dried too fast. I have been installing floors for over twenty-five years, and I can tell you that grout is the most temperamental substance in the building industry. It is a science experiment happening right in your bathroom or kitchen.
The chemical reality of grout hydration
Uneven grout color happens when inconsistent hydration or mineral deposits occur. Efflorescence creates white chalky patches while water retention in the thin-set causes dark spots. Portland cement based products are sensitive to water-to-powder ratios and evaporation rates, leading to pigment washout and surface blotching.
When we look at the chemistry of Portland cement, we are observing a process called hydration. This is not just drying out; it is a chemical reaction where water and cement form calcium silicate hydrate crystals. If an installer uses too much water in the initial mix, the pigment particles of the iron oxide are forced apart. As the water evaporates, it leaves behind microscopic voids. These voids change how light hits the surface, making the grout look lighter or even white. This is known as pigment washout. It is a common mistake made by those who want the grout to flow easier into the joints. On the other side, dark spots are often caused by moisture being trapped underneath the tile. This is especially common in showers where the waterproofing layer was not sloped correctly to the drain. The water sits in the mortar bed and keeps the grout saturated, which keeps the pigments in a permanently darkened state.
“Grout color consistency is heavily influenced by the amount of water used during the mixing and cleanup phases; excess moisture can wash out pigments.” – Master Flooring Axiom
The ghost of efflorescence
If you see white, crusty, or powdery patches on your grout, you are likely dealing with efflorescence. This is not a stain; it is a mineral deposit. Portland cement naturally contains soluble salts. When water moves through the grout or the mortar bed, it dissolves these salts and carries them to the surface. As the water evaporates into the air of your home, the salts stay behind. This is a massive problem in humid regions or in homes where the HVAC system is not running during the curing process. To prevent this, the moisture levels must be controlled. If you find yourself in this situation, you might need to investigate grout restoration secrets for long lasting results to strip those minerals and reset the look. Efflorescence is often a sign that there is an external moisture source, like a leaky window or a subfloor with high vapor transmission, pushing water through the tile assembly from the bottom up.
Why the sponge is the installer’s worst enemy
The most critical moment in a tile installation happens during the cleanup. Most people think they are just wiping away the haze, but they are actually affecting the final color. If a sponge is too wet, it adds extra water to the surface of the grout joint. This extra water dilutes the dye on the top layer. It also causes the cement to cure at a different rate than the grout deeper in the joint. I have seen entire floors ruined because a helper was too lazy to squeeze out his sponge. You want the sponge to be damp, not dripping. If you see bubbles forming in the grout joint as you wipe, you are already in trouble. That water is entering the pore structure of the cement and will leave you with white, chalky spots. For those who already have this problem, learning how to refresh grout without replacing it is the only way to fix the pigment without a full tear-out. Proper tile maintenance is about more than just aesthetics; it is about preserving the structural integrity of the hydration bond.
The subfloor secret that ruins everything
I often walk onto jobs where the homeowner is complaining about dark spots in the center of the room. I take out my moisture meter and find that the concrete slab is reading 90 percent relative humidity. That moisture is trying to escape. Since the tile is usually non-porous, the only exit for that vapor is the grout joint. This constant stream of vapor keeps the grout damp and dark. It can also lead to mold growth under the surface. This is why a moisture barrier is not optional. If you are designing showers with a style trendy ideas for small bathrooms, you must ensure the pan is properly pre-sloped. Without a slope on the subfloor level, water will pool in the corners, leading to those dark, damp grout lines that never seem to dry out even after three days of no use.
The relationship between tile and baseboards
People often ignore the perimeter, but the gap between your tile and your baseboards is a major player in grout health. In the industry, we call this the movement joint. If you grout all the way to the wall, the expansion and contraction of the house will crack that grout. Those cracks then allow cleaning water to seep under the tile. This water sits there and eventually causes discoloration throughout the room through capillary action. Using 100 percent silicone caulk at the baseboard line is the professional way to handle this. If you are looking for ways to update this area, check out baseboards makeover ideas to elevate your space. A proper transition ensures that moisture stays on top of the tile where it can be wiped away, rather than soaking into the substrate. This is a vital part of tile cleaning tips for a sparkling bathroom in 2025 because it prevents the ‘wet socks’ smell that comes from trapped moisture under the floor.
“Efflorescence is a natural phenomenon where soluble salts are carried to the surface of masonry materials by water and then deposited as the water evaporates.” – Master Flooring Axiom
The technical data of grout performance
The choice between sanded, unsanded, and epoxy grout will change your maintenance schedule. Sanded grout is used for joints wider than one eighth of an inch because the sand acts as a structural bridge to prevent shrinkage. However, that sand also makes the grout more porous, which means it is more likely to show dark spots from moisture. Epoxy grout is nearly waterproof and holds color perfectly, but it is a nightmare to install for a DIYer because it sets like a rock in minutes. [IMAGE_PLACEHOLDER]
| Grout Type | Porosity Level | Color Consistency | Best Use Case |
|---|---|---|---|
| Portland Cement Sanded | High | Moderate | Large Floor Tiles |
| Portland Cement Unsanded | High | Low | Wall Tiles / Thin Joints |
| High-Performance Polymer | Low | High | Showers and High Traffic |
| Epoxy Grout | Zero | Excellent | Commercial / Wet Areas |
A checklist for long term grout stability
- Always use distilled water for mixing if your local tap water is hard or contains high mineral counts.
- Wait at least 72 hours before sealing new grout to allow for complete hydration.
- Ensure the thin-set mortar is completely dry before applying grout; usually 24 to 48 hours.
- Avoid using acidic cleaners like vinegar which can eat away the calcium in the grout and cause fading.
- Verify that the subfloor meets deflection standards of L/360 for ceramic and L/720 for natural stone.
- Clean with pH-neutral cleaners to prevent chemical reactions with the pigments.
The physics of a floor are unforgiving. If you treat your grout like an afterthought, it will show its teeth in the form of spots, cracks, and stains. Whether you are dealing with the humidity of a coastal Florida home or the dry air of a desert climate, the rules of chemistry remain the same. Control your water, respect your subfloor, and use the right materials for the environment. That is how you get a floor that looks as good in ten years as it does on the day of the final walkthrough.