
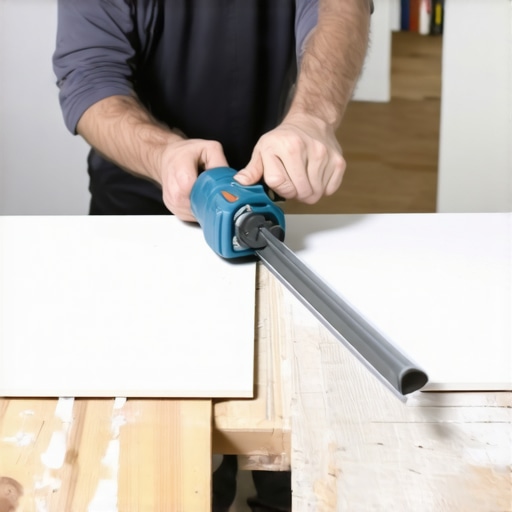
Most guys skip the leveling compound. They think the underlayment will hide the dip. It won’t. I spent three days grinding concrete on a job last month just so the floor wouldn’t click like a castanet. That same level of attention to detail applies to your cuts. You do not always need a massive, water-spitting wet saw to get a clean edge on a ceramic plank or a subway tile. In fact, for most residential bathroom remodels or kitchen backsplashes, the dry method is often faster, cleaner, and less likely to ruin your subfloor with overspray. I have spent 25 years on my knees with a moisture meter and a level, and I can tell you that the physics of a clean break are more about pressure distribution than water cooling. Cutting tile without a wet saw requires an understanding of the material’s structural integrity and the molecular tension of the glaze.
The science of the score and snap
Cutting ceramic tile without a wet saw involves using a manual snap cutter or a handheld glass cutter to create a controlled fracture along the glaze. This method relies on the brittle nature of ceramic. By scoring the surface with a tungsten carbide wheel, you create a point of concentrated stress. When pressure is applied to the ends of the tile, the fracture travels through the body of the clay at lightning speed, following the path of least resistance created by your score line. It is a clean, mechanical separation that produces zero dust compared to a motorized blade.
“A floor is only as good as the subfloor beneath it; deflection is the enemy of every joint.” – Master Flooring Axiom
The ceramic tile itself is a composite of minerals and clays fired at high temperatures. The top layer, the glaze, is essentially a thin sheet of glass fused to the structural body. When you use a manual snap cutter, you are not actually cutting through the tile. You are creating a microscopic valley in that glass layer. I have seen rookies try to press down as hard as they can, thinking they need to reach the bottom of the tile. That is a mistake. Too much pressure creates a jagged score, which leads to a jagged break. You want a smooth, consistent zip sound. If it sounds like you are grinding gravel, you are pushing too hard. The goal is a hairline fracture that guides the energy of the snap. This is especially vital when working in showers that wow modern designs for 2025 where precision is the difference between a luxury finish and a DIY disaster.
The manual snap cutter mechanics
The manual snap cutter is the workhorse of the professional installer’s kit. It consists of a flat bed with a padded surface, a dual rail system, and a lever with a scoring wheel. The padding on the bed is not just for comfort. It provides the necessary flex during the snapping phase. When you push down on the handle, the center of the tile is pushed into the padding while the edges are supported by the metal frame. This creates the tension required to pop the tile along your score. It is pure structural engineering in a hand tool. You need to ensure your rails are lubricated. I use a dry silicone spray. Never use oil, as it attracts ceramic dust and turns into a grinding paste that will seize your bearings within a week.
| Tool Type | Best For | Speed Rating | Dust Level |
|---|---|---|---|
| Manual Snap Cutter | Straight cuts on ceramic and porcelain | High | None |
| Angle Grinder | L-cuts, U-cuts, and circles | Medium | Extreme |
| Handheld Glass Cutter | Thin mosaic and glass tile | Low | None |
| Bite Nippers | Small adjustments and notches | Low | Low |
Precision with the angle grinder
When you cannot use a snap cutter because you need an L-cut or a hole for a shower valve, the angle grinder is your best friend. However, you must use a continuous rim diamond blade. Segmented blades are for concrete and will chip your tile glaze into oblivion. The trick to a clean grinder cut is the score-first method. You run the grinder lightly over the surface to mark your line, then you go back for the deep pass. This prevents the vibration of the motor from shattering the edges of your glaze. I always tell my apprentices that the grinder is a surgeon’s tool, not a demolition saw. You hold it with two hands, keep your elbows tucked, and let the diamond grit do the work. If you smell burning, you are moving too slow or your blade is dull.
Managing the perimeter and baseboards
Every floor needs room to move. I cannot count how many times I have been called to fix a buckled floor because the installer took the tile right up to the drywall. You need a gap. That gap is eventually covered by your trim. If you are looking for baseboards makeover ideas to elevate your space, remember that the thickness of the baseboard determines how much of an expansion gap you can leave. A standard 1/2 inch gap is sufficient for most ceramic installations. This gap allows the subfloor to expand and contract with seasonal humidity changes without putting pressure on the tile grout. If the tile hits the wall, the pressure has nowhere to go but up, resulting in tenting that will snap your grout lines like dry twigs.
The 1/8 inch that ruins everything
In the world of flooring, 1/8 of an inch is a mile. If your subfloor has a dip that deep over a ten foot span, your tile will eventually crack under the weight of a refrigerator or even a heavy person. Before you even think about cutting tile, you must check the flatness of the substrate. I use a ten foot straight edge. If I see light under that bar, I am reaching for the self-leveling underlayment. People think the thin-set mortar will fill the holes. It won’t. Thin-set is an adhesive, not a filler. As it cures, it shrinks. A thick bed of thin-set will shrink more than a thin bed, pulling the tile down and creating lippage. Lippage is when the edge of one tile is higher than the neighbor. It catches toes, it catches mops, and it looks amateur.
- Check subfloor moisture levels before starting any installation.
- Always wear safety glasses when using a snap cutter or nippers.
- Score the tile only once to avoid jagged edges.
- Use a diamond sanding pad to smooth the cut edges of the tile.
- Maintain a consistent expansion gap around the entire perimeter.
Handling complex cuts in small spaces
Working in tight quarters like showers with a style trendy ideas for small bathrooms often requires some creative cutting. When you need to fit a tile around a toilet flange or a drain, the snap cutter won’t help you. This is where tile nippers come in. Think of nippers as heavy duty pliers that bite off small chunks of ceramic. You don’t just squeeze. You nibble. You take off 1/16 of an inch at a time. If you try to take a big bite, the stress will travel through the tile and crack it right down the middle. It takes patience. It takes a steady hand. And it takes a lot of cleanup because those little shards are like glass. I keep a dedicated bucket just for the nipping waste so I don’t step on a shard later.
“Consistency in the score is the only way to ensure predictability in the snap.” – Master Flooring Axiom
Grout and the final seal
Once your tiles are cut and set, the grout is what locks everything together. But grout is porous. It absorbs oils, soaps, and dirty mop water. This is why understanding grout restoration secrets for long-lasting results is vital for any homeowner. If you used a dry cutting method, your grout lines will be cleaner because there was no slurry from a wet saw to contaminate the thin-set. Contaminated thin-set prevents a proper bond, which leads to loose tiles six months down the road. After the grout is cured, you must seal it. I prefer a penetrating sealer that sits below the surface rather than a topical sealer that can peel off over time. A good seal ensures that the moisture stays out of the subfloor, which is the ultimate goal of any flooring professional. When you finish the job, your tile cleaning tips for a sparkling bathroom in 2025 will be much easier to follow because the surface was prepared and cut with technical precision. Cutting tile without a wet saw isn’t a shortcut. It is a specific skill set that, when mastered, produces a cleaner and more efficient job site. Don’t let the lack of a power tool stop you from achieving a professional grade floor.