
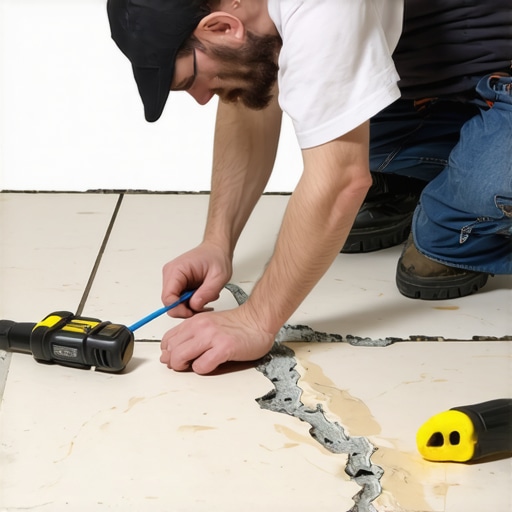
I spent three days grinding concrete on a job last month just so the floor wouldn’t click like a castanet. Most guys skip the leveling compound. They think the underlayment will hide the dip. It won’t. I walked into a kitchen where a single 12 by 24 inch porcelain tile had a hairline fracture running right through the center. The homeowner was ready to rip up the whole kitchen because the original installer didn’t leave a single spare. I smelled the familiar scent of oak dust and floor wax from the adjacent room, but here in the kitchen, the problem was pure physics. That crack wasn’t an accident. It was a symptom of a subfloor that was breathing more than it should. Before you reach for the hammer, you need to understand that a tile is a rigid body in a world that wants to move. If you rip it out, you risk the integrity of the surrounding bond. You risk the waterproofing if you are working in showers. You risk the thin-set bed. Instead, we look at the chemistry of structural adhesives and the art of the camouflage.
The ghost in the expansion gap
A cracked tile often stems from missing expansion gaps at the perimeter or improper subfloor deflection ratings. When a floor is locked tightly against the baseboards without the required 1/4 inch gap, the thermal expansion has nowhere to go. The pressure builds until the weakest point, usually a tile with a slight void in the thin-set, snaps. To fix this without replacement, you must first verify the subfloor is no longer moving. If the joists are undersized, the crack will return regardless of the repair. We measure deflection using the L over 360 standard for ceramic, which means the floor should not bend more than the length of the span divided by 360 under a standard load. If the structural integrity is there, we move to chemical injection. This involves using high-tensile resins that can penetrate the fissure and bond the porcelain back together at a molecular level.
“A floor is only as good as the subfloor beneath it; deflection is the enemy of every joint.” – Master Flooring Axiom
Chemistry over replacement
Using a two-part polyester or epoxy resin allows for a structural bond that mimics the original strength of the fired clay. You start by cleaning the crack with a vacuum and denatured alcohol. Any dust or oils will prevent the resin from cross-linking with the tile body. I prefer a resin with a centipoise rating low enough to flow into hairline gaps but high enough to stay put. You mix your resin with a dry pigment that matches the lightest tone in your tile. Most people make the mistake of matching the darkest vein, but the human eye notices dark lines more than light ones. You overfill the crack slightly. Once the resin cures, which depends heavily on the ambient humidity and temperature, you scrape it flush with a fresh razor blade at a 45 degree angle. This leaves the surface smooth and the crack nearly invisible.
| Condition | Humidity Level | Resin Cure Time | Structural Stability |
|---|---|---|---|
| Dry Climate | 15 to 30 percent | 20 minutes | High |
| Moderate | 35 to 50 percent | 45 minutes | Optimal |
| Humid Environment | Over 60 percent | 90 minutes | Variable |
The subfloor lie
The subfloor is the most common point of failure in residential tile installations due to moisture and material choice. Many installers think a layer of 1/4 inch plywood is enough. It isn’t. You need a stable, non-compressible substrate like cement backer board or a high-quality uncoupling membrane. These membranes allow the tile and the subfloor to move independently, preventing the transfer of stress that leads to cracking. If you find your tiles are cracking in a straight line across multiple units, you have a telegraphing crack from the concrete slab below. In those cases, a surface repair is only a temporary fix. You need to address the slab movement. For smaller, isolated cracks, the resin method is superior because it maintains the existing tension of the floor. If you rip out a tile, you often find that the grout around it starts to crumble because you’ve disturbed the mechanical lock of the entire grid.
“Movement joints are not optional; they are the pressure relief valves of a stone or tile installation.” – TCNA Handbook Standards
Grout restoration and the perimeter seal
Restoring the grout around a repaired tile ensures the entire surface remains water resistant and visually cohesive. Once the tile itself is bonded, you must look at the lines. If the crack extended into the joints, don’t just smear more grout on top. You need to remove the top 1/8 inch of the old material. You can find more details on how to handle this in our guide on how to refresh grout without replacing it. For long-term success, use a high-performance grout that contains polymers for flexibility. This is especially vital in areas where tile meets different materials. You should never use hard grout at a change of plane or where the floor hits the wall. Those areas require a 100 percent silicone sealant that matches the grout color. This allows the floor to expand and contract without putting pressure on the tiles.
The 1/8 inch that ruins everything
Precision in floor leveling is the difference between a floor that lasts decades and one that fails in months. When I’m on a job, I use a 10-foot straightedge. If I see a dip greater than 1/8 of an inch, I know there is a void waiting to happen. Voids under tiles lead to cracks. If you are repairing a crack, you can sometimes tap the surrounding tiles to listen for a hollow sound. That hollow sound, or drummy tile, means the bond has failed. In these cases, you can use a specialized floor adhesive injection kit. You drill tiny holes in the grout lines and pump in a high-strength liquid adhesive that spreads under the tile to fill the void. Once the adhesive sets, the tile is supported again, and your surface repair will actually hold. This is far better than the alternative of tearing up the floor and risking damage to the baseboards which often requires a full baseboards makeover to fix the resulting mess.
- Clean the crack with denatured alcohol and a fine brush.
- Select a two-part epoxy or polyester resin for the repair.
- Match the pigment to the base color of the tile, not the grain.
- Inject the resin using a fine-tip applicator to ensure deep penetration.
- Level the surface with a razor blade once the material is semi-hard.
- Address any grout issues to prevent moisture from reaching the subfloor.
The physics of the home are always at work. Wood shrinks in the winter and expands in the summer. Concrete slabs cure and settle for years. A successful floor installer knows that you cannot fight these forces, you can only manage them. By using resins and injection methods, you are working with the existing state of the floor rather than fighting it. This preserves the original look and saves the homeowner thousands in material costs. It also prevents the waste of perfectly good stone or ceramic. If you are interested in more sustainable practices, you might want to look into eco-friendly tile solutions for future projects. Always remember that the best repair is the one that no one knows happened. Keep your tools clean, your moisture meter calibrated, and your resins mixed with precision. That is how you maintain a professional standard in a world full of shortcuts.