
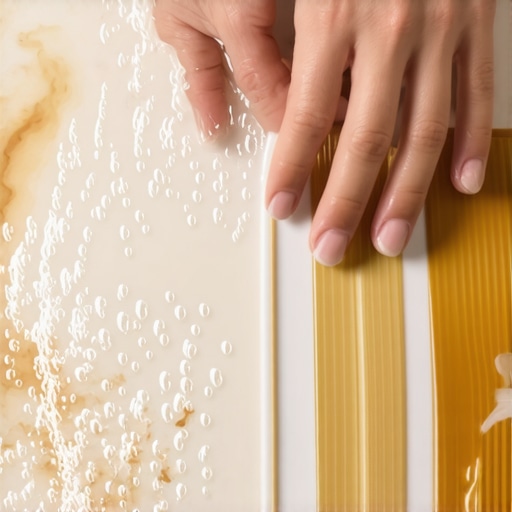
I spent three days grinding concrete on a job last month just so the floor wouldn’t click like a castanet. That level of obsession is what it takes to understand why your shower is failing you now. Most guys skip the leveling compound and they definitely skip the chemistry of a shower floor. When you see those non-slip strips turning a nasty, muddy brown, you are not just looking at dirt. You are looking at a complex biological and mineral matrix that has fused with the polymer of the tread. It is a structural failure of the surface. I have spent twenty five years on my knees looking at tile and grout, and I can tell you that a brown strip is a sign that your cleaning routine is fighting a losing battle against physics.
The molecular trap inside your shower floor
To clean non slip shower strips that turned brown you must use an alkaline cleaner to break down body oils followed by a mild acid to dissolve mineral deposits. Scrubbing with a stiff nylon brush is required to reach the microscopic valleys of the textured surface where bacteria and iron dwell. This process is the only way to reverse the oxidation and biofilm accumulation that occurs in high moisture environments. Most people think a quick spray of a generic bathroom cleaner will do the job. It will not. The texture on those strips is designed to create friction, but those same micro-cavities act as a perfect harbor for Serratia marcescens and calcium carbonate. You are dealing with a microscopic landscape of peaks and valleys. When you stand on those strips, you are compressing oils and skin cells into those valleys. Over time, the heat from your shower water parboils these organic materials, creating a hardened glaze that turns brown as it oxidizes. This is why tile cleaning tips for a sparkling bathroom in 2025 emphasize the need for mechanical agitation. You cannot just chemical your way out of a physical buildup.
“A floor is only as good as the subfloor beneath it; deflection is the enemy of every joint.” – Master Flooring Axiom
Why your non slip strips turn that nasty shade of rust
The brown discoloration on shower strips is primarily caused by iron bacteria, mineral scale from hard water, and the decomposition of skin proteins. These elements bond to the adhesive margins of the strips and the porous texture of the anti-slip material itself, creating a stubborn stain. If you live in an area with high iron content in your water, the browning will happen faster. The oxygen in the water reacts with the iron, and the non-slip strips act as a filter that catches the resulting rust. This is not just an aesthetic issue. This buildup reduces the friction coefficient of the strip, making it more slippery. You are literally standing on a layer of organic sludge. This is why grout restoration secrets for long lasting results always include a deep degreasing step. If you do not remove the oil, you will never reach the stain. I have seen homeowners try to bleach these strips. Bleach is a disinfectant, not a cleaner. It might kill the bacteria, but it will not remove the brown mineral matrix. In fact, bleach can sometimes react with the minerals and make the stain permanent.
The failure of standard bathroom cleaners
Standard bathroom cleaners often fail because they lack the surfactant load necessary to penetrate the dense adhesive boundaries of non-slip treads. Most off the shelf products are too weak to dissolve the polymerized soap scum that acts as a glue for brown iron stains. You need something that can break the surface tension of the water. In my years of flooring work, I have found that professional grade alkaline degreasers are the only things that prep a surface correctly. Think about the chemistry. Soap is a fat. Body oil is a fat. You need a high pH solution to saponify those fats and lift them out of the texture. If you are also dealing with baseboards makeover ideas to elevate your space, you know that the transition from floor to wall is where the most moisture collects. The same logic applies to your shower. The edges of those strips are the first place the brown starts because that is where the water dwells the longest. If the water cannot evaporate, the minerals stay behind. It is a cycle of deposition that never ends until you change the chemistry of the surface.
A chemical blueprint for restoring safety treads
Restoring brown shower strips requires a two stage chemical attack involving a degreaser to remove organic binders and a phosphoric acid based cleaner to tackle mineral rust. This combination ensures that both the biological biofilm and the inorganic mineral scale are fully emulsified for removal. First, you apply the alkaline cleaner and let it dwell for at least ten minutes. Dwell time is something most amateurs ignore. You have to give the chemicals time to work. Don’t let it dry. If it dries, the dirt just re-deposits and becomes even harder to remove. I remember a job where a client tried to clean their showers that wow modern designs for 2025 with straight vinegar. All they did was etch their stone and leave the strips brown. Vinegar is too weak for heavy mineral loads. You need a controlled acid that can target the iron without eating the grout. While you are at it, check the perimeter. If your grout is failing, your strips will never stay clean because they are soaking up dirty water from underneath. You might need to look at how to refresh grout without replacing it to ensure a clean foundation for your non-slip surfaces.
| Cleaner Type | pH Level | Impact on Adhesive | Grip Recovery |
|---|---|---|---|
| Alkaline Degreaser | 11-13 | Low | Very High |
| Phosphoric Acid | 1-2 | Moderate | High |
| Oxygen Bleach | 5-6 | Low | Medium |
| White Vinegar | 2.5 | Low | Low |
Tools that actually penetrate the texture
The most effective tool for cleaning brown shower strips is a short bristled nylon grout brush or an oscillating power scrubber. These tools provide the necessary mechanical force to dislodge particles from the 40 mil deep texture of professional grade non slip treads. A soft sponge will just glide over the top of the browning. You need to get into the grooves. I always tell people to think of it like cleaning a tire. You wouldn’t use a silk cloth to clean a mud-caked off-road tire. You use a stiff brush. The same applies here. If you are working in showers with a style trendy ideas for small bathrooms, space is tight, so a detail brush is your best friend. Scrub in circular motions. This ensures the bristles hit the stains from every angle. If you are still seeing brown after a heavy scrub, the stain has likely migrated into the adhesive layer. This is a common issue with cheap, peel and stick strips. The adhesive is often a low grade acrylic that absorbs water. Once the water gets in, the brown is there to stay.
The ghost in the expansion gap
A contrarian data point that most people miss is that the thickest non slip strips are actually the hardest to keep clean because they create a significant vertical lip. This lip traps water against the tile surface and leads to accelerated browning at the edges. In the flooring world, we call this a damming effect. You want the thinnest possible profile that still provides adequate friction. A thicker strip creates a larger shadow where mold can grow. This is why professional installers prefer integrated textures or high quality thin mil tapes. If your strips are more than 1/16th of an inch thick, you are fighting an uphill battle. The water just sits there, unable to drain toward the weep holes in your drain assembly. If you are looking for long term solutions, consider eco friendly tile solutions for sustainable homes in 2025 that feature built-in slip resistance. This eliminates the need for strips entirely and removes the adhesive trap. It is a cleaner, more structural approach to safety.
- Apply a high pH degreaser and allow ten minutes of dwell time.
- Scrub the strips with a stiff nylon brush in circular patterns.
- Rinse with hot water to remove emulsified oils.
- Apply a mild phosphoric acid solution to target iron stains.
- Rinse again and dry the surface with a microfiber cloth.
- Inspect the adhesive margins for lifting or brown seepage.
The 1/8 inch that ruins everything
Maintaining a clean shower environment requires managing the 1/8 inch gap where the floor meets the wall. If this transition is not sealed correctly, moisture will migrate under your tile and saturate the adhesive of your non slip strips from below. This is what I call the bottom-up failure. You can scrub the top of the strip all day, but if the adhesive is sitting in a pool of stagnant, mineral-rich water, the brown color will return within a week. This is why I am so obsessive about baseboards and transitions. If you look at chic baseboard designs that transform rooms in 2025, you will see that they all prioritize moisture management. A floor is a system. The strips are just the surface. If the system is wet, the surface will be brown. You must ensure your grout is sealed and your caulking is intact. A dry subfloor is the only way to have a clean top floor. Don’t let the simplicity of a sticker fool you. It is a structural element of your shower’s safety and hygiene.
“Tile is only as waterproof as the installer’s attention to detail; water will find the one hole you missed.” – Master Flooring Axiom