
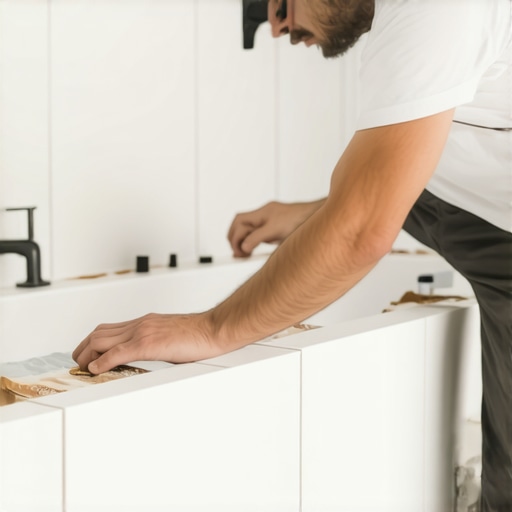
I spent three days grinding concrete on a job last month just so the floor wouldn’t click like a castanet. Most guys skip the leveling compound. They think the underlayment will hide the dip. It won’t. I was working on a high-end master bath with a curved alcove tub, the kind that looks like a sculpted piece of art but behaves like a nightmare for any installer who values his sanity. The client had spent six figures on the renovation, and they wanted a zero-clearance transition from the main floor into the wet area. If I had missed the mark by even an eighth of an inch, the whole geometry of the room would have collapsed. Flooring is not a decoration, it is a structural engineering challenge. You are managing moisture, gravity, and the crystalline structure of porcelain all at once. When you approach a curve, you aren’t just cutting tile. You are performing surgery on a performance surface. The smell of wet diamond blades and the fine mist of porcelain dust are my constant companions. I live by the level and the moisture meter. If the subfloor is not right, nothing else matters.
The physics of the subfloor preparation
Subfloor preparation for a curved bathtub requires deflection analysis, leveling compound application, and moisture barrier installation. You must ensure the joist spacing meets TCNA standards for L/360 deflection to prevent grout cracking or tile delamination near the tub apron. The foundation of any tile job is the structural integrity of what lies beneath. If you are working on a wooden subfloor, you need to check the ply thickness. I never trust a single layer of 5/8 inch OSB. It has too much flex. I want a minimum of 1 1/8 inches of total wood structure before I even think about thin-set. On concrete, the challenge is different. You are fighting moisture vapor transmission. I use a moisture meter to ensure the slab is under 4 percent before I apply a primer. If it is higher, you are asking for the adhesive to emulsify and fail. We look at the chemistry of the bond. The mechanical lock of the mortar into the substrate is what keeps that floor from shifting over twenty years of thermal expansion and contraction. This is why I prefer uncoupling membranes. They allow the house to breathe and move without snapping the brittle porcelain above it. You can see more about advanced layouts in our guide to showers that wow modern designs for 2025 which covers the integration of these systems into modern aesthetics.
The geometry of the template and the scribe
Template mapping for a curved tub apron involves using Kraft paper or luan strips to create a physical layout of the floor tiles. This mechanical scribe ensures that the expansion gap between the tile edge and the tub wall is consistent to allow for movement joints and silicone sealant. You don’t just eyeball a curve. You use a compass or a scribing tool to follow the exact radius of the tub. Every tub, even from the same manufacturer, has slight variances in its cast or acrylic molding. I take a piece of heavy paper and lay it against the tub. I mark the tiles and then transfer that line to the porcelain. This is where the physics of the cut comes in. If you cut too tight, you have no room for the movement of the house. If you cut too loose, your grout line looks like a canyon. I aim for a 1/8 inch gap. This gap is not for grout. It is for 100 percent silicone. Grout is rigid and brittle. If you put grout against a bathtub, it will crack within six months. The tub expands when filled with hot water. The floor does not. Something has to give. If it’s not the silicone, it will be your tile. This is a fundamental rule of the Tile Council of North America.
“A floor is only as good as the subfloor beneath it; deflection is the enemy of every joint.” – Master Flooring Axiom
The chemistry of polymer modified mortars
Thin-set mortar for curved tile installations must be polymer-modified to provide high-bond strength and flexibility. The C2TE classification ensures that the adhesive can handle the vibration and thermal stress common in wet areas and bathrooms. When you are back-buttering a tile for a curved cut, you are looking for 95 percent coverage. In a wet area, anything less is a failure. Air pockets under the tile are where water collects. Water leads to mold. Mold leads to a teardown. I look at the molecular bond. The polymers in modern thin-set act like tiny rubber bands. They allow the mortar to absorb the shock of a heavy footfall or a tub full of water without breaking the bond. I never use premixed mastic in a bathroom. Mastic is basically organic glue that will re-emulsify if it gets wet. It is the hallmark of a hack. I mix my mortar with a high-torque drill until it has the consistency of peanut butter, then I let it slake. Slaking allows the chemicals to fully hydrate. If you skip the slake, your mortar will dry out too fast and you will get a weak bond. This is the difference between a floor that lasts five years and one that lasts fifty. If you need to fix older work, you might want to look into how to refresh grout without replacing it for temporary cosmetic fixes, but for a new build, the mortar is your lifeline.
| Tile Material | Janka Hardness/Mohs | Water Absorption | Cutting Difficulty |
|---|---|---|---|
| Porcelain | 7-9 Mohs | < 0.5% | High – Requires Diamond Blade |
| Ceramic | 4-6 Mohs | 3.0% – 7.0% | Medium – Standard Wet Saw |
| Natural Stone | Varies (3-7) | High to Low | High – Chips Easily on Curves |
| Glass Mosaic | 6 Mohs | 0% | Extreme – Requires Specialized Nibblers |
The diamond blade and the radius cut
Cutting tile for a curved tub requires a wet saw with a continuous rim diamond blade to achieve smooth edges. The RPM of the saw and the flow of water are critical to prevent thermal shock and chipping on the porcelain glaze. When I am making these cuts, I don’t force the tile. I let the diamonds do the work. If you push too hard, you heat up the blade, and the glaze will start to flake off in jagged chunks. For a tight curve, I might use a series of straight plunge cuts, often called finger cuts, and then use tile nippers to break off the slivers. Then I go back in with a diamond sanding pad. I start at 50 grit and work my way up to 200. You want that edge to feel like factory-finish. This is about professional pride. A lot of guys hide their ugly cuts under a thick bead of caulk. I want my cuts so clean that they could stand alone. If you are using baseboards near the tub, the transition needs to be even more precise. You can see examples of how to integrate these elements in chic baseboard designs that transform rooms in 2025. The way the floor meets the wall and the tub is the ultimate test of an installer.
- Check subfloor for levelness within 1/8 inch over 10 feet.
- Verify moisture content of wood or concrete substrate.
- Create a full-scale paper template of the curved apron.
- Back-butter every tile to ensure 95 percent mortar coverage.
- Maintain a 1/8 inch expansion gap at all vertical surfaces.
- Use 100 percent silicone sealant at the tub-to-tile transition.
The movement joint and the final seal
Movement joints are the non-negotiable part of tile installation that prevents tenting and cracking. Using silicone instead of grout at the tub interface allows for the differential movement of dissimilar materials like acrylic and porcelain. Most people think more grout is better. They are wrong. Too much cushion or a rigid joint where there should be a flexible one will ruin a floor. I’ve seen $20,000 floors ruined because someone grouted the change of plane. The house settles, the tub fills with water and drops a fraction of an inch, and suddenly your tile is popping off the floor. I use color-matched silicone that has been treated with antimicrobial agents. This prevents the black mold that usually grows in the corners of showers. Once the tile is set and the grout has cured, I wait at least 48 hours before applying the final seal. For those looking at long-term maintenance, tile cleaning tips for a sparkling bathroom in 2025 provides the roadmap. You have to treat your floor like the machine it is. It needs maintenance, and it needs to be cleaned with pH-neutral solutions to avoid eating away at the grout. If you are finishing the room with wood accents, consider baseboards makeover ideas to elevate your space to bridge the gap between the wet area and the rest of the home.
“Grout is not a structural component; it is a filler. The strength is in the bond and the movement is in the joint.” – TCNA Installation Guide
The contrarian truth about underlayments
While most people want the thickest underlayment thinking it adds comfort, too much cushion actually causes the locking mechanisms on LVP to snap under pressure and causes tile grout to powderize. In tile work, rigidity is your best friend. I’ve seen installers use thick cork or foam under tile to try and deaden sound. All they did was create a trampoline. Every time someone walked on it, the tile deflected, the mortar bond sheared, and the floor failed within a year. If you need sound dampening, you use a liquid-applied membrane or a specialized thin-set designed for that purpose. You never sacrifice the mechanical bond for a soft feel underfoot. Tile is supposed to be hard. It is supposed to be permanent. If you want soft, buy a rug. When we talk about eco-friendly tile solutions for sustainable homes in 2025, we are talking about longevity. A floor that lasts 50 years is much more sustainable than a ‘green’ floor that you have to rip out and throw in a landfill in 5 years because the installer didn’t understand the physics of deflection. If you have questions about your specific project, you can always reach out at contact us for expert advice on structural floor design.