
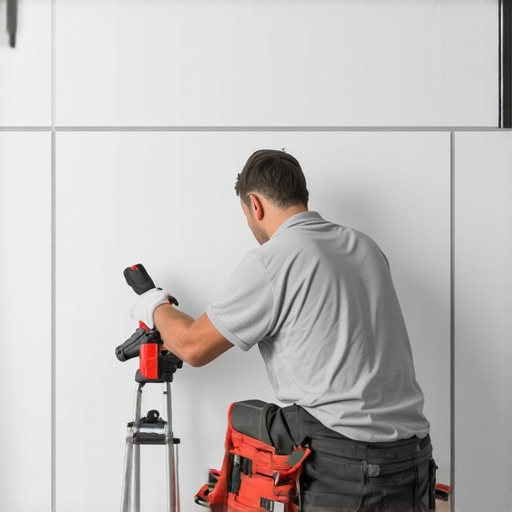
I spent three days grinding concrete on a job last month just so the floor wouldn’t click like a castanet. Most guys skip the leveling compound. They think the underlayment will hide the dip. It won’t. If you are putting down 12 by 24 or 24 by 48 inch porcelain, that dip is a death sentence for your grout joints. I remember the smell of the concrete dust mixing with the WD-40 on my grinder blades. It was a brutal job, but the alternative was a floor that looked like a staircase. When you deal with large format tiles, the margin for error is zero. You cannot hide mistakes with extra grout. You cannot float a tile over a valley. The physics of the material will not allow it.
The mathematics of a flat subfloor
Avoiding lippage with large format tiles requires subfloor flatness of 1/8 inch over 10 feet according to TCNA standards. High quality LHT mortar, mechanical leveling clips, and a 50 percent offset maximum are necessary. Using back-buttering techniques ensures full coverage for porcelain tiles in high moisture areas like showers. If your subfloor is off by even a fraction, the edge of one tile will sit higher than its neighbor. This is lippage. It ruins the look of the room. It creates a trip hazard. It is the hallmark of a lazy installer. You need to pull out the 10 foot straightedge before a single bag of thin-set is opened. If you see daylight under that level, you have work to do.
The trap of the factory edge
Every large tile has a secret. They are rarely perfectly flat. During the firing process in the kiln, the center of the tile often bows upward. This is called crowning. When you stagger these tiles in a traditional 50 percent brick pattern, the highest point of one tile sits right next to the lowest point of the adjacent tile. The result is a ridge that catches every shadow and every toe. This is why the industry suggests a 33 percent offset or a stacked bond. You have to fight the geometry of the clay itself. I have seen guys try to force these tiles down with heavy weights. It never works. The tension remains in the material. Eventually, the bond will fail. You are looking for a mechanical solution to a manufacturing reality.
“Surface preparation is the most critical part of any tile installation; the substrate must be flat within 1/8 inch in 10 feet for large format tiles.” – Master Flooring Axiom
Chemistry of the modern bond
Standard thin-set is not your friend here. You need Large and Heavy Tile mortar, formerly known as medium-bed mortar. This stuff is engineered with high polymer counts and a specific rheology. It is designed to support the weight of a massive slab of porcelain without shrinking as it cures. If you use a cheap, standard mortar, the water evaporates and the tile sinks. You might set it perfectly flat at 5 PM, but by 8 AM the next morning, it has slumped into a valley. This is why chemical selection matters. The polymer chains in a high-grade LHT mortar create a bridge between the substrate and the tile that resists the pull of gravity and the stress of evaporation. It is about maintaining the elevation you set during the initial install.
The plastic savior for modern floors
Mechanical leveling systems are not a crutch for bad installers. They are a requirement for large format materials. These systems use clips and wedges to lock the edges of adjacent tiles into the same plane. It forces the tiles to move as a single unit while the mortar sets. Without them, you are relying on your eye and your hands, which are not as precise as a calibrated wedge. These systems also help manage the crowning I mentioned earlier. By applying pressure to the edges, you can often pull out a slight bow and hold the tile in a flat position. Just remember to kick the clips out the next day in the direction of the grout joint. If you break them off wrong, you will be digging plastic out of your grout for hours. This is especially true when working around showers that wow where precision is the only thing that prevents water pooling.
| Tile Edge Length | TCNA Flatness Requirement | Recommended Offset |
|---|---|---|
| Under 15 inches | 1/4 inch in 10 feet | 50 percent |
| 15 to 24 inches | 1/8 inch in 10 feet | 33 percent |
| Over 24 inches | 1/8 inch in 10 feet | Stacked or 33 percent |
| Gauged Porcelain Panels | 1/16 inch in 10 feet | Stacked |
Mastering the trowel technique
The way you spread your mortar determines the life of the floor. You must use a notched trowel, typically 1/2 inch by 1/2 inch for large tiles. The ridges must all run in the same direction, preferably the short way across the tile. Never use the ‘spot bond’ or ‘five-spot’ method. This leaves massive air voids under the tile. Without support, a large porcelain tile will crack the moment someone walks on it in high heels. You need to collapse the ridges by sliding the tile back and forth. This creates a solid bed of support. You also need to back-butter. This means applying a thin, flat coat of mortar to the back of the tile before setting it. It ensures 100 percent coverage. In showers with a style, this coverage is what prevents moisture from sitting in hollow pockets and growing mold.
Grout and the finishing touch
Grout is not just a filler. It is a structural component that handles the expansion and contraction of the floor. For large format tiles, you want a narrow grout joint to keep that clean, monolithic look. However, you cannot go too narrow. If the tiles touch, they will chip as the house shifts. You need at least a 1/16 inch joint, but 1/8 inch is safer. Using a high-performance grout will prevent staining and cracking. If you have old grout that looks terrible, you should look into grout restoration secrets to bring it back to life. For new installs, make sure the grout is packed deep into the joint. Surface grouting is a recipe for failure. It will pop out within a year.
- Check subfloor for deflection and levelness using a 10-foot straightedge.
- Grind down high spots and fill low spots with self-leveling underlayment.
- Select an ANSI A118.15 LHT mortar for maximum bond strength.
- Use a mechanical leveling clip system on every joint.
- Back-butter every single tile to ensure full coverage.
- Maintain a consistent grout joint width using spacers.
The hidden role of baseboards
Once the floor is flat, the transition to the wall is where many people fail. Your baseboards should sit on top of the tile, not buried behind it. This allows for an expansion gap at the perimeter. The house moves. The floor moves. If you lock the tile against the wall, it will tent up in the middle of the room. A proper gap hidden by chic baseboard designs gives the system room to breathe. I have seen entire floors fail because the installer forgot to leave that 1/4 inch at the edge. They thought the baseboard would hide the mistake, but the mistake was the lack of space.
“A floor is only as good as the subfloor beneath it; deflection is the enemy of every joint.” – Master Flooring Axiom
Environmental factors and curing
Temperature and humidity play a massive role in how the mortar behaves. If you are working in a hot, dry climate, your mortar will skin over in minutes. Once it skins over, the tile will not stick. You have to work in small sections. Conversely, in a cold, damp basement, the mortar might take days to reach full strength. Do not rush the process. Do not walk on the floor too soon. If you move a tile while the mortar is in its ‘green’ state, you break the bond. You will end up with a hollow sound when you walk on it later. Patience is a technical requirement. After the install, keep the floor clean. For long term care, check out tile cleaning tips to keep the surface pristine. Avoid harsh acids that can eat away at your grout.
Final inspection and the light test
The best way to check for lippage is the light test. Place a flashlight on the floor and shine it across the tiles. The long shadows will reveal every tiny imperfection. If you see a shadow, you have a ridge. If you caught it while the mortar was wet, you can fix it. If the mortar is dry, you are looking at a tear-out. This is why professional installers are so obsessed with their work light. We don’t just look at the floor. We interrogate it. We look for the ghost in the expansion gap. We look for the dip that shouldn’t be there. A perfect floor is a silent floor. No clicks. No pops. No shadows. Just a flat, engineered surface that will outlast the house itself.