
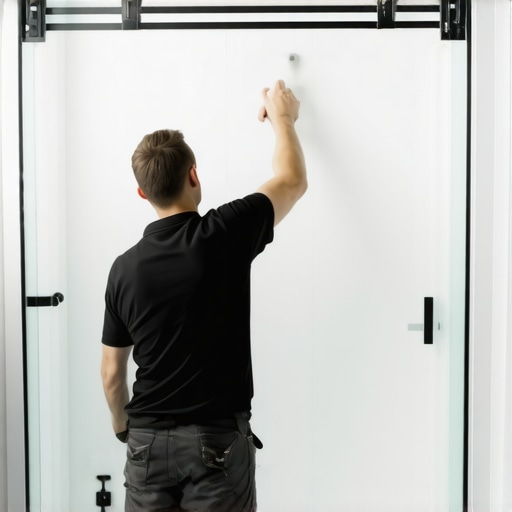
I spent three days grinding concrete on a job last month just so the floor wouldn’t click like a castanet, and that same homeowner asked me if I could slap a sliding door onto their fiberglass shower unit while I was at it. I looked at that flimsy wall and knew exactly what was coming. People think these fiberglass inserts are solid like a mountain, but they are mostly air and resin held together by hope. I once walked into a house where the previous guy had just screwed a heavy glass door directly into the fiberglass without hitting a single stud. The whole wall was bowing outward like a sail in a hurricane. Every time they slid the door, the fiberglass groaned and the grout lines on the adjacent floor started to crack because the whole room was flexing. You cannot treat a shower like a decorative curtain rod project. It is a structural engineering challenge that starts behind the gelcoat. If you do not understand the physics of deflection and the chemistry of waterproofing, you are just waiting for a catastrophic leak or a shattered panel.
The phantom flex in your fiberglass walls
Installing a sliding glass door on a fiberglass shower requires locating the vertical wall studs behind the unit to provide structural support for the heavy track and glass panels. Most fiberglass surrounds are thin, ranging from an eighth of an inch to a quarter inch in thickness, which is insufficient to hold the mechanical load of a sliding assembly. You must use a high-quality electronic stud finder to map out the 2×4 framing before you even think about picking up a drill. If the studs do not align with the door track location, you are forced to use specialized anchors or, better yet, open the wall from the backside to add blocking. Fiberglass has a nasty habit of cracking if you apply point-load pressure without a solid substrate behind it. This is not about aesthetics, it is about the structural integrity of the entire bathroom envelope.
“A floor is only as good as the subfloor beneath it; deflection is the enemy of every joint.” – Master Flooring Axiom
The same logic applies to your shower walls. If that wall moves, the seal breaks. When the seal breaks, water finds its way into the subfloor and ruins your expensive baseboards and the flooring you just spent thousands to install. I have seen entire floor joists rot out because a sliding door track leaked for two years straight. The fiberglass itself is a non-porous polymer, but the holes you drill into it are invitations for disaster. You need to understand the molecular behavior of the materials. Fiberglass is a composite of glass fibers and resin. When you heat it up with a dull drill bit, the resin melts and the fibers fray. This creates a weak point that can propagate into a full-scale crack under the weight of the door. Use a brand-new carbide bit and run the drill at a medium speed to maintain a clean cut. Speed creates heat, and heat is the enemy of fiberglass structural stability.
Why your drill bits hate gelcoat
The outer layer of a fiberglass shower is a specialized gelcoat resin that provides the shine and water resistance but is extremely brittle and prone to spiderweb cracking. To prevent the gelcoat from shattering, you must apply masking tape over your drill marks and use a sharp, high-speed steel or diamond-tipped bit. The tape provides enough surface tension to prevent the bit from dancing across the slippery surface and gouging the finish. You are not just making a hole, you are creating a penetration in a moisture-controlled environment. If that hole is not perfectly clean, your silicone will not bond, and water will wick into the wall cavity. I have seen guys try to use wood bits or dull masonry bits, and the result is always a jagged mess that looks like a gunshot wound in the shower wall.
When you are designing showers with a style that lasts, you have to think about the longevity of the fasteners. Stainless steel is the only option. Anything else will corrode in the high-humidity environment of a bathroom. The chemistry of corrosion is relentless. Galvanized screws will eventually rust and bleed orange streaks down your beautiful white fiberglass. I have been called to fix grout restoration projects where the only problem was a rusty screw from a door track that had contaminated the surrounding materials. It is a domino effect of failure that starts with a cheap fastener choice.
The chemistry of silicone and structural bonding
Pure silicone sealant is the only acceptable material for waterproofing the holes and tracks on a fiberglass shower installation because it maintains flexibility while resisting mold and mildew. You should never use acrylic caulk or painter’s caulk in a shower environment because they cannot handle the thermal expansion and contraction of the fiberglass unit. A fiberglass shower expands when you turn on the hot water and contracts when it cools down. This movement is microscopic but constant. If your sealant is rigid, it will pull away from the surface, creating a gap for water to enter. I always recommend 100 percent silicone. It smells like vinegar while it cures, but that is the sound of a chemical bond that will keep your house dry for a decade.
| Material Type | Pull-out Strength (lbs) | Water Resistance | Expansion Compatibility |
|---|---|---|---|
| Hollow Wall Anchor | 50 | Low | Poor |
| Toggle Bolt | 150 | Medium | Moderate |
| Direct Stud Screw | 500+ | High | Excellent |
| Fiberglass Only | 15 | Low | Fail |
When you look at the table above, the data is clear. If you are not hitting a stud, you are gambling with your safety. A sliding glass door panel can weigh sixty pounds or more. Every time you slide that door shut, you are sending a shockwave through the track. If that track is only held by the fiberglass skin, the vibration will eventually enlarge the holes and the whole assembly will pull loose. This is why showers that wow in the showroom often fail in the real world. They are built for the photo, not for the physics of daily use. You have to be smarter than the marketing material.
Measuring the geometry of a wet space
Precision measurement is the difference between a door that slides like silk and one that binds and grinds against the track. Fiberglass showers are rarely perfectly plumb. They are molded in factories and then shoved into wooden frames by plumbers who are often in a hurry. You must measure the width of your opening at the top, the middle, and the bottom. If your walls are leaning in or out by more than an eighth of an inch, your sliding door will not seat correctly in the side jambs. This creates gaps that allow water to spray out onto your floor, which leads back to the issues I mentioned earlier with rotting subfloors and moldy baseboards.
I always use a four-foot level to check the threshold where the bottom track will sit. If the shower base is not level, the door will want to slide open or closed on its own. It is a ghost in the machine that drives homeowners crazy. You can compensate for small variances with the rollers on the door panels, but there is a limit. If the threshold is sloped the wrong way, water will pool in the track instead of draining back into the shower pan. This is how you end up with a slimy, black mess in your tracks that requires constant cleaning. If you want a low-maintenance life, you have to get the level right during the install phase.
The 1/8 inch that ruins everything
A single eighth of an inch of misalignment in the upper track can cause the tempered glass panels to bind or, in extreme cases, explode due to uneven pressure. Tempered glass is incredibly strong on its face but remarkably fragile on its edges. If the track is twisted or tilted, the rollers will apply uneven torque to the glass. One day you are just taking a shower, and the next day you are standing in a pile of five thousand glass cubes. It happened to a client of mine who tried to DIY their install. They didn’t realize the header was slightly bowed. The tension built up for six months until the glass couldn’t take it anymore. It is a violent and terrifying event that is entirely preventable with proper structural alignment.
- Identify the stud locations using a deep-scan tool
- Level the bottom track and apply a continuous bead of silicone
- Drill pilot holes using a new carbide bit through masking tape
- Inject silicone into every hole before driving the stainless steel screws
- Install the wall jambs and verify plumb with a high-quality level
- Hang the glass panels and adjust the rollers for a vertical seal
- Seal the interior and exterior perimeters but leave weep holes on the inside
“A shower is a machine for water containment; if one part of the machine fails, the house pays the price.” – TCNA Technical Manual
Do not be the person who ignores the mechanics of the build. Whether you are dealing with tile and tile cleaning tips or installing a complex glass enclosure, the fundamentals remain the same. You respect the material, you account for the movement, and you never take shortcuts on the fasteners. Your bathroom is the most high-stress environment in your home. The temperature swings, the humidity, and the mechanical forces of daily use will find every weakness in your work. Build it like you expect it to last fifty years, not five. If the fiberglass feels thin, reinforce it. If the studs aren’t there, find them or make them. That is the difference between a professional result and a disaster waiting to happen.