
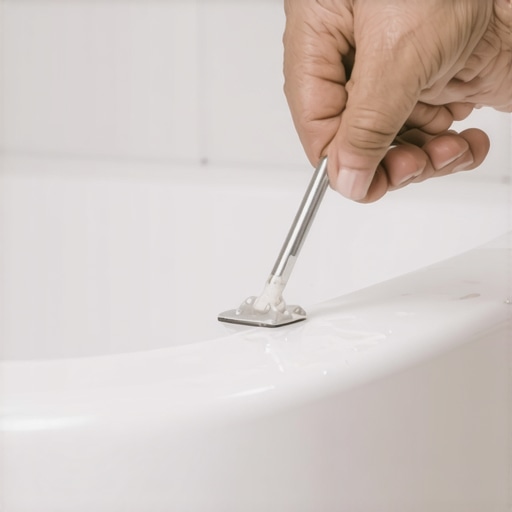
The silent failure of old sealant
Removing old silicone caulk involves mechanical scraping, chemical softening, and meticulous surface decontamination to ensure a watertight bond for the new sealant. To successfully clear a bathtub joint, you must address the molecular residue left by polydimethylsiloxane, which prevents new silicone from adhering to ceramic or porcelain surfaces. I once walked into a house where the homeowners were convinced they had a plumbing leak under the slab. They had spent thousands on leak detection only for me to find that they had applied new caulk directly over the old, moldy stuff. The water was simply wicking through the microscopic gaps between the two layers, bypassing the seal entirely and rotting the subfloor until it felt like a wet sponge. This is why you cannot take shortcuts. Silicone is an inorganic polymer that does not stick to itself once cured. If you leave even a thin film behind, your new bead is destined to fail within months. This task is a structural engineering requirement for your bathroom.
“A floor is only as good as the subfloor beneath it; deflection is the enemy of every joint.” – Master Flooring Axiom
The chemical reality of silicone bonds
Silicone caulk creates a hydrophobic barrier through a cross-linking chemical reaction that occurs when it is exposed to atmospheric moisture. This acetoxy-cure process releases acetic acid, which is that sharp vinegar smell you recognize, and creates a permanent mechanical bond with the silica in tile glazes. Understanding this chemistry is the first step toward defeating it. You are not just dealing with a sticky substance. You are dealing with a material that has integrated itself into the microscopic pores of your tile. To break this bond, you must use a combination of physical force and solvent-based softening. Most people reach for a screwdriver or a dull putty knife, but these tools lack the precision required to sheer the silicone off the surface without damaging the delicate porcelain finish of the tub. You need a razor-sharp edge and a steady hand. The goal is to get beneath the silicone layer and lift it in long, continuous strips. If the silicone is breaking into small, crumbly pieces, it has likely been in place for over a decade and has lost its internal plasticizers, making it brittle and significantly more difficult to extract.
Tools for a surgical extraction
Professional caulk removal tools should include stainless steel utility knives, plastic scrapers for acrylic tubs, and denatured alcohol for the final wipe down. Using a sharp blade allows for a clean cut along the transition line between the tub and the grout or tile surface. I always keep a fresh pack of heavy-duty utility blades in my truck because a dull blade is a dangerous blade. It requires more pressure, which leads to slips and deep scratches in the tub finish. For homeowners with acrylic or fiberglass tubs, metal is the enemy. You must use a stiff plastic scraper or a specialized nylon removal tool that can catch the edge of the sealant without gouging the plastic substrate. This is a game of patience. You are looking for that sweet spot where the blade glides along the surface, separating the bond without digging in. Once the bulk of the material is gone, you are still left with the silicone ghost, a thin, oily film that will ruin any future application. This is where chemical intervention becomes mandatory. While there are commercial caulk removers available, many of them are simply gelled versions of mineral spirits. They work by swelling the silicone, making it softer and easier to scrape, but they still require manual labor to be effective.
| Tool Type | Primary Use Case | Risk Factor |
|---|---|---|
| Utility Knife | Porcelain and Cast Iron | Scratching the finish |
| Plastic Scraper | Acrylic and Fiberglass | Snapping the tool |
| Mineral Spirits | Softening old residue | Fumes and skin irritation |
| Denatured Alcohol | Final decontamination | High flammability |
The physics of the bond breaker
Chemical bond breakers like mineral spirits or isopropyl alcohol work by penetrating the polymer matrix of the silicone and increasing its molecular volume. This internal pressure causes the sealant to expand and detach from the porous substrate of the tile and grout. This is the zooming part of the job. If you look at your grout under a magnifying glass, it looks like a mountain range. The silicone is tucked into every valley of that cementitious surface. When you apply a softener, you need to give it time to work. We are talking about thirty minutes to two hours depending on the thickness of the bead. You should see the silicone start to look bloated. That is the sign that the solvent has done its job. However, you must be careful not to let the solvent sit so long that it evaporates, or the silicone will simply re-harden. I often cover the solvent-soaked caulk with a strip of plastic wrap to keep the chemicals from off-gassing too quickly. This keeps the reaction active for longer. It is also important to consider the grout restoration needs of the joint once the caulk is gone. If the grout behind the caulk is crumbling, no amount of silicone will fix the underlying structural issue. You have to scrape out the loose grout before you even think about the new bead.
Why moisture is the enemy of adhesion
Moisture trapped behind the sealant bead will cause delamination and the growth of staph and mold within the joint cavity. Ensuring the substrate is bone dry is a critical requirement before applying a new bead of silicone. This is the part where most DIY projects fail. They scrape the old caulk, wipe it down, and immediately start pumping a new tube of 100 percent silicone. But the space behind the tub flange is likely damp. You need to use a heat gun or a hair dryer to force all the moisture out of that gap. If you trap water behind the new seal, it will eventually push the silicone off the wall. This is basic physics. Water expands and contracts with temperature changes, and vapor pressure will find the weakest point in your seal. I have seen showers with a style that looked amazing but smelled like a basement because the installer did not dry the joint. It only takes one small pocket of moisture to start the failure. You must be methodical. Use the heat gun until the grout looks light in color again, indicating that the deep-seated moisture has evaporated.
“Sealant failure is rarely a product defect; it is almost always a failure of surface preparation and moisture management.” – Tile Professional Handbook
Preparing the surface for a new era
Surface preparation requires a three-stage cleaning process involving abrasive scrubbing, solvent wiping, and a neutralizing rinse. This ensures that the surface energy of the tile and tub is high enough to allow the new silicone to wet out and bond. After you have scraped and softened the old material, take a coarse abrasive pad and scrub the area with a bit of water and a strong detergent. This removes any biological growth or soap scum that the solvents might have missed. Then, do a heavy wipe with denatured alcohol. This is the most important step. Denatured alcohol leaves no residue and kills any remaining mold spores. It also acts as a drying agent, pulling moisture out of the pores of the tile. If you are working near chic baseboard designs at the floor level, protect them with painter’s tape. You do not want the solvents to drip and ruin the finish on your trim. It is these small details that separate a hack job from a professional installation. The surface should be so clean that it squeaks when you run a finger over it. If there is any slickness, you still have silicone residue, and you need to go back to the solvent stage.
- Inspect the joint for any hidden mold or black spots.
- Use a vacuum with a brush attachment to remove all dust and debris from the gap.
- Ensure the room is well ventilated to handle the solvent fumes.
- Apply a thin layer of painter’s tape to both sides of the joint for a perfect bead.
- Wait at least 24 hours after drying before applying the new sealant.
- Test the tub for movement; if it flexes too much, the caulk will tear.
The mistake that leads to structural rot
Structural rot occurs when water bypasses the sealant and enters the wall cavity, compromising the studs and subfloor. This is often caused by improperly applied silicone that lacks the proper depth-to-width ratio. People think that more caulk is better. They fill the gap with a giant glob of silicone. But silicone needs to be able to stretch. If the bead is too thick, it loses its elasticity and will pull away from the wall as the tub settles when filled with water. This is why pros use a backer rod for wide gaps. A backer rod is a foam strip that fills the void and allows the silicone to form a C-shape. This shape is the most resilient against movement. When the tub moves, the C-shape stretches like a rubber band. A solid block of silicone will simply snap at the edges. This is a common point of failure in showers that wow visually but fail structurally. You must understand the physics of movement. A cast iron tub filled with forty gallons of water and a two hundred pound human is going to move. If your sealant cannot handle that movement, you are going to have a leak. It is that simple. I always recommend filling the tub with water before you apply the caulk. This pre-stresses the joint so that the silicone cures in the expanded position. It will stay under compression when the tub is empty, which is much better for the longevity of the bond.
Protecting your surrounding tile work
Surrounding tile work must be protected from mechanical damage and chemical staining during the silicone removal process. High-quality ceramic tiles can be scratched by hardened steel blades if the angle of approach is too steep. I always tell my guys to keep the blade at a low 15 degree angle. This allows the blade to slice through the silicone without the tip digging into the glaze. If you have natural stone like marble or travertine, you have to be even more careful. These materials are porous and will soak up mineral spirits, which can leave a permanent oily shadow. For stone, I only use isopropyl alcohol and mechanical scraping with plastic tools. You also need to be mindful of the grout. If you are not careful, you can accidentally pull out chunks of grout while you are pulling the silicone. This creates a larger hole that needs to be repaired. If the grout comes out, you need to let it dry and then patch it with a matching sanded or unsanded grout before you recaulk. This is a common issue when people are dealing with baseboards makeover ideas that transition into the bathroom floor. The transition between the wet area and the dry area is a prime spot for water to migrate into the subfloor.
Testing for residue before the final bead
Testing for silicone residue involves a simple water bead test where droplets of water are placed on the cleaned surface to check for hydrophobic reactions. If the water beads up like it is on a freshly waxed car, there is still silicone present. The water should spread out and wet the surface evenly. This is the final verification. If you pass this test, you are ready for the new application. Do not rush this. I have seen guys spend four hours cleaning a tub only to fail the bead test and have to spend another hour on their knees. It is frustrating but necessary. Once the surface is truly clean, you can apply your new 100 percent silicone. Avoid the cheap acrylic latex caulks that claim to be silicone-enhanced. They do not have the same flexibility or mold resistance. They will turn yellow and shrink within a year. Stick to the high-end, professional-grade tubes. They cost more, but they are the only thing standing between your bathroom and a five-thousand-dollar mold remediation bill. Remember that the easiest way to remove old silicone is to do it right the first time so you do not have to do it again for another fifteen years. It requires a commitment to the process and an understanding of the chemistry involved. If you follow these steps, your bathtub will remain sealed, your subfloor will remain dry, and your bathroom will remain a functional part of your home architecture.