
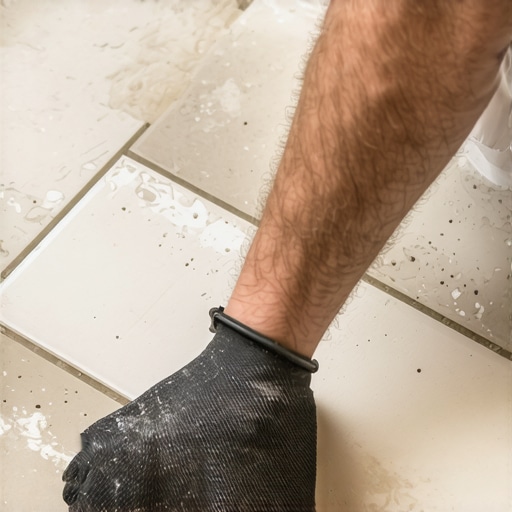
Repairing a chipped ceramic tile is a surgical procedure that most homeowners treat like a quick craft project. This is a mistake. When a heavy object hits a ceramic surface, it creates a fracture that extends beyond the visible crater. You are not just filling a hole; you are restoring the structural integrity of a glazed surface. Most guys will tell you to just dab some paint on it and walk away. I have spent 25 years on my knees fixing those exact botch jobs. If you want a repair that lasts ten years instead of ten days, you have to understand the physics of the bond. We are going to look at the chemistry of resins and the reality of subfloor movement. This is not about hiding a scar. This is about engineering a permanent fix.
Why your subfloor is lying to you
Most guys skip the leveling compound. They think the underlayment will hide the dip. It won’t. I spent three days grinding concrete on a job last month just so the floor wouldn’t click like a castanet. That experience taught me everything I need to know about why tiles chip in the first place. When you have a hollow spot under a tile, any impact is magnified. The tile has no support from the thin-set. It flexes. When it flexes, the glaze, which is essentially a thin layer of glass, becomes brittle and snaps. If you have a chip, the first thing you need to do is tap the surrounding area with the back of a screwdriver. If it sounds like a drum, you have a subfloor issue that a little bit of epoxy won’t solve. You are dealing with deflection. Deflection is the enemy of every joint. If the tile is solid, we can move forward with the repair. If it is hollow, you are just putting a bandage on a broken leg. You can read more about maintaining the integrity of your surfaces in our tile cleaning tips for a sparkling bathroom in 2025 which covers surface maintenance in detail.
“A floor is only as good as the subfloor beneath it; deflection is the enemy of every joint.” – Master Flooring Axiom
The molecular bond of two part resins
A chipped ceramic tile can be repaired using high-grade epoxy resins or ceramic filler kits without a total teardown. You must clean the area, mix a two-part resin with pigment, apply it precisely to the void, and level it once cured. This preserves the surrounding grout and subfloor. This process requires a deep understanding of how polymers interact with the porous clay biscuit of the tile. Ceramic is not one solid block. It is a dense clay body topped with a vitreous glaze. When that glaze is breached, the biscuit is exposed. This clay is thirsty. It will suck the moisture out of your repair material before it has a chance to bond. This leads to the filler popping out six months later. You must seal the biscuit first or use a resin with a high enough solid count to resist this capillary action. We use two-part epoxies because they create a covalent bond. They do not just sit on top; they hook into the microscopic jagged edges of the fracture.
The physics of impact and glaze failure
When an object hits a tile, it creates a compression wave. The glaze, being rigid, cannot absorb this energy, so it shatters. The edges of the chip are usually undercut. This means the hole is wider at the bottom than it is at the top. If you do not clean out the loose shards, your filler will be sitting on a bed of glass dust. I use a dental pick to scrape the edges. You need to see the raw clay. This is where the work happens. If you are working in wet areas, like showers that wow, the stakes are higher. Moisture can get behind the glaze and start a process called spalling. This is where the glaze literally peels off the tile. Your repair has to be 100 percent waterproof. This is why we avoid water-based acrylic fillers for floor tiles. They are too soft and they absorb water over time.
Tools for the surgical floor technician
You cannot do this with a butter knife and a prayer. You need a specific kit to manage the surface tension of the resin. The goal is to overfill the hole slightly and then shave it down so it is perfectly flush with the factory glaze. Any bump will catch your mop or your socks. Any dip will collect dirt and turn black within a week. Here is the list of what I keep in my repair bag.
- Denatured alcohol or 99 percent isopropyl alcohol for degreasing
- Two-part clear epoxy resin with a 24 hour cure time
- Universal pigment tints in black, white, and primary colors
- A set of artist brushes for fine detail work
- 600 grit to 2000 grit wet and dry sandpaper
- Single edge razor blades for leveling
- Non-marring masking tape to protect the surrounding tile
Comparing filler materials for structural longevity
Not all fillers are created equal. You have to choose your weapon based on the traffic the floor sees. If this is a decorative wall tile, you can get away with a polyester filler. If this is a high-traffic kitchen floor where people are walking in boots, you need the Shore D hardness of a true epoxy. Polyester fillers shrink as they cure. This leaves a visible ring around the repair. Epoxies have almost zero shrinkage. They stay exactly where you put them. This is the difference between a repair that vanishes and one that looks like a thumbprint on a window.
| Material | Shore D Hardness | Cure Time | Shrinkage Rate |
|---|---|---|---|
| Epoxy Resin | 80-85 | 24 Hours | Less than 0.1 percent |
| Polyester Filler | 70-75 | 4 Hours | 1-2 percent |
| Acrylic Paste | 60-65 | 2 Hours | 3-5 percent |
Color theory and the art of the invisible patch
The hardest part of this job is not the mechanics; it is the color. Most people try to match the tile by looking at it from six feet up. You have to get your nose on the floor. Ceramic glazes are rarely a solid color. They have depth. They have speckles. They have variations in opacity. I mix my colors on a piece of clear glass or a scrap tile. I start with the base color, usually a white or a tan, and I add pigments one drop at a time. You have to remember that epoxy often darkens slightly as it cures. If you match it perfectly while it is wet, it will be too dark when it is dry. You also have to consider the grout. If your chip is near the edge, you need to make sure your filler does not bleed into the grout line. If your grout is looking rough, you might need to look at grout restoration secrets for long lasting results to make the whole floor look uniform again.
“Surface preparation determines the longevity of any repair; bond failure is almost always a result of contamination.” – TCNA Industry Insight
The 1/8 inch that ruins everything
Precision is the difference between an amateur and a pro. When you are filling the chip, you have to account for the meniscus. This is the curve the liquid forms at the edges of the hole. If you don’t overfill, the resin will settle and leave a divot. I use a masking tape dam if the chip is on the edge of the tile. This keeps the resin from running down into the grout. If you are working near baseboards makeover ideas to elevate your space, be careful not to get epoxy on the wood. It will bond to the finish and you will never get it off without sanding. Once the resin is tacky, I use a razor blade held at a 45 degree angle to shave the excess. If you wait until it is fully hard, you will have to sand it. Sanding is dangerous because you will inevitably scratch the surrounding factory glaze. A razor blade is cleaner.
The relationship between tiles and baseboards
A floor is a system. The tiles, the grout, and the baseboards all work together to handle the movement of the house. When a house settles, it puts pressure on the perimeter. If your tiles are tight against the wall with no expansion gap, they will tent or chip. This is why I always check the baseboards when I see multiple chips in a floor. If the floor was installed too tight, the tiles are under constant stress. Repairing a chip in a stressed floor is a waste of time. The stress will eventually find a new weak point. If you find that your baseboards are hiding a lack of expansion space, you might want to explore chic baseboard designs that transform rooms in 2025 to see how a proper transition should look. A floor needs to breathe.
Grout restoration and finishing
Once your tile is patched and leveled, you have to look at the surrounding grout. A bright white patch in a tile surrounded by grey, dirty grout will stand out like a sore thumb. This is the time to clean the entire area. Use a professional grade alkaline cleaner to get the deep-seated oils out of the grout pores. If the grout is permanently stained, you should learn how to refresh grout without replacing it using a high quality colorant. This seals the grout and matches it to your newly repaired tile. This holistic approach is what separates a Master Architect from a handyman. We look at the whole surface, not just the hole.
Why waterproof is a marketing myth
In the flooring industry, we hear the word waterproof every day. It is a lie. Nothing is truly waterproof; things are only water resistant to a certain degree and for a certain duration. If you have a chip in a shower floor, that chip is a highway for water to get into your mud bed or onto your waterproofing membrane. Ceramic tiles are the shield. When the shield is cracked, the system is vulnerable. You must use a marine-grade epoxy for repairs in showers with a style. Regular household glue will emulsify and fail under the constant heat and moisture. The thermal expansion of the tile in a hot shower is different than in a dry hallway. Your filler must have the elasticity to expand and contract at the same rate as the ceramic.
Final steps for a permanent fix
After the resin has cured for a full 24 hours, I hit it with a polishing compound. This brings back the shine of the glaze. If the tile has a matte finish, I use a high grit sandpaper to dull the resin until the light reflects off it the same way it does the rest of the floor. This is the