
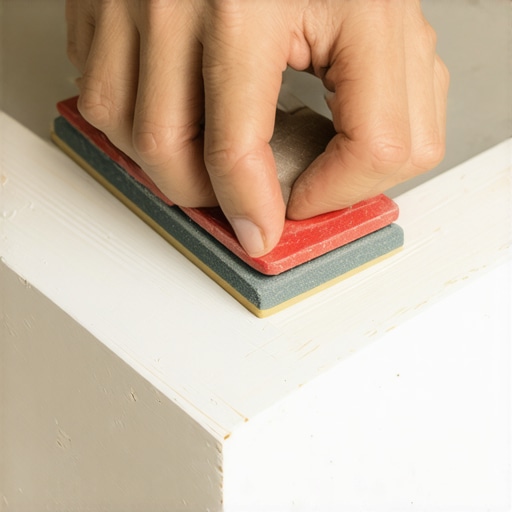
Most guys skip the leveling compound. They think the underlayment will hide the dip. It won’t. I spent three days grinding concrete on a job last month just so the floor wouldn’t click like a castanet. When the floor isn’t flat, your baseboards won’t sit right. You can sand those joints until your fingers bleed, but if that subfloor is bouncing, the joint is going to pop. I have spent 25 years on my knees with a moisture meter and a level. I have seen fifteen thousand dollar walnut floors turn into potato chips because of poor humidity control. I have seen baseboards that look like they were hacked together with a butter knife. To get a joint that looks like a single continuous piece of wood, you have to understand the physics of the material and the chemistry of the bond.
The myth of the perfect miter
Perfect miter joints require a flat subfloor and a square wall to avoid visible gaps. Most installers think they can just cut two 45-degree angles and call it a day. That is a lie. Walls are rarely 90 degrees and floors are rarely flat. If the subfloor has a 1/8 inch dip, your miter will open at the top. If the wall has a hump of mud from the drywaller, the miter will open at the face. You have to sand the back of the trim or shim the bottom to get the faces to meet. Only then can you begin the mechanical process of abrasion. If you are looking for chic baseboard designs that transform rooms in 2025, you must first master the structural foundation of the joint itself.
The molecular physics of wood fiber abrasion
Sanding baseboard joints involves the mechanical destruction of wood lignin and cellulose fibers to create a level surface. When you take a sanding block to a joint, you are not just smoothing things out. You are shearing off the cellular walls of the wood. Solid oak has a high density and a high Janka rating, meaning the fibers resist shearing more than pine or MDF. If you use a grit that is too fine, you will burnish the wood. Burnishing closes the pores, which means your wood glue or paint won’t bite. You need to maintain an open pore structure while reducing the scratch pattern to a point where the human eye cannot detect the transition. This requires a systematic progression through the grit scales, starting with a coarse abrasive to remove the height of the joint and ending with a fine abrasive to blend the texture.
“A floor is only as good as the subfloor beneath it; deflection is the enemy of every joint.” – Master Flooring Axiom
Grit sequences for professional results
Selecting the correct sandpaper grit depends on the baseboard material and the severity of the joint misalignment. For most hardwood baseboards, I start with 80-grit aluminum oxide. This grit is aggressive enough to level a proud joint where one piece sits slightly higher than the other. I move to 120-grit once the two pieces are flush. This removes the deep scratches from the 80-grit. Finally, I finish with 150-grit or 180-grit. If you go higher than 180 on wood that will be stained, you risk the wood not taking the stain evenly. For MDF, you have to be careful. MDF is just glued-together sawdust. If you sand too hard, you hit the fuzzy core, and no amount of paint will hide that texture. Use a light touch and 220-grit for finishing MDF. Below is a breakdown of the materials and their requirements.
| Surface Material | Starting Grit | Finishing Grit | Mechanical Reason |
|---|---|---|---|
| Solid White Oak | 80 Grit | 150 Grit | High lignin density requires aggressive leveling |
| Primed MDF | 120 Grit | 220 Grit | Soft core prone to fiber pull-out and fuzzing |
| Pine or Fir | 100 Grit | 180 Grit | Resinous wood can clog fine grits quickly |
| Engineered Wood | 120 Grit | 150 Grit | Thin veneers limit the depth of the cut |
The chemistry of wood filler and bonding
Wood filler must match the Shore A hardness of the baseboard material to ensure an even sand. If you use a filler that is softer than the wood, your sanding block will dish out the joint. This creates a concave dip that looks like a shadow under the light. I prefer high-solids, solvent-based fillers for hardwood because they shrink less and dry harder. For painted trim, a two-part wood epoxy or a high-quality wood dough is better than standard spackle. Spackle is for drywall. It has no structural integrity. If the house shifts or the humidity changes, spackle will crack and fall out. You need something that forms a chemical bond with the wood fibers. The same logic applies to other surfaces. For example, knowing how to refresh grout without replacing it involves understanding the bond between the grout and the tile edge. In wood, that bond is everything.
The ghost in the expansion gap
Wood is a hygroscopic material that expands and contracts with the ambient relative humidity of the room. Even the best-sanded joint can fail if the wood was not acclimated. In the dry heat of Phoenix, wood will shrink until the joints open up. In the swampy humidity of Houston, solid wood will swell and crush the miter. I always use a pin-style moisture meter to check the trim and the subfloor before installation. The NWFA recommends that wood flooring and trim be within 2 percent of the moisture content of the subfloor. If you sand a joint tight when the wood is wet, it will pull apart when the HVAC kicks on in the winter. This creates a ghost gap that no amount of sanding can fix once the paint is dry. Proper installation is the precursor to a successful sand.
The 1/8 inch that ruins everything
Precision in the initial cut reduces the amount of material that must be removed during the sanding phase. If your miter is off by even half a degree, you are looking at a 1/16 inch gap at the tip. Most guys try to fill that gap with caulk. Caulk is the mark of a hack. Caulk is flexible, but it cannot be sanded. If you try to sand over caulk, it just rolls up into little boogers. You want a wood-to-wood connection. I use a technique called coping for inside corners. Coping involves cutting the profile of one board into the face of another. It allows the joint to stay tight even if the walls aren’t square. For outside miters, I use a miter clamp to squeeze the joint together with PVA glue. The glue should squeeze out. Once it dries to a rubbery consistency, I scrape it off and then start sanding. This creates a monolithic corner that behaves like a single piece of timber.
- Use a dedicated sanding block rather than your bare hand to ensure a flat surface.
- Always sand in the direction of the grain to prevent cross-grain scratches.
- Clean the dust with a tack cloth or vacuum between every grit change.
- Check your progress with a work light held at a low angle to the wall.
- Apply a sanding sealer to soft woods to prevent the grain from raising.
Light and the visual lie of the joint
The angle of incidence for light hitting the baseboard determines if a joint appears invisible or flawed. This is why I always carry a high-intensity LED shop light. I hold it against the wall so the light rakes across the joint. If there is even a microscopic hump or dip, the light will cast a shadow. This is the ultimate test. If the joint passes the rake light test, it will look perfect under normal room lighting. This level of detail is what separates a professional from a DIY enthusiast. It is the same attention to detail required when considering baseboards makeover ideas to elevate your space. If the finish is not smooth, the design does not matter. You have to be a stickler for the physics of light reflection. Paint has a specific light reflectance value. Glossier paints will highlight every single sanding mark, while flat paints are more forgiving. If you are using a high-gloss enamel, you better sand all the way to 220-grit and use a tack cloth like your life depends on it.
“Wood moves. It is a living, breathing material. If you don’t account for the moisture, your joints will fail regardless of your skill with a sander.” – Master Flooring Axiom
The grit of the shopkeeper
I hate the cheap sandpaper you find at big-box retailers. It clogs in five seconds and the grit falls off the paper. I buy industrial-grade abrasives with an anti-clogging stearate coating. It costs more, but it saves time. Time is the only thing we can’t buy more of in this trade. When I am sanding a joint, I am looking at the way the dust behaves. If the dust is clumping, the wood is too wet or the filler isn’t cured. If the dust is a fine powder, I know I’m getting a good mechanical cut. I don’t use electric detail sanders on baseboard joints. They are too aggressive and they round off the crisp edges of the profile. I use a hard rubber sanding block or a custom-shaped piece of scrap wood that fits the profile of the baseboard. This ensures that I maintain the architectural integrity of the molding while smoothing the transition. If you are doing tile cleaning tips for a sparkling bathroom in 2025, you know that the right tools make the difference. The same is true for wood. You can’t use a hammer for a job that requires a scalpel. Sanding a joint is surgery on a structural scale.