
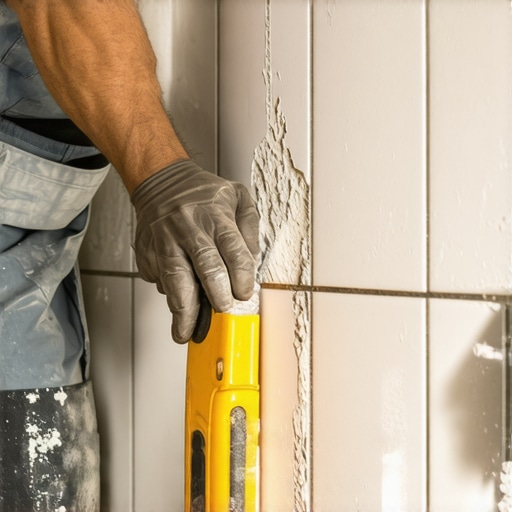
Most guys skip the leveling compound. They think the underlayment will hide the dip. It won’t. I spent three days grinding concrete on a job last month just so the floor wouldn’t click like a castanet. When you move to the walls, the stakes get even higher. A wall is just a vertical subfloor that has to fight gravity while hiding every mistake the framing crew made twenty years ago. If you start with a hump in your drywall or a stud that’s bowed out by a quarter inch, your tile job is dead before you mix the first bag of thin-set. I have seen fifteen thousand dollar bathroom remodels look like a DIY disaster because the installer thought they could fix the plane of the wall using only the thickness of the adhesive. It does not work that way. Physics always wins. You end up with lippage that casts shadows as long as a winter afternoon.
The 1/8 inch that ruins everything
To align tiles on an uneven wall you must first establish a perfectly flat plane using a six foot straightedge or laser level to identify high and low spots. Substrate correction involves mechanical grinding of high points or applying a feather finish compound to fill the voids. You cannot expect a standard thin-set to bridge gaps larger than three sixteenths of an inch without experiencing shrinkage or sag. Large format tiles are particularly unforgiving. If the wall is out of plumb or has a belly in it, the corners of the tiles will not meet. This creates a lip. When the light hits that lip, it highlights every imperfection. You need to understand the tolerance levels defined by the Tile Council of North America. For tiles with any side longer than fifteen inches, the maximum allowable variation is one eighth of an inch in ten feet. If your wall does not meet that, you are setting yourself up for failure.
“A floor is only as good as the subfloor beneath it; deflection is the enemy of every joint.” – Master Flooring Axiom
Why your substrate is lying to you
Identifying substrate irregularities requires a methodical approach using a long level and a pencil to map the topography of the wall surface. Drywall and backer boards often follow the contour of warped studs creating a wave pattern that disrupts tile alignment. The human eye is incredibly sensitive to variations in light. Even a two millimeter offset between tiles will catch a shadow. This is why mapping the wall is non negotiable. I always take a six foot level and run it horizontally and vertically across the entire installation area. When I find a low spot, I mark it with a circle and write the depth. If it is a shower project, this step is where you decide if the project succeeds. For those looking for design inspiration, checking showers that wow modern designs for 2025 can help you visualize why a flat wall is vital for those sleek looks. If you ignore the bumps, your vertical grout lines will start to wander like a drunk sailor. You will find yourself trying to open up grout joints to compensate, but that only works for so long before the pattern breaks entirely.
The chemistry of the bond and mortar thickness
Using the correct mortar is essential when dealing with uneven surfaces because standard thin-sets are not designed for thick applications. Medium bed mortars allow for thicknesses up to three quarters of an inch after the tile is embedded providing the necessary body to level out minor wall dips. You have to look at the polymer content of your bag. A modified thin-set has the tensile strength to hold heavy porcelain on a vertical surface without slipping. If you try to build up regular thin-set too thick, the water evaporates and the mortar shrinks. As it shrinks, it pulls the tile backward toward the wall. If one tile has a quarter inch of mud and the next has an eighth, they will shrink at different rates. That is how you get lippage overnight while the mortar cures. I always recommend back-buttering every single piece of tile. This ensures one hundred percent coverage and gives you that extra bit of control over the depth of the bed.
| Mortar Type | Max Thickness | Best Use Case |
|---|---|---|
| Standard Thin-set | 1/4 inch | Flat walls, small mosaics |
| Medium Bed Mortar | 3/4 inch | Large format tile, uneven walls |
| Mastic | 1/16 inch | Dry areas, perfectly flat drywall |
| Epoxy Grout | N/A | High chemical resistance areas |
The ghost in the expansion gap
Managing expansion gaps at the perimeter is a structural requirement that prevents tile tenting and cracking during seasonal humidity shifts. A minimum gap of one eighth of an inch should be maintained at all internal corners and transitions to allow for substrate movement. The wall moves. The house breathes. If you jam your tile tight against the floor or the ceiling, something has to give. Usually, it is the bond between the tile and the wall. I have walked into jobs where the tile was literally popping off the wall because the installer did not leave room for expansion. You hide these gaps with your chic baseboard designs that transform rooms in 2025 or a bead of high quality 100 percent silicone. Never use grout in a corner change of plane. Grout is rigid. It will crack. Silicone is flexible. It handles the movement of the house without failing. This is a technical detail that separates the pros from the hacks. If you want to keep your project looking fresh, you must understand grout restoration secrets for long lasting results so you know why the original install failed in the first place.
Corrective measures for the worst walls
When a wall is too far out of alignment for mortar to fix, you must resort to mechanical shimming or installing a new layer of backer board. This process involves stripping the wall to the studs and using wood shims or sistered studs to create a perfectly plumb and level plane. Sometimes the best tool for a tile job is a power planer or a crowbar. If a stud is bowing out half an inch, no amount of mud is going to hide that. You rip it out or you plane it down. If you are working over existing tile, which I generally advise against, you need to use a primer like Eco Prim Grip to ensure the new mortar actually sticks. For sustainable projects, look at eco friendly tile solutions for sustainable homes in 2025 to see how modern materials handle these challenges. Once the wall is flat, you can focus on the layout. I always start from the center and work my way out. This ensures your cuts at the corners are even. A tiny sliver of tile in one corner and a full tile in the other is a hallmark of a lazy installer.
- Check wall flatness with a 6-foot level
- Grind down high spots in concrete or masonry
- Shim studs before hanging backer board
- Use a laser level for the first course of tile
- Apply medium-bed mortar for large tiles
- Use a lippage tuning system or spacers
- Back-butter every tile for full coverage
Finishing the transition at the floor and ceiling
The interface between an uneven wall and the floor requires careful planning to ensure the bottom row of tile remains level despite floor slope. Using a ledger board or a laser line allows you to start the second row first ensuring the entire wall remains perfectly aligned. Most floors are not level. If you start your tile on the floor, your grout lines will be crooked by the time you reach the ceiling. I screw a straight piece of wood to the wall at the height of one tile plus the grout joint. I level that board perfectly. Then I build the wall up from there. Once the wall is done and the mortar has set, I remove the board and cut the bottom row to fit the floor. This hides the slope. You can then finish the look with baseboards makeover ideas to elevate your space. If the grout starts looking dingy over time, you do not always have to rip it out. You can learn how to refresh grout without replacing it to save time. For bathroom specific maintenance, these tile cleaning tips for a sparkling bathroom in 2025 will keep that precision work looking sharp for decades. Just remember that a floor or wall is a system. Every layer matters from the stud to the sealer.