
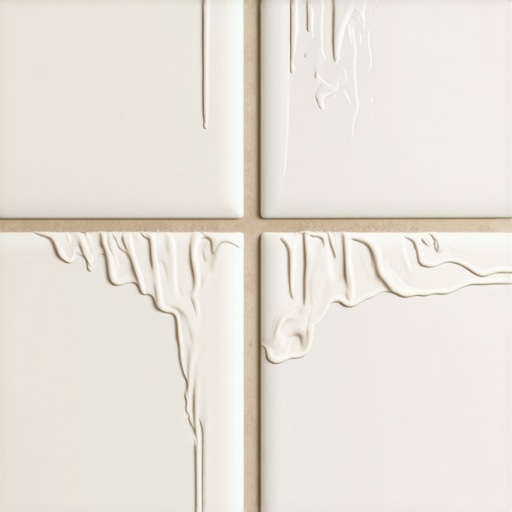
Most guys skip the leveling compound. They think the underlayment will hide the dip. It won’t. I spent three days grinding concrete on a job last month just so the floor wouldn’t click like a castanet. That is the exact same type of shortcut culture that leads people to smear a fresh bead of silicone right over the top of old, crumbling grout in showers. It is a lazy fix that creates a nightmare for whoever has to fix it next. I have spent twenty five years with my knees on the subfloor and my hands in the thin-set. I can tell you that the physics of a wet environment do not care about your weekend DIY timeline. When you put silicone over old grout, you are not sealing anything. You are just building a coffin for your bathroom walls.
The chemical failure of overlapping sealants
Applying silicone over old grout fails because the acetic acid in many silicone formulas reacts poorly with the alkaline nature of cementitious grout. This reaction prevents a true molecular bond from forming, leaving microscopic voids where water can sit and foster mold growth behind the clear or colored bead. The surface of old grout is often covered in soap scum, body oils, and mineral deposits. Silicone requires a surgically clean surface to adhere. Without removing the old material and cleaning the substrate with denatured alcohol, the new silicone is simply sitting on a layer of filth. Within months, the edges will lift. This creates a capillary effect where water is sucked behind the silicone but cannot evaporate because the silicone acts as a vapor barrier. You end up with a wall that stays permanently wet, rotting the studs and the cement board from the inside out. If you are looking for actual fixes, you should check out grout restoration secrets for long lasting results instead of reaching for the caulk gun. I have seen tile fall off the wall because a homeowner thought they were being proactive with a tube of $8 silicone.
“A floor is only as good as the subfloor beneath it; deflection is the enemy of every joint.” – Master Flooring Axiom
Why moisture destroys the bond from within
Moisture trapped under a layer of silicone will inevitably lead to bond failure because the water vapor pressure increases when the shower is in use. This pressure pushes against the silicone bead from the backside, causing it to peel away in long, disgusting strips that harbor black mold. Think about the porosity of cement grout. It is a sponge. Even if it feels dry to the touch, the core of the grout line can hold a significant percentage of moisture. When you cap that moisture with a non-breathable polymer like silicone, you are creating a localized greenhouse. This is why showers that have been capped with silicone always smell like a damp basement. The water has nowhere to go. It travels through the grout line, hits the silicone, and then turns back toward the wall cavity. This often ruins baseboards in the adjacent room as the water wicks through the floor plate. You can find better ways to handle these updates by looking at how to refresh grout without replacing it properly.
The geometry of movement joints
Movement joints require a flexible sealant but that sealant must be applied to the substrate and the tile edges, never to the grout itself. Grout is rigid and silicone is flexible, and when these two materials are layered, the thermal expansion and contraction of the house will cause them to separate immediately. Every house moves. Your floor joists flex when you walk on them. Your walls expand when the heater kicks on in the winter. A shower is a box that is constantly changing shape. The corners, known as change-of-plane joints, should never have grout in them to begin with. They should be 100 percent silicone. But if someone put grout there, you cannot just cover it up. You have to rake the grout out of the corner completely. You need a clean channel. If you just put silicone over the grout, the joint is now too stiff. It will not flex. Instead of the silicone stretching, it will simply tear away from the tile. This is the difference between an installer and a handyman. One understands the physics of expansion, the other just wants to get paid and leave.
| Material Type | Porosity Level | Adhesion Strength | Common Failure Mode |
|---|---|---|---|
| Cementitious Grout | High | Mechanical | Cracking and crumbling |
| Epoxy Grout | Zero | Chemical | Surface staining over time |
| Silicone Sealant | Zero | Surface Only | Peeling and mold growth |
| Urethane Grout | Low | Chemical | Extended cure time issues |
The 1/8 inch that ruins everything
The thickness of a silicone bead determines its ability to handle movement, and a thin layer smeared over old grout lacks the body to stretch without tearing. For a sealant to function, it needs a specific depth-to-width ratio that is impossible to achieve when it is layered on top of an existing material. I always tell my apprentices that if they can see the old grout through the silicone, they have failed. But the solution isn’t more silicone. The solution is the correct depth. Professional installers use backer rods in deep joints to ensure the silicone only bonds to the two side surfaces and not the back of the joint. This is called three-point bonding, and it is a failure. You want two-point bonding so the bead can stretch like a rubber band. When you smear it over grout, you are forcing it into a three-point bond. It will snap every single time. If you want a bathroom that actually holds up, look into showers that wow modern designs for 2025 to see how modern waterproofing systems eliminate these issues.
“Movement joints in tile installations must be kept free of all rigid materials to prevent stress-induced cracking.” – TCNA Handbook Principles
A checklist for professional grout repair
- Remove every trace of old silicone using a sharp razor and a dedicated silicone solvent.
- Rake out at least 1/8 inch of the old grout to create a channel for the new material.
- Scrub the tile edges with a stiff nylon brush and denatured alcohol to remove all oils.
- Ensure the area is completely dry for at least 24 hours before applying new sealant.
- Use a neutral cure silicone which has better adhesion and less odor than acetoxy versions.
- Tool the joint with a dry finger or a specialized tool to force the sealant into the edges.
Baseboards and the perimeter gap
Baseboards should never be caulked to the floor with silicone because the floor needs a perimeter expansion gap to move freely. When you bridge this gap with a rigid or semi-rigid sealant, you risk the floor buckling or the baseboard pulling away from the wall during seasonal humidity shifts. In my years of fixing botched jobs, I have seen baseboards that were practically glued to the tile with heavy beads of silicone. When the house settled, the baseboards literally ripped the drywall paper because the floor had no room to breathe. The floor is a living thing. It expands in the summer and shrinks in the winter. If you are looking to update your trim, check out baseboards makeover ideas to elevate your space but remember to keep that gap clear. Use a shoe molding or a quarter round to hide the expansion gap, but do not fill it with silicone. You are just fighting against the laws of physics. For those interested in maintaining their surfaces properly, tile cleaning tips for a sparkling bathroom in 2025 offers better ways to keep things fresh without resorting to caulk.