
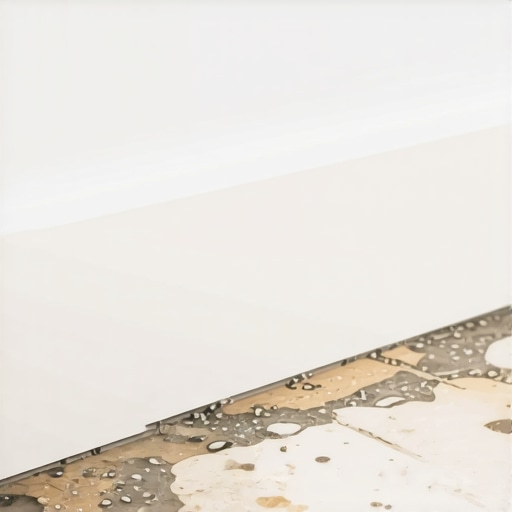
Why Your Bathroom Baseboards Are Swelling at the Floor
I spent three days grinding concrete on a job last month just so the floor wouldn’t click like a castanet, but what I saw in the bathroom was worse. The homeowner pointed at his baseboards and asked why they looked like bloated sponges. He thought it was a spill. I knew better. I pulled a pry bar from my belt and popped a section of that trim. Behind it, the drywall was soft and the back of the MDF board was a forest of black mold. The installer had ignored the basic physics of moisture migration. He had installed the tile tight against the wall without a proper waterproof membrane transition, creating a highway for water to travel from the shower right into the wood fibers. This is the reality of modern flooring. It is not about how it looks on day one. It is about how the materials handle the inevitable presence of water at the molecular level.
The physics of capillary action and porous trim materials
Bathroom baseboard swelling occurs because porous materials like MDF or finger-jointed pine absorb water through capillary action when the perimeter seal of a floor fails. Water molecules find microscopic pathways through grout or unsealed edges and travel upward into the cellulose fibers of the trim. This causes the internal bond of the wood to break and expand permanently. When you see that telltale bubbling at the bottom of your trim, you are looking at a structural failure of the material. Most modern baseboards are made of Medium Density Fiberboard. This is essentially sawdust held together by urea-formaldehyde resins. When H2O enters the mix, the resin loses its grip. The fibers swell and they do not shrink back down once they dry. It is a one-way street to replacement. I have seen guys try to sand it down and paint over it. It never works. You are just painting a wet sponge.
Why your shower pan is actually a leaky bucket
A leaking shower pan or failing grout lines in the splash zone allow liquid water to migrate beneath the tile layer and saturate the subfloor. This moisture then travels laterally until it hits the wall plate where your baseboards are pinned. Most showers that wow in photos are often built with zero regard for the flood test. If the waterproofing membrane does not integrate perfectly with the floor tile, you have a breach. Grout is not waterproof. It is a mineral-based filter. It slows water down but it does not stop it. Over time, the repeated wetting of the subfloor creates a high-humidity environment behind the baseboard. This is why you see the swelling start at the floor and move up. It is the material drinking from a puddle you cannot see. I always tell clients that if they are not using a high-quality modified thin-set and a verified waterproofing system, they are just waiting for a disaster. You can see more about proper setups at showers with a style where we discuss modern designs that actually hold water.
“A floor is only as good as the subfloor beneath it; deflection is the enemy of every joint.” – Master Flooring Axiom
The chemical failure of grout and caulk
Grout and caulk serve as the first line of defense against moisture but they eventually fail due to structural movement and chemical degradation from harsh cleaners. When the bond between the tile and the baseboard breaks, a hairline crack forms. Gravity and surface tension pull water into that crack every time you step out of the shower. This is why tile cleaning tips often emphasize using pH-neutral cleaners. Bleach and ammonia-based products eat away at the polymers in your caulk. Once those polymers are gone, the caulk becomes brittle. It pulls away from the wall. Now you have an open door for moisture. If you are struggling with old grout, check out how to refresh grout without replacing it to see if you can save the installation before the baseboards are ruined. But once the swelling starts, you have a deeper problem than just aesthetics.
Subfloor moisture migration through capillary pathways
Subfloor moisture migration happens when concrete slabs or plywood underlayments hold onto moisture and release it as vapor that condenses behind the trim. In many homes, the concrete slab was never properly tested for moisture vapor emission rate. If the slab is pushing out five pounds of moisture per thousand square feet, that vapor has to go somewhere. It gets trapped under your flooring and moves toward the walls. When it hits the cold backside of a baseboard, it turns back into liquid. This is the hidden killer of chic baseboard designs. You might have the most beautiful trim in the world, but if the slab is sweating, that trim is doomed. I have seen $20,000 bathroom remodels ruined in six months because the contractor skipped the $100 moisture barrier. It is pure negligence. If you want to avoid this, you need to understand grout restoration secrets and how to seal the entire system correctly.
| Material Type | Moisture Resistance | Swell Potential | Recommended Use |
|---|---|---|---|
| MDF (Fiberboard) | Very Low | High | Dry hallways only |
| Finger-jointed Pine | Moderate | Medium | General living areas |
| Solid PVC | Extreme | None | Wet rooms and baths |
| Solid White Oak | Moderate | Medium | High-end dry areas |
Technical specifications for moisture resistant baseboards
The technical specification for a bathroom baseboard should prioritize non-porous materials like cellular PVC or high-density polystyrene to prevent swelling. These materials have zero organic content. Mold cannot eat them and water cannot enter them. If you insist on wood, you must use a solid species and seal every single side of it before installation. That includes the back and the cut ends. Most installers just paint the front. That is like wearing a raincoat that is open in the back. The moisture finds the raw wood and the swelling begins. For those looking at baseboards makeover ideas, consider going with a 100 percent waterproof option. It looks like wood once painted but it will never bloat. It is the only way to guarantee a long-lasting result in a high-humidity environment like a bathroom. Even eco-friendly tile solutions need to be paired with trim that can handle the environment.
The proper way to seal a bathroom perimeter
Sealing a bathroom perimeter requires a 100 percent silicone sealant applied to the transition between the floor tile and the wall before the baseboard is installed. This creates a secondary barrier. If water gets past the baseboard caulk, it hits the silicone bead and stops. I also recommend back-priming any wood trim with an oil-based primer. Water-based primers just soak into the wood and do not provide a true moisture block. You need that chemical barrier. Also, never let your baseboard touch the floor directly. Leave a 1/16 inch gap and fill it with high-quality silicone. This prevents the wood from sitting in a puddle. It is a small detail that saves you thousands of dollars in repairs down the line. If you have questions about our methods, you can always visit our contact us page or read our privacy policy for more info on how we handle project data.
“Tile installations without a perimeter movement joint often transfer moisture directly into the wall plate and trim through capillary action.” – TCNA Technical Manual
- Inspect the grout lines near the shower for cracks.
- Check the caulk bead at the floor-to-wall transition.
- Measure the moisture content of the trim with a pin-meter.
- Look for signs of mold or mildew at the bottom edges.
- Verify that the shower door sweep is not leaking onto the floor.
Remediation strategies for water damaged trim
Remediation of swollen baseboards requires removing the damaged material, addressing the moisture source, and replacing the trim with a water-resistant alternative. You cannot fix swollen MDF. Once those bonds are broken, the structural integrity is gone. You must identify where the water is coming from first. Is it a leak in the shower pan? Is it splashing from the tub? Or is it vapor coming up from the slab? If you do not fix the source, the new trim will swell just like the old stuff. I usually suggest switching to a PVC baseboard for the replacement. It eliminates the risk forever. Clean the area with a microbial inhibitor before installing the new pieces. Ensure the drywall behind the trim is dry and sound. If the drywall is soft, you need to cut it out and replace it too. Do not bury a problem behind new trim. It will only come back to haunt you. Flooring is a system, not a collection of parts. If one part fails, the whole system is at risk.