
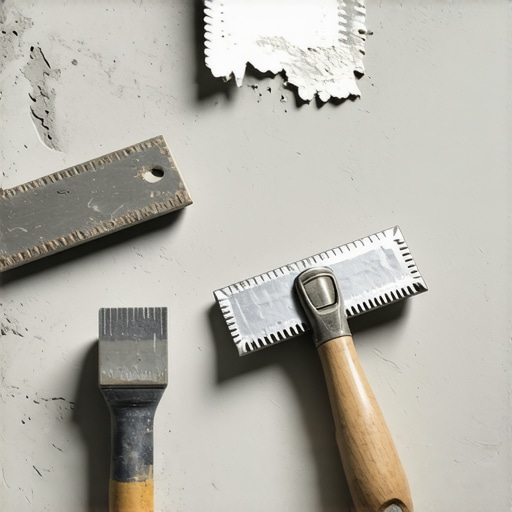
The myth of the flat concrete slab
A large format tile requires a trowel notch size that ensures at least 80 percent mortar coverage in dry areas and 95 percent in wet areas like showers. Most installers fail because they assume a subfloor is flat enough for a 1/4 inch notch. It never is. Most guys skip the leveling compound. They think the underlayment will hide the dip. It won’t. I spent three days grinding concrete on a job last month just so the floor wouldn’t click like a castanet. When you are dealing with tiles where one side is longer than 15 inches, the margin for error effectively vanishes. The physics of a large tile mean that any void underneath becomes a pressure point. If you drop a coffee mug on a hollow spot, the tile cracks. If you walk on it with high heels, the corner snaps. I have seen thousand-dollar installations ruined because someone wanted to save twenty dollars on a bag of self-leveling underlayment. You cannot argue with a straightedge. If the floor deviates more than 1/8 inch over 10 feet, you are not ready to spread thin-set. You are ready to grind or pour.
The physics of the mortar ridge
Mortar ridges created by a notched trowel must collapse completely to create a continuous bond between the substrate and the tile. When you pull a trowel across a floor, you are not just spreading glue, you are engineering a series of air channels. The shape of the notch determines how much air is trapped and how much mortar is available to fill the gaps. Square notches create ridges that stand tall, but they can be difficult to collapse if the mortar is too stiff. U-notches produce a rounded ridge that folds over more easily, often leading to better coverage for beginners. For large format tile, the goal is a bed of mortar that is thick enough to compensate for the inherent bowing of the tile itself. Large tiles are rarely perfectly flat; they almost always have a slight crown from the kiln. A larger notch size provides the volume of material needed to fill that center bow while still supporting the edges. If your ridges do not collapse, you are essentially balancing a heavy stone on a series of brittle toothpicks.
“A floor is only as good as the subfloor beneath it; deflection is the enemy of every joint.” – Master Flooring Axiom
Square notch versus U notch geometry
Square notches provide more mortar volume than U-notches of the same nominal size, making them better for heavy tiles that require a deeper bed. A 1/2 inch by 1/2 inch square notch trowel leaves a ridge that is roughly half the height of the notch once compressed, assuming a 45 degree angle during application. However, if you hold the trowel at too shallow an angle, you lose volume. This is why many pros prefer the Euro-notch or the slanted notch designs. These specialized shapes are designed to collapse in a specific direction, pushing air out rather than trapping it in pockets. When working on showers that wow, the coverage must be absolute. Any air pocket in a wet environment becomes a reservoir for stagnant water, which eventually leads to mold and the failure of the bond. I have pulled up tiles in bathrooms that smelled like a swamp because the installer used a small square notch and left 30 percent of the space hollow. The tile stayed down for a year, then the grout started cracking and the smell began.
The mandatory nature of back buttering
Back buttering is the process of applying a thin layer of mortar to the back of the tile with the flat side of the trowel to ensure 100 percent contact. You cannot skip this step with large format porcelain. Think of it like paint. If you try to stick two dry surfaces together with a few blobs of glue, the bond is mechanical and weak. If you wet both surfaces with a thin layer of mortar, the bond becomes chemical and structural. The mortar on the floor and the mortar on the tile fuse together into a single monolithic layer. This is especially vital when the tile has a textured back or a mesh reinforcement. I tell my apprentices that if they do not back butter, they are not tiling, they are just gambling. We use a high-polymer modified thin-set that meets ANSI A118.15 standards. This stuff is basically liquid rock. Once it sets, it is not coming up without a jackhammer. But it only works if it touches the tile. A large tile can look perfectly installed while sitting on top of the ridges without actually being bonded to them.
The geometry of tile expansion and grout
Expansion joints are non-negotiable in large format tile installations to prevent tenting and cracking caused by thermal movement. Every structure moves. The wood shrinks, the concrete expands, and the house settles. In a large room, the cumulative movement can be significant. If you butt the tile tight against the wall, it has nowhere to go. It will push against the wall, the pressure will build, and the floor will eventually pop up in the middle of the room. We leave a 1/4 inch gap at the perimeter, which is easily covered by chic baseboard designs. For long runs, you need an intermediate expansion joint filled with 100 percent silicone caulk that matches your grout. Hard grout is brittle. It cannot handle the shear force of a shifting slab. If you are seeing cracks in your lines, you might need to look into how to refresh grout without replacing it, but usually, a crack is a sign of movement that grout cannot accommodate. We use color-matched silicone in all plane changes, like where the floor meets the wall or the shower pan. This allows the assembly to breathe without leaking.
| Tile Size (inches) | Recommended Trowel Notch | Minimum Coverage Target |
|---|---|---|
| 12 x 12 | 1/4″ x 3/8″ Square Notch | 80% (Dry) |
| 12 x 24 | 1/2″ x 1/2″ Square Notch | 90% (Dry/Wet) |
| 24 x 24+ | 3/4″ x 9/16″ Flowing Notch | 95% (Wet) |
| Plank Tiles | 1/2″ x 1/2″ U-Notch | 90% (Dry) |
The tool that defines your success
Selecting the correct trowel is a decision based on the flatness of the substrate and the depth of the tile’s lugs. I often see guys using a rusty old trowel they found in the back of their truck. If the notches are worn down, you aren’t getting the depth you need. A 1/2 inch trowel with worn teeth is actually a 3/8 inch trowel. That 1/8 inch difference is the margin between a floor that lasts 50 years and one that fails in five. In regional climates with high humidity like the Gulf Coast, the moisture in the air can slow down the skin-over time of your mortar, but it also means you have to be more careful about your coverage. Moisture trapped under a tile in a humid environment will never dry. It will just sit there and weaken the thin-set. This is why tile cleaning tips always emphasize keeping the surface dry. If the water gets under the tile because of poor coverage, no amount of surface cleaning will save the installation. You have to get it right the first time. There are no do-overs in the world of large format porcelain.
- Verify subfloor flatness within 1/8 inch over 10 feet.
- Select a trowel that provides at least 1/2 inch of depth for tiles over 15 inches.
- Directional troweling should always be done in the shortest direction of the tile.
- Back butter every single piece of large format tile with a flat coat of mortar.
- Use a tile leveling system to prevent lippage and hold tiles in place during cure.
- Ensure 95 percent coverage for all wet area applications like walk-in showers.
Requirements for wet area installations
Showers and steam rooms require a specialized approach where the trowel notch size is secondary to the waterproofing membrane integrity. When building showers with a style, you are essentially building a pool. Every single notch must be collapsed to ensure no water can track behind the tile. If you leave ridges uncollapsed, you create tiny straws that wick water through capillary action. This water eventually hits the waterproofing. If there is even a pinhole in that membrane, your subfloor is toast. I have seen joists rotted through because an installer used a 1/4 inch notch on a 12×24 tile in a shower. The tile looked fine, but the water was living in the voids behind it. This is where grout restoration secrets become irrelevant because the failure is structural. You cannot grout your way out of a bad mortar bed. For these jobs, I use a specialized LFT mortar with high sag resistance. It holds the heavy tile in place on the wall while providing the creamy consistency needed for total ridge collapse. It is a balancing act of chemistry and muscle.
“Consistency is the hallmark of the professional; if your mortar mix varies, your floor will fail.” – TCNA Handbook Wisdom
Dealing with lippage and leveling systems
Tile leveling systems are not a substitute for a flat floor, but they are essential for eliminating lippage on large format tiles. Lippage is when the edge of one tile is higher than the edge of the adjacent tile. With large format tiles, even a tiny amount of lippage is a trip hazard and looks amateur. The clips and wedges you see today are a godsend. They mechanically lock the tiles into a single plane while the mortar cures. But here is the catch. If you use too much tension, you can actually lift the tile off the mortar bed, creating a massive void underneath. You have to find the sweet spot. You need enough mortar under the tile so that when the clip pulls it down, it stays in contact with the bed. This is why you use a larger notch. You need that extra volume of material to allow for the adjustment. If you are interested in keeping your space looking sharp, consider how baseboards makeover ideas can finish the look once the floor is perfectly flat and level. A flat floor makes the baseboard installation twice as easy because you aren’t fighting gaps and shadows along the bottom edge. It all ties together. The subfloor, the trowel, the tile, and the trim. It is a system, not a collection of parts.