
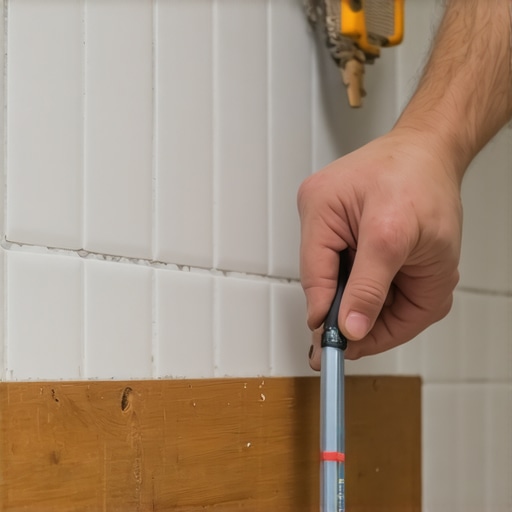
Installing trim against an uneven surface is the ultimate test of craftsmanship. When you try to force a straight piece of wood against a undulating surface, you end up with massive gaps that no amount of caulk can cleanly hide. This structural guide reveals how to achieve a seamless joint through the precise art of scribing.
The day the master bathroom met reality
Scribing trim requires a compass, a coping saw, and absolute patience to transfer the exact contour of a wavy wall onto your baseboard material. By taking physical measurements of the wall deviations and transferring those coordinates directly to your wood, you create a customized profile that interlocks with the tile surface perfectly. This physical adjustment eliminates the need for thick, unsightly caulking beads that eventually crack and collect dirt.
I once walked into a house where a homeowner had spent thousands of dollars on handmade Moroccan zellige tile for their bathroom. The tile was stunning, but the walls looked like a choppy sea. The previous trim guy had tried to smash a rigid primed MDF baseboard directly against this wavy tile wall. He filled the massive gaps, some over half an inch wide, with cheap painters caulk. Within three weeks, the moisture from the nearby showers caused the framing to shift. That thick caulk bead split right down the middle, leaving a black, gaping void that looked like a cavern. It ruined the entire aesthetic of the high-end tile installation. I had to rip out all the ruined trim, spend a full day scraping cured caulk off the delicate glazed tile edges, and rebuild the baseboard installation from scratch using a proper scribing compass and a belt sander. It was a tedious process, but it was the only way to save the room.
Tile installations in wet areas are subjected to constant moisture cycles. When steam rises from modern showers, the relative humidity in the room spikes. This humidity penetrates the drywall and causes microscopic expansion in the timber framing. If your trim is not perfectly custom-fit to the tile surface, these micro-movements will quickly tear apart any adhesive or caulk joint. You cannot fight physics with a tube of silicone.
“A floor is only as good as the subfloor beneath it; deflection is the enemy of every joint.” – Master Flooring Axiom
The physics of wavy tile installations
Wall curvature is caused by bowed studs, uneven drywall mudding, or variations in the tile thickness itself. When dealing with artisan tile, clay shrinkage during the firing process creates natural warps that make a flat trim installation impossible without custom modifications. Understanding these physical deviations allows you to plan your scribing strategy before making a single cut.
To understand why tile walls wave, you have to look at the framing behind them. Standard construction lumber is rarely perfectly straight. Over time, studs twist and bow as they dry. When tile backing boards are screwed to these bowed studs, they follow the curve. The tile installer then applies thin-set mortar. If they try to flatten the wall with extra mortar, they often create localized high spots. If you are working in a bathroom featuring trendy small bathroom showers, these tight spaces amplify the visual impact of even minor wall waves.
Furthermore, handmade or rustic tiles have varying thicknesses. A single tile can be an eighth of an inch thicker on one side than the other. When these tiles are grouted, they create a highly textured, irregular surface along the floor line. For details on maintaining these complex surfaces, understanding advanced tile cleaning protocols can prevent dirt buildup in the deep recesses. The table below outlines how different trim materials react when forced against these irregular tile surfaces.
| Trim Material | Flexibility Index | Scribing Difficulty | Moisture Resistance | Best Cutting Tool |
|---|---|---|---|---|
| Solid White Oak | Very Low | High | Medium-High | Belt Sander & Rasp |
| Primed Pine | Medium | Medium | Medium | Coping Saw |
| MDF (Medium Density) | High | Low | Very Low | Jigsaw with Scroll Blade |
| PVC / Composite | Very High | Low | Maximum | Utility Knife & File |
Why your subfloor is lying to you
Subfloor levelness and wall plumbness are rarely in perfect alignment, creating a compounding error for baseboard installation. If the floor slopes downward while the tile wall bulges outward, a standard square cut on your baseboard will result in a joint that is open at either the top or bottom. You must analyze both planes simultaneously before committing to your scribe line.
Before you even touch your scribing compass, you must establish a level reference line. Do not assume the floor is flat. Run a laser level across the room. If the floor dips, your baseboard must be scribed on both the bottom edge, to match the floor, and the back edge, to match the wavy tile wall. This dual-axis scribing requires extreme precision. If you are upgrading your trim as part of a larger project, exploring baseboard makeover design options can help you choose a profile that is easier to manipulate along irregular walls.
If you fail to account for the subfloor slope, your mitered corners will never align. When the baseboard is forced to tilt forward to meet a bulging tile, the angle of the miter changes. This creates a gap at the face of the corner joint that wood filler cannot convincingly fix. The wood must sit naturally against the wall without tension. Tension is the silent killer of trim work, slowly pulling nails out of studs over several heating and cooling seasons.
“Subfloor flatness must be maintained within 3/16 inch over a 10-foot radius to prevent structural stress on interlocking wall joints.” – TCNA Installation Standards Handbook
The tool kit for surgical precision
A professional scribing setup requires a high-quality drafting compass, a coping saw, a variable-speed belt sander, and blue painter’s tape. Using cheap tools or trying to freehand the cut with a standard miter saw will shred the wood fibers and ruin the trim profile. Each tool serves a specific purpose in translating the micro-contours of the tile to the wood.
The secret to a clean scribe is visibility. You cannot easily see a pencil line on dark wood or primed white trim. Always apply high-visibility blue painter’s tape along the edge of the baseboard that will face the tile. This tape serves two purposes. It provides a high-contrast background for your pencil line, and it protects the wood finish from splintering during the cutting process. For those looking to coordinate their trim with overall room transformations, selecting matching modern chic baseboard designs can elevate the entire architectural look of the space.
- Drafting Compass: Choose one with a locking thumbwheel to prevent the width from changing mid-scribe.
- Blue Painter’s Tape: Protects the wood face and makes the scribe line highly visible.
- Coping Saw: Equipped with a 15-tooth-per-inch blade for making intricate micro-cuts.
- Belt Sander (80-grit): Used for rapidly removing bulk waste wood up to the scribe line.
- Hand Rasp and Files: For fine-tuning the wood profile in deep depressions.
The step by step scribing execution
The process of scribing involves holding the baseboard plumb, setting the compass to the widest gap, and tracing the tile profile onto the wood. You must maintain a perfectly horizontal compass angle throughout the entire run to prevent distortion of the line. Any deviation in the hand angle will translate to an inaccurate cut on the wood.
First, position your baseboard piece directly against the wavy tile wall. Push it as tight as it will go against the high spots of the tile. Use a level to ensure the baseboard is sitting perfectly plumb. If the board tilts forward or backward, your scribe line will be inaccurate. Clamp or nail the board temporarily into place so it cannot shift during the scribing process. This step is critical; even a millimeter of movement will ruin the alignment.
Next, find the widest gap between the tile wall and the back of the baseboard. Set your locking compass to this exact dimension. Place the metal point of the compass against the tile wall and the pencil lead point on the blue tape on your baseboard. Slowly draw the compass down the length of the wall. Keep the metal point pressed firmly against the tile contours, ensuring the two points of the compass remain perfectly horizontal and perpendicular to the wall. This transfers the exact wave of the tile onto the baseboard face.
Sanding to the line with surgical control
Cutting the scribe line requires relief cuts and careful back-beveling to ensure only the very front edge of the wood contacts the tile. By cutting at a slight angle, you create a hollow space behind the front face of the trim, which allows the front edge to compress tightly against the tile without hitting obstructions behind it.
Once your line is drawn, remove the baseboard from the wall. If you have significant waste material, use a jigsaw to cut within a sixteenth of an inch of your pencil line. Always tilt the shoe of the jigsaw to create a 5-degree back-bevel. This means you are cutting away more wood from the back of the board than the front. This back-bevel is the secret weapon of professional trim carpenters.
With the bulk of the waste removed, switch to your belt sander. Secure the baseboard to your workbench face down. Using an 80-grit sanding belt, slowly sand right up to the pencil line. Hold the sander at an angle to maintain that crucial back-bevel. Do not cross the pencil line. The pencil line represents the exact point of contact with the tile. For the tightest curves, put down the sander and use a half-round hand rasp to carefully sculpt the wood until the tape edge is reached. Clean, precise joints are especially important if you are using eco-friendly tile products that feature unique, hand-crafted textures.
The final fit and sealing protocols
The final step involves test-fitting the piece, adjusting minor high spots, and sealing the joint to prevent moisture penetration. Even a perfectly scribed board may require minor adjustments with a sanding block during the dry fit. Once the fit is airtight, you must seal the raw wood edges to prevent future warping.
Push the scribed baseboard into place against the tile wall. If there are any remaining gaps, look for the high spots that are preventing the board from seating fully. Mark these spots with a pencil, pull the board back, and use your hand rasp to shave away the excess wood. Repeat this process until the baseboard fits tight against every wave of the tile. If your tile installation has older grout lines, you might want to look into grout refresh techniques or even full grout restoration methods before permanently installing the new trim.
Before final fastening, seal the raw, freshly cut wood back-bevel with a high-quality primer or clear sealer. This prevents moisture from the tile wall or floor from soaking into the back of the wood, which would cause it to swell and ruin your perfect joint. Once dry, install the trim. Apply a microscopic bead of premium silicone sealant along the joint where the wood meets the tile. This bead should be virtually invisible, serving only to keep water from getting behind the baseboard. For any custom project inquiries or expert assistance, feel free to visit our contact page to connect with a specialist.