
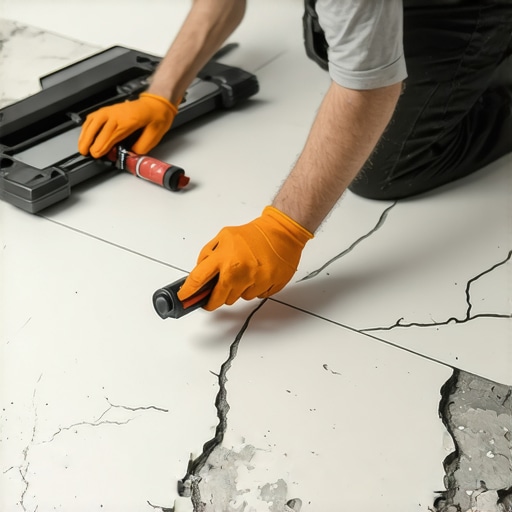
Replacing a fractured ceramic or porcelain tile does not require renting heavy, water-spraying machinery or turning your home into a wet construction zone. By utilizing manual scoring tools, carbide-tipped grout removal blades, and targeted chisel strikes, you can isolate and remove a single damaged tile safely without disturbing the surrounding floor system.
The day the substrate spoke
I once walked into a custom master bath where a gorgeous $80 square foot handmade tile was fractured directly down the middle, looking like a hairline canyon in an otherwise flawless installation. The homeowner assumed the tile itself was defective, but tiles do not simply crack on a whim. I knelt down, pulled out my analytical tools, and realized the installer had completely skipped the perimeter expansion joints and laid the tile directly over an active concrete control joint without an isolation membrane. The concrete shifted, the adhesive held too well, and the tile split. This is why we focus on the physics of the subfloor before we ever touch a decorative piece. If you do not resolve the movement underneath, any repair you execute will crack again within six months. When dealing with high-moisture zones like showers or floors abutting heavy wood framing, understanding structural tension is your only shield against recurring failure.
The myth of the wet saw necessity
To fix a cracked tile without a wet saw, you must use a handheld glass cutter or a manual carbide-tipped scoring wheel to deeply score the glaze, followed by isolated kinetic force from a hammer and chisel to break the tile from the center outward. This mechanical separation technique bypasses the need for water-cooled diamond blades by relying on the natural cleavage planes of ceramic materials. Manual scoring is cleaner, faster, and preserves the integrity of nearby grout lines without risking water damage to exposed subfloors.
Many homeowners believe that a power tool is mandatory for tile work. This is incorrect. Porcelain is extremely dense, but it behaves exactly like glass when subjected to targeted stress. By cutting a deep score line directly across the face of the damaged piece, you create a point of high tension. When you strike the center of the tile with a cold chisel, the shockwaves travel outward and stop at the score line, snapping the material cleanly along your designated path. This method is incredibly useful when working around delicate areas such as freshly painted baseboards or custom plumbing trim where water slurry from a wet saw would cause expensive property damage.
“A tile installation is an engineered system of layers; any attempt to repair a top-level failure without respecting the structural deflection limits of the subfloor will result in a repeat fracture.” – Master Flooring Axiom
Before you begin, you must assess the environment. Is the cracked tile on a heated floor system? If so, mechanical scraping with deep chisels carries a high risk of severing the heating wires embedded in the thin-set. Are you working in a shower pan? If so, your waterproof membrane lies directly underneath that mortar bed, and one slip of a chisel will puncture your liner, leading to hidden rot. These variables dictate your speed and force.
The tool kit for dust-free surgery
Executing a perfect manual tile replacement requires a heavy-duty carbide grout saw, a glass scoring wheel, a narrow cold chisel, protective eyewear, high-strength modified thin-set, and matching replacement grout. Gathering these specialized manual hand tools ensures that you can surgically extract the broken ceramic piece without sending crystalline silica dust billowing throughout your living space. Having the exact replacement materials on hand prevents long delays while adhesive cures.
You cannot use generic, multi-purpose tools for this process. A standard wood chisel will be utterly ruined within three seconds of contacting cured thin-set mortar. You need a hardened steel cold chisel with a narrow tip, preferably half an inch or less, to maintain complete control over the impact zones. For grout removal, manual hand scrapers equipped with diamond grit blades are vastly superior to rotary tools for beginners, as they minimize the risk of chipping the pristine edges of the adjacent, non-damaged tiles.
| Tool Type | Primary Function in Repair | Why It Outperforms Power Alternatives |
|---|---|---|
| Carbide Grout Saw | Isolates the damaged tile by scraping away surrounding grout | Zero dust generation and complete physical control |
| Glass Scoring Wheel | Creates a precision weak point across the tile face | Produces a perfectly clean fracture line without water |
| Narrow Cold Chisel | Fractures the tile and pops the cured mortar from the subfloor | Delivers targeted kinetic shock directly to the adhesive line |
| Modified Thin-Set | Bonds the new tile securely to the existing subfloor substrate | Polymer additives allow for superior flexural strength |
Keep your vacuum hose running directly next to your hand scraper throughout the process. Even manual scraping creates tiny, razor-sharp shards of glaze that can easily embed themselves in your skin or ruin nearby finished wood floors if stepped on. Take your time during this preparation stage to ensure your workspace remains immaculate.
The anatomical structure of grout extraction
To isolate the damaged tile, you must completely remove the surrounding grout joint down to the substrate level using a manual hand scraper. This step is mandatory because grout acts as a continuous structural bridge across your floor. Striking a damaged tile while it is still locked to its neighbors by cementitious grout will transfer the shockwaves directly to those healthy tiles, causing them to crack or lose bond.
Start by positioning your carbide-tipped hand scraper directly in the center of the grout joint. Apply firm, downward pressure and pull the tool toward you. Repeat this motion until you have carved out a deep trench. If you are working on a wall, start from the top and work downward to let gravity assist with the debris. If your grout is extremely hard, you can use a hammer to gently tap the back of the scraper handle, but do not let the metal tool slip and strike the good tiles. For more tips on maintaining these joints long-term, consult our guide on grout restoration secrets for long-lasting results.
Once the grout is removed, you should see a clear gap around the entire perimeter of the damaged tile. This gap serves as your safety buffer. It ensures that when you start hammering, the physical vibrations will dissipate into the empty space rather than traveling into the rest of the floor. This is also an excellent opportunity to evaluate the depth of your grout joints and prepare for the re-grouting process later.
The center strike and pry method
To remove the broken tile pieces safely, drill a series of small holes in the center of the tile to break its structural integrity, then chisel outward. By drilling small relief holes using a carbide-tipped masonry drill bit running at low speed, you shatter the internal tension of the tile, making it incredibly easy to pop the pieces out from the center without putting pressure on the outer edges.
Never start chiseling at the edge of the tile near the good pieces. This is the most common mistake amateur installers make. The wedging action of the chisel will push against the adjacent tile, chipping its delicate glazed edge. Instead, place your cold chisel directly in one of the drilled holes in the center of the broken tile. Hold the chisel at a forty-five-degree angle and strike it firmly with a hammer. The tile will break into smaller, manageable chunks.
Slide the chisel flat along the substrate underneath the broken pieces. Tap the hammer against the back of the chisel to slice through the old adhesive bond. Keep your hand low to the floor to prevent the chisel from digging into the subfloor itself. If you are working over a plywood subfloor, digging too deep will tear the wood fibers, weakening the structure. If you are working over concrete, too much vertical force will dull your chisel instantly.
The clean slate substrate prep
To prepare the floor for the new tile, you must scrape away the old cured thin-set mortar until the subfloor is completely flat and smooth. New tile cannot be laid on top of old, bumpy mortar, because any high spot will create a pressure point that causes the new tile to crack the moment someone steps on it. The replacement area must look like a clean, recessed pocket.
Use a heavy-duty floor scraper or your cold chisel to level the old mortar bed. You do not need to remove every single atom of the old adhesive, but you must remove enough so that when you place the new tile into the pocket dry, it sits slightly below or perfectly flush with the surrounding tiles. This dry-fit test is non-negotiable. If the dry tile sits proud of the floor, you need to grind away more mortar.
Vacuum the pocket thoroughly. Any remaining dust, loose sand, or microscopic debris will act as a bond-breaker, preventing your new thin-set from adhering to the subfloor. Wipe the pocket down with a damp sponge to remove the last traces of powder and let it dry completely. If you want to keep your surrounding tile work in pristine condition during this dusty phase, check out these tile cleaning tips for a sparkling bathroom in 2025 to keep the area spotless.
The delicate dance of new adhesive
To install the new tile, apply a high-quality polymer-modified thin-set mortar to both the subfloor pocket and the back of the new tile. This double-buttering technique ensures one hundred percent mortar coverage, eliminating any hollow air pockets underneath the tile that could collapse under heavy foot traffic or localized weight loads.
Use a notched trowel that matches the scale of your tile. For small tiles, a quarter-inch notch is usually sufficient. Comb the mortar in straight, parallel lines rather than circular swirls. Straight ridges allow the trapped air to escape easily when you press the tile down into place. If you swirl the mortar, you trap pockets of air, which drastically reduces the strength of your adhesive bond.
Carefully lower the new tile into the pocket. Gently wiggle it back and forth perpendicular to the mortar ridges to collapse the ridges and ensure complete coverage. Press down until the face of the tile is perfectly flush with the surrounding tiles. Use a straightedge or a small level laid across the joint to verify that there are no high edges, which are known in the trade as lippage.
The physical chemistry of matching grout
To complete the repair, fill the perimeter joints with matching grout, packing it tightly into the gaps with a rubber grout float. Matching the color and texture of existing grout requires attention to detail, as old grout often darkens over time due to dirt, foot traffic, and household cleaners. Cleaning the surrounding joints beforehand is essential to ensure a seamless color blend.
If the existing grout is years old, a brand-new batch of the same color code will likely look too bright. You can mimic the aged look by mixing a tiny amount of a darker pigment, or you can plan to apply a grout stain across the entire floor afterward to unify the appearance. For older floors where the joints look worn, you can learn how to refresh grout without replacing it to make the entire room look cohesive again.
Hold your rubber float at a forty-five-degree angle to the joint and drag it firmly across the tile. This angle prevents the edge of the float from dropping into the joint and gouging out the wet grout. After letting the grout firm up for about fifteen to twenty minutes, wipe the face of the tile with a barely damp sponge. Do not use too much water, as excess moisture will wash the pigment out of the grout, causing it to dry with splotchy, uneven colors.
The silent threat of thermal expansion
To prevent future tile fractures, you must maintain flexible joints wherever the tile meets dissimilar materials or vertical walls. Hard tile and cementitious grout do not expand at the same rate as wood baseboards or drywall. When rooms change temperature and humidity, these materials push against each other, creating massive lateral pressure that will crack your tiles if there is no room to move.
Never pack cementitious grout into the corner joint where your floor tile meets your wall tile, or where your tile meets your wooden chic baseboard designs. These areas must be sealed with a high-quality, color-matched silicone caulk. Silicone is highly flexible and acts as a shock absorber, compressing when the materials expand and stretching when they contract. This simple detail is what separates a professional, long-lasting installation from a rushed DIY job.
“Movement joints are not optional; they are the pressure release valves of your entire flooring system.” – TCNA Handbook Guidelines
If you are working in wet environments, ensuring that these expansion joints are completely watertight is critical to preventing mold growth behind your walls. For those planning a full bathroom remodel, choosing high-quality materials is a great first step, and you can explore eco-friendly tile solutions for sustainable homes in 2025 to build a durable, green wet space.
The maintenance checklist for flawless floors
To keep your newly repaired tile and the surrounding floor system in perfect structural condition for decades, you must implement a strict maintenance and monitoring routine. Use the following step-by-step checklist to ensure your installation remains completely stable and beautiful.
- Inspect all grout lines twice a year for hairline cracks or signs of localized powdering.
- Re-apply a high-penetration grout sealer annually to prevent water and oil absorption.
- Check the silicone caulk lines at the perimeter baseboards and corners every eighteen months.
- Never clean your ceramic or porcelain tiles with harsh acid-based chemicals that strip the grout.
- Maintain a consistent indoor relative humidity between thirty-five and fifty-five percent to minimize substrate movement.
By following these diagnostic and repair protocols, you can easily repair damaged tiles without ever needing to rent expensive, messy wet saws. For more detailed design inspiration, professional tile installation advice, or to speak directly with our structural flooring specialists, feel free to visit our contact us page.