Why your subfloor is lying to you
Subfloor preparation dictates the success of bathroom waterproofing. You must evaluate the structural integrity of the joists and the subfloor thickness to prevent tile cracking and grout failure. Proper floor leveling ensures that the waterproofing membrane bonds correctly to the substrate before any tile is laid. Water is a patient predator. It does not just sit on the surface, it hunts for a path to your structural lumber. Most guys skip the leveling compound. They think the underlayment will hide the dip. It won’t. I spent three days grinding concrete on a job last month just so the floor wouldn’t click like a castanet. If the floor has more than an eighth of an inch of variance over ten feet, you are building a failure point. Most homeowners think a floor is just a pretty surface. It is not. It is an engineered system that must manage deflection. If your joists are spaced too far apart, the plywood will flex. That flex snaps the bond of the thin-set. Once that bond snaps, the waterproofing is compromised. You might as well just pour water directly onto your floor joists. You need to check the L over 360 deflection rating before you even open a bucket of sealer. This is about physics, not aesthetics. I have seen fifteen thousand dollar jobs ruined because someone was too lazy to use a straightedge. You smell the oak dust and the WD-40 on a real job site, not the scent of a candle. We are talking about preventing rot, mold, and structural collapse. If you want showers that wow, you start with the part you cannot see. The subfloor is the foundation of the entire system.
“A floor is only as good as the subfloor beneath it; deflection is the enemy of every joint.” – Master Flooring Axiom
The chemistry of the liquid barrier
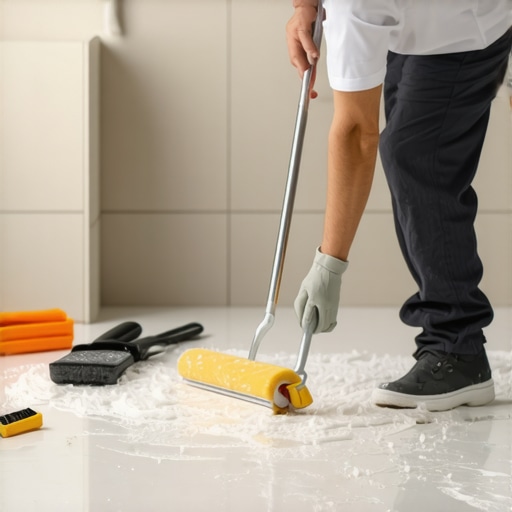
Liquid waterproofing membranes provide a monolithic shield that protects the subfloor from moisture intrusion and capillary action. These polymer-modified coatings are applied with a roller or brush to create a flexible gasket over the entire bathroom floor and shower pan. When you apply a liquid membrane, you are essentially painting a rubber suit onto your house. But it is not just paint. It is a complex chemical compound designed to bridge cracks. If you apply it too thin, it will fail. You need a wet film thickness gauge. If you are not measuring your mils, you are just guessing. Guessing leads to rot. I have walked into bathrooms where the liquid membrane was applied like a thin coat of watercolor paint. The water walked right through it. You need a minimum of thirty mils to be safe. It is about the molecular density of the cured rubber. While most people want the thickest underlayment possible, too much cushion actually causes the locking mechanisms on modern floors to snap under pressure, but in tile, the risk is the bond strength. If the membrane is too thick and soft, the tile will move. Movement is death. You want a hard, stable, waterproof surface. We use high-performance polymers that bond at the microscopic level to the cement board or plywood. This ensures that even if your grout fails, your house stays dry. You can learn more about maintaining that surface with tile cleaning tips to ensure longevity. This is the difference between a floor that lasts five years and one that lasts fifty.
The 1/8 inch that ruins everything
Expansion gaps and perimeter joints are the most failing components of a waterproof bathroom floor. You must leave a movement joint at the perimeter where the floor meets the wall to allow for thermal expansion and structural shifting without breaking the waterproof seal. Everyone forgets the corners. They jam the tile tight against the wall and think the chic baseboard designs will hide the sin. It won’t. When the house shifts, and all houses shift, that tile will push against the wall and tent in the middle of the room. I have seen floors pop up like a V-shape because there was no room to breathe. You need a soft joint at the perimeter. That means 100 percent silicone caulk, not grout. Grout is rigid. Silicone is flexible. If you use grout in the corners, it will crack within six months. Water will find that crack. It will seep behind the tile and find the subfloor. Use a foam backer rod in the gap if it is deep. This prevents three-sided adhesion, which is another way silicone fails. You want the silicone to stretch like a rubber band between the floor and the wall. This is technical installation, not a DIY craft project. If you are doing showers with a style, do not let the beauty distract you from the mechanics of the corners. The perimeter is the ghost in the machine. It is where the water always wins if you are not smart.
| Feature | Liquid Membrane | Sheet Membrane |
|---|---|---|
| Application Speed | Moderate | Fast |
| Cure Time | 12 to 24 Hours | Immediate |
| Crack Isolation | High | Very High |
| Vapor Permeance | Low | Extremely Low |
The ghost in the expansion gap
Vapor transmission can destroy a tile floor from the bottom up if you do not use a vapor barrier with a low perm rating. Moisture travels through concrete slabs via hydrostatic pressure, meaning your waterproofing system must manage moisture from both the top and the bottom. People think concrete is solid. It is not. It is a sponge. If you are on a ground floor or a basement, that concrete is constantly exhaling moisture. If you trap that moisture under a waterproof membrane without the right bond, it will create bubbles. Those bubbles turn into delamination. I have seen entire floors peel up like an orange because the installer did not check the calcium chloride levels in the slab. You need to know the moisture vapor emission rate. It is about the physics of evaporation. If you are looking at eco-friendly tile solutions, make sure the adhesives are compatible with your vapor barrier. Many green glues fail in high-moisture environments. You need a moisture-insensitive thin-set. I do not care how much the tile cost if the mortar turns into mush. You must understand the capillary effect. Water can travel up through the pores of the grout and sit under the tile. This is why we use non-porous membranes. We want to stop the water at the first possible layer.
- Check subfloor for deflection and L/360 compliance.
- Sand or grind high spots and fill low spots with self-leveling underlayment.
- Clean all dust and debris to ensure a chemical bond.
- Apply waterproofing tape to all changes of plane.
- Apply two coats of liquid membrane or one layer of sheet membrane.
- Conduct a twenty four hour flood test before tiling.
- Use silicone caulk at all floor to wall transitions.
The chemistry of the bond
Polymer-modified thin-set creates a mechanical and chemical bond between the waterproofing membrane and the tile. You must select a mortar that meets ANSI A118.15 standards to ensure the heavy tiles do not sag or de-bond over time in a wet environment. Thin-set is not just mud. It is an engineered adhesive. It contains sand, cement, and powdered polymers. When you add water, the polymers rehydrate. They form microscopic bridges between the surface of the membrane and the back of the tile. If you use cheap, unmodified thin-set over a waterproof membrane, the tile will pop off. The water in the mortar has nowhere to go because the membrane is waterproof. It stays wet too long and never develops a strong bond. You need a mortar that cures through a chemical reaction, not just evaporation. This is why I tell people to stop buying the bargain bags at the big box stores. You are risking a five thousand dollar tile job to save ten dollars on a bag of mud. It is insanity. Once the tile is set, the grout becomes the first line of defense. But grout is porous. It will let water through. That is why the membrane is the real hero. If you need to fix old work, look into how to refresh grout to keep it looking good, but never rely on grout to keep your house dry. Only the membrane does that.
“Waterproofing is not a single product, but a series of interconnected systems designed to manage moisture flow.” – TCNA Installation Handbook
Comments
One response to “How to Waterproof a Bathroom Floor Before Tiling It”
I completely agree with the importance of proper subfloor preparation before waterproofing. In my experience, many DIYers overlook the significance of checking for deflection and levelness, which almost always leads to issues down the line. I once encountered a project where skipping the grinding process caused a lot of tile cracking within a year because of the uneven surface, despite using high-quality membrane and mortar. It really highlights how foundational these steps are to long-lasting results. I’m curious, has anyone experimented with different types of self-leveling compounds to see which bond best with waterproof membranes? I’ve noticed some brands seem to perform better when followed up with a liquid membrane, especially on tricky surfaces. It’s such a critical step that sometimes gets rushed, but the consequences are costly. Would love to hear others’ tips on ensuring a perfectly flat and stable subfloor before waterproofing—these details make all the difference.