
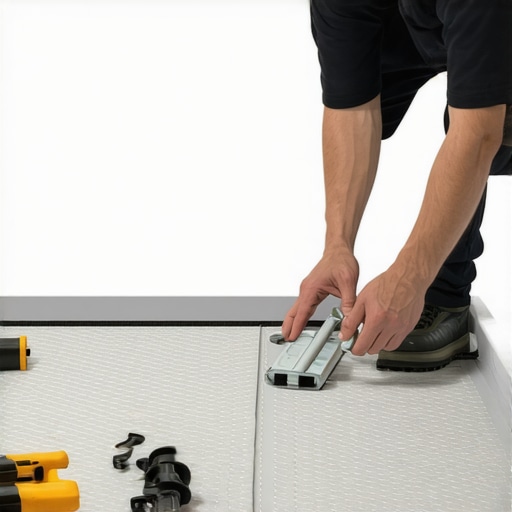
Mastering the Shower Pan Liner Installation for a Lifetime of Dry Subfloors
Most guys skip the leveling compound. They think the underlayment will hide the dip. It won’t. I spent three days grinding concrete on a job last month just so the floor wouldn’t click like a castanet. When it comes to building showers, that same level of laziness results in a stagnant puddle under your tile that eventually rots the floor joists. I have spent twenty five years fixing the mistakes of installers who thought they could outsmart gravity. A shower pan is not just a piece of plastic. It is a technical water management system that requires precision, chemistry, and a deep respect for the physics of fluid dynamics. If you get this wrong, you are not just looking at a small leak. You are looking at a complete teardown of the bathroom. I have seen fifteen thousand dollar marble installations ripped out because someone forgot to clear the weep holes in the drain assembly.
The hidden foundation of a successful shower pan
Shower pan liner installation depends entirely on the structural integrity of the subfloor and the accuracy of the pre-slope. You must ensure the subfloor is rigid and free of deflection before applying a mortar bed that slopes a quarter inch per foot toward the drain. This first layer of mortar is the most ignored step in the entire process. Without it, water that permeates the grout will sit on a flat liner forever. This leads to the smell of sulfur and the eventual failure of the adhesive bond. I have walked into homes where the tile was literally floating on a layer of slime because the water had nowhere to go. You need to use a high density mortar mix, often called deck mud, to create this initial incline. It should be dry enough to clump in your hand but not wet enough to flow. This is where the engineering begins.
“A floor is only as good as the subfloor beneath it; deflection is the enemy of every joint.” – Master Flooring Axiom
The chemistry of PVC and CPE membranes
Choosing the right shower pan liner involves understanding the chemical resistance and flexibility of PVC versus CPE materials. PVC liners are the industry standard for durability and cost effectiveness while CPE membranes offer superior flexibility in colder climates and higher resistance to certain chemicals. Most big box retailers sell 40 mil PVC. It is thick, heavy, and unforgiving. If you are working in a region with significant temperature swings, PVC can become brittle. I prefer CPE for custom shapes because it drapes over the curb without fighting you. You must also consider the adhesive. You cannot use just any glue. You need the specific solvent cement designed for that polymer. I have seen guys try to use PVC pipe glue on a shower liner. It does not work. It creates a brittle bond that snaps the first time the house settles. You need a fusion bond that creates a single continuous piece of material.
The geometry of the dog ear corner fold
Correct corner folds in a shower liner require a technique known as the dog ear fold to ensure no cuts are made in the waterproof membrane. Cutting into the corners is the primary cause of catastrophic shower leaks and must be avoided by folding the excess material behind the main flap. I never use pre-made corner pieces if I can help it. They are just extra points of failure. I want one solid sheet. When you get to the corner, you pull the liner tight and fold the flap back against the stud. It should look like a neatly wrapped gift. You then nail or staple the liner at the very top, at least six inches above the finished floor height. Never put a fastener through the bottom six inches of the pan. That is your bathtub. If you poke a hole there, you might as well not have installed a liner at all. It is basic physics. Water will find that hole.
| Material Property | PVC (Polyvinyl Chloride) | CPE (Chlorinated Polyethylene) | Liquid Applied Membrane |
|---|---|---|---|
| Thickness | 40 mil standard | 40 mil standard | Variable (30 to 50 mil) |
| Flexibility | Moderate | High | Very High |
| Installation Speed | Moderate | Moderate | Fast |
| Flood Test Ready | Immediately | Immediately | After 24 hours |
The mechanics of the clamping ring drain
The clamping ring drain serves as the mechanical interface between the waterproof liner and the plumbing system by sandwiching the membrane between two heavy duty plastic or metal flanges. Proper installation requires clearing the weep holes to allow subsurface water to escape into the drain pipe. I cannot tell you how many times I have seen these weep holes clogged with mortar. If the water cannot get out, it stays in the mud bed. This is why your grout looks wet for days after you shower. When you set the liner over the bottom flange, you use a utility knife to cut the hole for the drain, but only after you have felt the bolts through the material. You apply a bead of 100 percent silicone between the liner and the bottom flange. Not plumbers putty. Silicone. Then you bolt the top ring down until it is tight. This creates a gasket seal that water cannot penetrate.
The expansion gap and the curb transition
Managing the transition from the shower floor to the curb requires the liner to wrap completely over the top of the dam without any penetrations on the interior or top surfaces. The curb is the most common point of failure because installers often nail their backer board through the liner on the inside of the shower. This is a death sentence for your subfloor. Use a curb sleeve or just let the weight of the mortar hold the liner in place. When you move to the outside of the shower, you need to consider how your baseboards will meet the tile. I always suggest looking at baseboards makeover ideas to see how to handle these transitions. If you are doing a zero threshold shower, the engineering becomes even more complex. You need a recessed subfloor to account for the thickness of the mud bed and the tile. It is a game of millimeters. One wrong calculation and you have a trip hazard or a flood in the hallway.
The 24 hour flood test protocol
A mandatory flood test involves plugging the drain and filling the shower pan with water to a height of two inches below the top of the curb for at least 24 hours. This test is the only way to verify the integrity of the liner and the drain assembly before the final mortar bed and tile are installed. Do not skip this. I do not care if you are behind schedule. I do not care if the homeowner is hovering over your shoulder. If you skip the flood test, you are gambling with your reputation. Mark the water level with a piece of tape. If it drops, you have a leak. It could be a pinhole in a fold or a loose bolt on the clamping ring. Find it now. It is much easier to fix a liner today than it is to perform grout restoration on a failing floor in six months. A successful flood test is your insurance policy.
“Water is the most patient architect; it will find every weakness in your armor eventually.” – Master Flooring Axiom
Final structural considerations for tile and grout
The final mortar bed must be reinforced with galvanized wire mesh to prevent cracking and to provide a stable base for the tile installation. This layer must maintain the slope established by the pre-slope to ensure all surface water moves toward the drain. Once the mud bed is dry, you can begin the aesthetic phase. This is where you can look at showers with a style for inspiration. But remember, the tile and grout are not the primary waterproofing. They are the wear layer. They protect the pan from physical damage. Use a high quality modified thin-set and ensure 95 percent coverage on the back of the tile. In a wet environment, air pockets behind the tile become breeding grounds for bacteria. Keep your joints consistent and your grout packed tight. This is not just about looks. It is about building something that will outlast the mortgage.
- Verify the subfloor is level and structurally sound with no deflection.
- Install a pre-slope of deck mud at a quarter inch per foot incline.
- Apply a 40 mil PVC or CPE liner with proper solvent cement at all seams.
- Execute the dog ear fold at all corners to avoid cutting the membrane.
- Seal the clamping ring drain with 100 percent silicone.
- Perform a 24 hour flood test and document the water levels.
- Protect the liner with a final reinforced mortar bed before tiling.
Building a shower that lasts is about respecting the materials. It is about knowing that the moisture in the air of a place like Houston will behave differently than the dry air in Reno. In high humidity environments, you might even consider a secondary liquid membrane over the mud bed for added security. Whatever you do, do not cut corners. The 1/8 inch you ignore today is the leak that ruins the ceiling below tomorrow. Be precise. Be stubborn about the standards. That is how you install a shower pan correctly every time.