Why Your Caulk is Turning Black Despite Constant Cleaning
I spent three days grinding concrete on a job last month just so the floor wouldn’t click like a castanet. People think flooring is just what you see on top. It is the same with showers. I once walked into a luxury bathroom where the homeowner was scrubbing her grout with a toothbrush every day. The caulk was pitch black. She thought she was dirty. I told her the truth. The water was trapped behind the tile because the installer skipped the waterproofing membrane on the bench. Most guys skip the leveling compound and they definitely skip the proper substrate prep. They think the underlayment or the caulk will hide the dip. It won’t. When you see black spots creeping through your sealant, you are not looking at a cleaning failure. You are looking at a structural moisture trap. I have spent 25 years with a moisture meter in my hand and I can tell you that the blackening of caulk is a biological response to a technical error. It is about the physics of the 1/8 inch gap and the chemistry of the bond.
The biological reality of wet enclosures
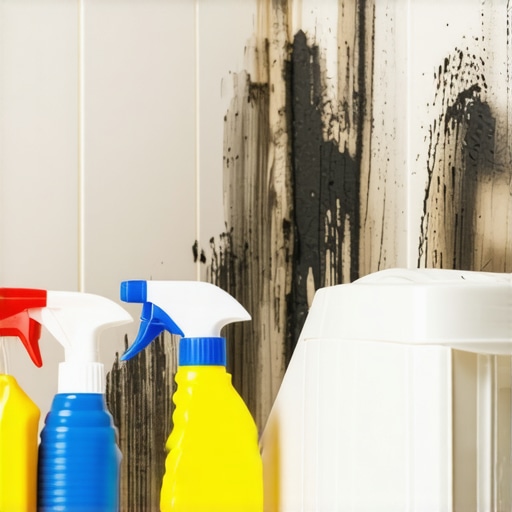
Black caulk is typically the result of fungal colonization, specifically mold species like Aspergillus niger that thrive in high-humidity environments. When moisture becomes trapped behind the sealant or within its porous structure, cleaning the surface becomes ineffective because the root system of the mold remains protected and hydrated. This fungus is not just sitting on the surface. It is eating the organic matter trapped in the soap scum and the additives within low-grade caulking. If your shower was built using builder-grade materials, the sealant likely lacks high-performance biocides. Mold spores are microscopic. They find the smallest micro-fracture in the bond between the tile and the tub. Once they are inside, they grow from the back forward. You can scrub with bleach until your hands are raw, but you are only whitening the surface of the mold. The mycelium stays alive in the dark, damp space behind the bead. This is why the black color returns within days of a deep clean.
Why surface cleaning fails to reach the root
Surface cleaning fails because most household chemicals cannot penetrate the dense polymer structure of silicone or the deep pores of cementitious grout. Bleach is particularly deceptive as it dissipates the pigment of the mold but does not kill the spores hidden deep within the substrate or the adhesive bond. I tell my clients all the time that bleach is the enemy of a long-lasting floor. It is a harsh base that can actually degrade the chemical bonds of the sealant over time. When those bonds break, you get microscopic cracks. These cracks are like highways for water. This is why tile cleaning tips for a sparkling bathroom in 2025 emphasize pH-neutral cleaners and mechanical agitation rather than harsh oxidizers. If you are constantly cleaning and the black persists, the mold is likely feeding on the very moisture that is supposed to be drained away. Capillary action pulls water into the spaces where the caulk has pulled away from the tile. Even a gap of a few microns is enough to sustain a colony of mold for months. To fix this, you have to look at grout restoration secrets for long lasting results which involve removing the old material entirely rather than just scrubbing the top.
“A floor is only as good as the subfloor beneath it; deflection is the enemy of every joint.” – Master Flooring Axiom
The hidden chemistry of sealant failure
The chemical failure of caulk happens when the material loses its elasticity or when its antimicrobial additives are washed away by aggressive cleaning agents. As the sealant shrinks or hardens, it creates a void where condensation collects, providing the perfect anaerobic environment for black mold to proliferate without interference. You have to understand the difference between acetoxy and neutral cure silicones. Most cheap caulks are acetoxy. They smell like vinegar. They are fine for some things, but they can be brittle. A high-end shower requires a neutral cure silicone that stays flexible. When the house settles, or when the tub fills with water and gets heavy, the joint moves. If the caulk is too stiff, it shears off the tile. Now you have a pocket. That pocket collects skin cells, soap residue, and water. It is a buffet for fungi. This is especially true in showers that wow modern designs for 2025 where large format tiles are used. Large tiles mean fewer grout lines, but they also mean more stress on the remaining joints. If those joints fail, the black mold is inevitable.
Structural failure behind the shower wall
Blackening often indicates that water is saturating the cement board or drywall behind the tile, turning the wall cavity into a moisture reservoir. This structural failure means the caulk is the last line of defense, but it is being attacked from the inside out by water that cannot escape. In my 25 years, I have seen it a thousand times. The installer didn’t use a waterproof membrane like Kerdi or Wedi. They just slapped tile onto Greenboard or Wonderboard. These materials are water-resistant, not waterproof. They soak up moisture like a sponge. Once that board is wet, it stays wet. The caulk is then sitting against a wet surface 24/7. It never gets a chance to dry out. This is why showers with a style trendy ideas for small bathrooms must prioritize the internal drainage and waterproofing over the finish. If the bones of the shower are wet, the caulk will be black. It is that simple. You can see this clearly in transitions. Look at where the tile meets the floor. If that joint is black, the water is likely sitting in the thin-set bed under the floor tile.
The moisture trap in baseboard transitions
Baseboards act as a perimeter dam that can trap humidity and floor-washing runoff if the gap between the floor and the wall is not properly sealed or vented. When caulk is applied over these transitions without considering expansion and contraction, the resulting cracks become a breeding ground for dark fungal growth. This is a major issue with LVP and hardwood floors. These floors move. If you pin them down with caulk and baseboards, they will buckle or the caulk will snap. If you are looking at baseboards makeover ideas to elevate your space, you need to ensure the installer left a proper expansion gap. If they filled that gap with cheap latex caulk, it will turn black the first time you mop with too much water. The water seeps into the gap, gets trapped by the wood, and rots the caulk from the bottom. For a more modern look, chic baseboard designs that transform rooms in 2025 often use shadow lines or metal transitions to avoid the need for messy, mold-prone caulking altogether.
| Sealant Type | Moisture Resistance | Chemical Base | Best Use Case |
|---|---|---|---|
| Acetic Cure Silicone | High | Acetoxy | Glass and non-porous tile |
| Neutral Cure Silicone | Very High | Alcohol/Oxime | Natural stone and metal |
| Polyurethane | Moderate | Isocyanate | Expansion joints and baseboards |
| Latex Caulk | Low | Water-based | Dry areas and trim |
A contrarian view on underlayment and cushion
While most people want the thickest underlayment to hide subfloor imperfections, too much cushion actually causes the locking mechanisms on LVP to snap under pressure, leading to joint gaps that allow moisture to infiltrate and turn sealant black. This is a hard truth many homeowners don’t want to hear. They think more padding equals more luxury. In reality, a soft floor is a failing floor. When the floor deflects, the caulk at the baseboard is stretched beyond its limit. It tears. Once it tears, you have an entry point for mold. The same logic applies to showers. If the shower pan flexes because it wasn’t set in a mortar bed, the caulk at the floor-to-wall transition will never stay sealed. You need rigidity for sealants to work. If you are struggling with recurring mold, stop buying more cleaning products. Start checking for movement. If the tile moves when you step on it, no amount of bleach will save your caulk. You might need to look at how to refresh grout without replacing it as a temporary fix, but the structural movement must be addressed for a permanent solution.
The checklist for a mold free installation
To ensure your caulk stays white and functional, you must follow a strict installation protocol. This is the only way to beat the biology of the bathroom.
- Verify that the subfloor or wall substrate is completely dry using a pinless moisture meter before application.
- Ensure a minimum 1/8 inch gap exists between all changes of plane to allow for a proper sealant bead.
- Clean the joint surfaces with 90 percent isopropyl alcohol to remove all oils and dust before caulking.
- Use a high-solids neutral cure silicone with integrated biocides rather than cheap painter’s caulk.
- Avoid using bleach for regular maintenance as it degrades the sealant’s surface and antimicrobial properties.
- Check the integrity of the grout nearby to ensure water isn’t bypassing the caulk through porous grout lines.
“The National Wood Flooring Association (NWFA) states that moisture is the single most common cause of flooring failure, and this applies equally to the sealants that protect those floors.” – Structural Standards Manual
The solution for long term sealant health
If you want to stop the cycle of black caulk, you have to commit to a full replacement. You cannot caulk over old caulk. That is like putting a clean bandage over a dirty wound. You need to scrape out every bit of the old material. Use a plastic scraper to avoid scratching the tile or tub. Once it is out, you need to treat the void with a mold killer that actually penetrates, like an enzyme-based cleaner. Let it dry for 24 hours. Use a fan. If you have the budget, consider eco-friendly tile solutions for sustainable homes in 2025 that use non-porous materials which are naturally resistant to fungal growth. When you apply the new bead, don’t use your finger to smooth it. Your finger has oils and bacteria. Use a professional caulking tool. This creates a smooth, dense surface that water cannot cling to. If you are still seeing issues, it might be time to contact us for a professional evaluation of your shower’s waterproofing. Sometimes the problem is deeper than the surface. It is the hidden water that does the damage. Respect the 1/8 inch gap. Respect the chemistry. That is how you keep your bathroom clean.”
Comments
One response to “Why Your Caulk is Turning Black Despite Constant Cleaning”
This article hits the mark on a common problem many homeowners overlook. I’ve had situations where the black mold on caulk seemed like a stubborn surface issue, but after stripping everything out and inspecting behind the tiles, I found moisture trapped in the lack of proper waterproofing. It’s fascinating how much structural preparation plays into the longevity of the sealant. I especially agree on the importance of using high-quality, flexible silicone with biocides rather than just scrubbing repeatedly. It made me wonder, for those facing persistent mold problems, have you considered eco-friendly, non-porous materials or even redesigns? Sometimes the best solution is addressing the root rather than just the symptoms. Also, I’ve noticed that with proper installation and regular monitoring of movement, the issue can be significantly minimized. Has anyone else had success upgrading to membranes like Kerdi or Wedi to prevent this from recurring? Would love to hear about your experiences or advice!