
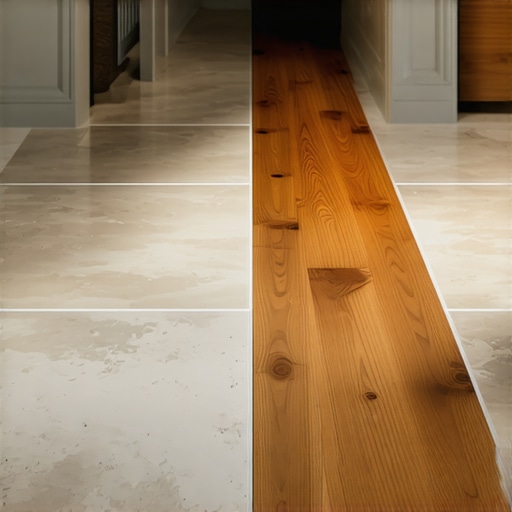
Why your subfloor is lying to you
The most effective way to transition tile to wood involves precision subfloor leveling to ensure both materials sit flush. This requires calculating the total height of the tile, thin-set, and underlayment against the wood plank and its adhesive. Most successful installations use a metal L-profile or a silicone-filled expansion joint.
Most guys skip the leveling compound. They think the underlayment will hide the dip. It won’t. I spent three days grinding concrete on a job last month just so the floor wouldn’t click like a castanet. My hands were vibrating for hours after I put the grinder down. The homeowner thought I was crazy until they saw the finished product. If that slab is out by even an eighth of an inch over ten feet, your wood-to-tile transition will look like a speed bump. I smell like WD-40 and oak dust most days because I do not take shortcuts. If you want a floor that lasts, you look at the slab first. You do not just throw down some grout and hope the door doesn’t rub. You have to respect the physics of the house. Concrete is a sponge. Wood is a lung. If you do not understand how they breathe together, you are just a guy with a hammer, not an installer.
The structural reality of height differences
Achieving a level transition requires a deep understanding of the stack height for each material. Wood flooring varies from 3/8 inch to 3/4 inch, while tile typically sits between 1/4 inch and 1/2 inch. Adding the thickness of the mortar bed and the subfloor prep is the only way to reach a zero-threshold finish.
When you are looking at the molecular level of these materials, you realize that height is not just a number on a tape measure. It is a calculation of compression and shear strength. For tile, you are looking at the ANSI A118.15 standards for improved modified thin-set. This material provides the chemical bond necessary to hold the ceramic or porcelain in place without shifting. If your wood is a solid 3/4 inch white oak, you are dealing with a massive amount of potential movement. The Janka scale tells us how hard the wood is, but it doesn’t tell us how much it will expand when the humidity hits 80 percent in the summer. You need to account for the plywood or cement board under the tile. If you are working near showers, the moisture management becomes even more intense. I always tell people that the tile is the shield, but the underlayment is the armor.
“A floor is only as good as the subfloor beneath it; deflection is the enemy of every joint.” – Master Flooring Axiom
The 1/8 inch that ruins everything
A failed transition often stems from a lack of a proper expansion gap between the wood and the tile. A gap of at least 1/8 inch to 1/4 inch must be maintained to allow the wood to expand and contract. This gap should be filled with a color-matched 100 percent silicone caulk rather than hard grout.
I have seen $20,000 floors destroyed because the installer thought they could butt the wood tight against the tile. Wood is hygroscopic. It drinks water from the air. When those cellulose fibers swell, the wood needs somewhere to go. If it hits a wall of hard tile and grout, it will buckle or pop the tile right off the thin-set. Using a flexible sealant is the secret. Silicone has a high movement capability, meaning it can compress when the wood expands and stretch when the wood shrinks. This keeps the joint looking clean while protecting the structural integrity of the installation. If you are worried about the look, you can find silicone that is textured to match your grout perfectly. It looks like a hard joint, but it performs like a shock absorber.
| Material Type | Standard Thickness | Adhesive Requirement | Expansion Needs |
|---|---|---|---|
| Solid Hardwood | 3/4 inch | Nail or Urethane Glue | High |
| Engineered Wood | 3/8 to 5/8 inch | Glue or Float | Moderate |
| Porcelain Tile | 3/8 inch | Modified Thin-set | Low |
| Natural Stone | 1/2 to 3/4 inch | Medium Bed Mortar | Low |
Transitioning near showers and wet zones
Wet area transitions require a waterproof membrane that extends at least 6 inches past the tile edge under the wood. This prevents secondary moisture from the bathroom from wicking into the end grain of the wood planks. Utilizing a Schluter-type metal profile provides a mechanical edge that protects the tile from chipping.
Bathrooms are a different animal. You have steam, splashing, and humidity fluctuations that would make a desert look stable. When I install showers that wow modern designs for 2025, I am thinking about the water that you do not see. The water that sits under the rug. If that moisture hits the cut end of a wood plank, it will swell like a sponge. That is why the transition must be sealed tight. I often use a liquid-applied membrane over the cement board before I even think about the tile. If the customer is looking for showers with a style trendy ideas for small bathrooms, I suggest a minimalist metal transition that disappears into the design. It is about protection first, then aesthetics. You can always use tile cleaning tips for a sparkling bathroom in 2025 to keep the surface looking good, but if the subfloor is rotten, no amount of scrubbing will save you.
The chemistry of a permanent bond
Modern adhesives have replaced the need for unsightly T-mouldings in residential transitions. High-performance urethane adhesives offer enough flexibility to allow for wood movement while maintaining a permanent grip on the subfloor. This allows the wood to sit perfectly adjacent to the tile edge with only a thin bead of sealant between them.
I prefer a glue-down method for these transitions. When you nail a floor, you have a tiny bit of play in the fastener. When you use a high-solids urethane glue, that wood is married to the slab. This is especially important when you are trying to match the height of a tile floor exactly. If the wood is floating, it will bounce. That bounce creates friction against the tile edge, which eventually leads to the finish wearing off or the tile cracking. If you have old grout that looks terrible at the junction, you can look into how to refresh grout without replacing it to clean up the appearance. But for the transition itself, I want a bond that is stronger than the wood itself. I want that floor to feel like a solid piece of rock under your feet.
“Tile is a rigid system; any movement in the substrate will manifest as a crack in the grout or the tile body.” – TCNA Handbook Standards
Baseboards and the finishing touch
Finishing the transition requires attention to the perimeter where the wood and tile meet the walls. The baseboard must cover the expansion gap at the edges while allowing the floor to move freely underneath. Scribing the baseboard to the floor is the mark of a professional installation.
Don’t just slap a piece of plastic trim over the gap and call it a day. That is the mark of a hack. I take the time to look at chic baseboard designs that transform rooms in 2025 to find something that adds weight to the room. If the floor is level, the baseboard should sit flat. If the floor has a slight wave, you scribe the wood to the floor. It is a tedious process. You take a compass, you trace the floor’s profile onto the baseboards, and you cut it with a jigsaw. It takes time, but it is the difference between a floor that looks like it was built and a floor that looks like it was installed. You can check out baseboards makeover ideas to elevate your space for more inspiration on how to handle these corners. Also, if you are working with older tile, grout restoration secrets for long-lasting results can help the transition area look brand new without a full tear-out.
The master installer checklist for flush transitions
- Check subfloor levelness with a 10-foot straight edge.
- Calculate total stack height of tile, thin-set, and underlayment.
- Acclimate wood flooring to the home’s humidity for at least 7 days.
- Install a moisture barrier over concrete slabs.
- Leave a 1/4 inch expansion gap at all vertical obstructions.
- Use 100 percent silicone sealant for the transition joint.
- Scribe baseboards to the finished floor height.
If you follow these steps, you won’t be calling me in two years to fix a buckling floor. You have to think about the long game. Using eco-friendly tile solutions for sustainable homes in 2025 is a great way to ensure you are using modern, stable materials. Just remember that the physics don’t change. Gravity and moisture are always working against you. Your job is to build something that stands its ground. It is about the grind, the sweat, and the sawdust under your nails. It is about doing it right the first time so you can sleep at night knowing that floor isn’t going anywhere.