
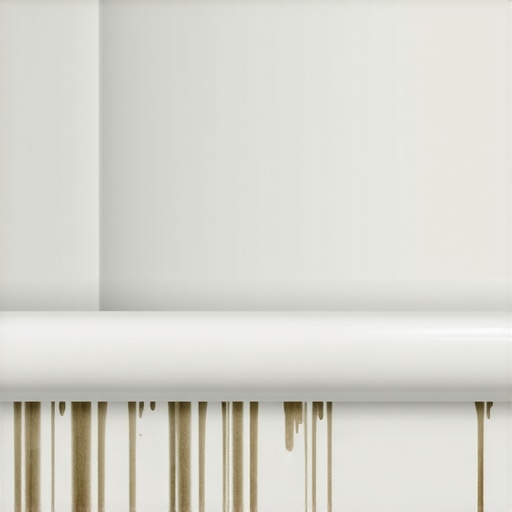
Why Your Bathroom Baseboards Are Getting Wet from Behind
I once walked into a house where a fifteen thousand dollar wide-plank walnut floor was cupping so bad it looked like a potato chip because the installer did not check the crawlspace humidity. It was a mess, but bathrooms are even worse. I spent three days grinding concrete on a job last month just so the floor would not click like a castanet, and that is when I saw the rot. The homeowner thought they just had a little peeling paint on their baseboards. When I pulled the trim back, the drywall was black with mold and the bottom plate of the wall was soft enough to push a screwdriver through. This was not a pipe leak. It was a slow, agonizing death by moisture migration. Most guys skip the leveling compound and ignore the moisture meter, but that is how you end up with a structural failure. I have spent twenty-five years on my knees with a level and a moisture meter, and I can tell you that a floor is a performance surface, not a decoration. If your baseboards are wet, your bathroom is failing at a structural level.
The physics of capillary rise in wet walls
Moisture behind baseboards usually occurs through capillary action where water travels up the back of the trim or through porous subfloors. This movement happens when surface tension pulls liquid into narrow spaces like the gap between your drywall and the floor plate. In a bathroom, this is often the result of water escaping the shower footprint and finding a way into the unsealed edges of the wall assembly. Water is a polar molecule, and it loves to stick to things. When it hits the gap behind your baseboard, it does not just sit there. It climbs. It wicks into the gypsum core of your drywall and the cellulose fibers of your baseboards. This is why you see the paint bubbling two inches above the floor. The water has already traveled six inches up the back of the board by the time you notice the damage on the front. We are talking about the molecular level where the attraction between water and the substrate is stronger than gravity. This is common in regions with high ambient humidity where the wood never gets a chance to dry out. In my shop, I smell floor wax and sawdust, but in these bathrooms, I smell the rot of a thousand missed caulking beads.
Why your grout is a sponge in disguise
Standard cementitious grout is naturally porous and permits water transmission via its microscopic network of voids. Unless you use high-performance epoxy or specialized additives, moisture will eventually migrate through the grout lines in your shower or floor and hit the underlying structure. Most people think grout is a waterproof shield, but that is a dangerous lie. Cement-based grout is a sieve. It is made of Portland cement and sand, and it has thousands of tiny holes that pull water in. This is why how to refresh grout without replacing it is such a common topic, but refreshing the surface does not fix the underlying porosity. If the installer did not use a high-quality sealer or a waterproof membrane behind the tile, that water goes straight into the backer board and eventually the baseboards. You need to understand that grout is there for compression and aesthetics, not for keeping things dry. That job belongs to the membrane. When water gets into the grout, it stays there, creating a reservoir that slowly feeds the wood trim nearby. This leads to the swelling and warping that ruins a good design. Check your grout for cracks and pinholes, because that is the gateway for the destruction of your wall plates.
“A floor is only as good as the subfloor beneath it; deflection is the enemy of every joint.” – Master Flooring Axiom
The ghost in the expansion gap
Failing to leave a proper expansion gap or over-filling that gap with rigid grout causes structural stress and water trapping. Baseboards must be installed with a slight elevation from the tile surface to prevent wicking and to allow for the natural movement of the house. I see it all the time. A guy installs tile tight against the drywall, then slams the baseboard down hard on top of the tile. He then runs a bead of grout between the tile and the baseboard. That is a crime. Houses move. They breathe. When the house settles or the seasons change, that grout cracks. Now you have a funnel for mop water or shower overspray to go directly under the baseboard and stay there. I always leave a sixteenth of an inch gap and use a 100 percent silicone sealant that matches the grout. Silicone remains flexible and creates a true waterproof dam. Grout is rigid and will fail every single time it is used in a change of plane. If you do not have that gap, you are inviting capillary action to pull every drop of water right into the end grain of your wood trim. Once that end grain gets wet, it acts like a straw, pulling moisture up the entire length of the board. It is the 1/8 inch that ruins everything.
The hidden failure of shower pan membranes
A leaking shower pan often manifests as wet baseboards in the adjacent room due to the lack of a proper capillary break. If the waterproof liner is punctured or the curb is not integrated correctly, water follows the path of least resistance right into your baseboard backing. The curb of the shower is the most common point of failure. If the installer nailed the cement board through the top of the curb, they just poked holes in the boat. Water sits in the mud bed of the shower, finds those nail holes, and travels horizontally along the floor joists or the subfloor until it hits the wall. This is why you see showers with a style trendy ideas for small bathrooms that look great on the outside but are rotting from within. The water migrates under the tile, hits the wall studs, and starts soaking the baseboards in the bedroom on the other side of the wall. It is a slow process that can take months to show outward signs. By the time the baseboard is soft, the subfloor is usually saturated. You need a continuous membrane that wraps over the curb and connects to the floor waterproofing to prevent this horizontal migration of moisture.
Materials and their resistance to moisture absorption
| Material Type | Absorption Rate | Resistance Level | Best Use Case |
|---|---|---|---|
| MDF (Medium Density Fiberboard) | High | Very Low | Dry areas only, never bathrooms |
| Solid Pine | Medium | Moderate | Low moisture rooms with high seal |
| PVC (Solid Plastic) | Zero | Maximum | Wet rooms and high humidity areas |
| Modified Thin-set | Low | High | Setting tile in wet environments |
As the table shows, the material you choose for your baseboards dictates how much trouble you are in when a leak occurs. Using MDF in a bathroom is a death wish for your trim. It is basically compressed paper and glue. One small splash and it swells to twice its size. If you are building for the long haul, you use PVC or a high-quality hardwood that has been sealed on all six sides, including the back and the cut ends. Most people forget to seal the back. That is where the moisture hits first. I always tell my clients that if they want chic baseboard designs that transform rooms in 2025, they better make sure those designs are executed in materials that can handle the reality of a bathroom environment.
The regional reality of humidity and vapor drive
In high humidity regions like the Gulf Coast, ambient moisture can condense behind cool bathroom baseboards and create a breeding ground for mold. This is exacerbated when air conditioning cools the walls while the exterior remains humid, creating a vapor drive toward the interior. If you live in a place like Houston or Miami, your bathroom is a constant battleground. The cold air inside meets the warm, moist air trapped in the wall cavity. This creates condensation on the back of the drywall. Since the baseboard is a dense layer, it prevents that moisture from evaporating into the room. It stays trapped against the paper face of the drywall and the back of the wood. This is why you need tile cleaning tips for a sparkling bathroom in 2025 that include checking the perimeter for any signs of mold growth. If your bathroom is not properly ventilated with a high-CFM fan, you are essentially living in a steam room. That steam will find its way behind the trim and cause the same damage as a plumbing leak. You have to consider the dew point. If the wall temperature drops below the dew point, you get liquid water. It is basic physics, and it destroys more bathrooms than actual floods do.
“Grout is not a waterproof barrier. The waterproofing layer exists beneath the tile and must be continuous to protect the substrate.” – Master Flooring Axiom
Restoration secrets and the myth of air drying
Once a baseboard has reached a moisture content of over 20 percent, structural changes in the wood fibers become permanent and require replacement. You cannot just put a fan on a swollen MDF baseboard and expect it to go back to normal. The glue has failed and the fibers have expanded. For grout, grout restoration secrets for long-lasting results often involve removing the old, saturated material and replacing it with something less permeable. If you catch the moisture early, you might save the drywall, but usually, once you see the stain, you are looking at a tear-out. You have to find the source. Is it a failing wax ring on the toilet? Is it a lack of silicone at the tub shoe? Or is it a failure of the waterproofing membrane in the shower? I use a non-invasive moisture meter to trace the path of the water. It tells me exactly where the wetness stops. If the meter is pegged at 100 percent in the corner, I know exactly which direction to start pulling trim. Do not let a contractor tell you they can just paint over it. That is a hack move. The mold will grow under the new paint and the wood will continue to rot.
A checklist for bathroom moisture prevention
- Check the silicone bead between the tub or shower and the floor for any gaps or peeling.
- Ensure the bathroom exhaust fan is rated for the square footage and actually venting to the exterior.
- Seal all grout lines every six to twelve months with a high-quality penetrating sealer.
- Inspect the baseboards for any softness or paint bubbling every time you clean the floors.
- Never install baseboards tight to the floor; maintain a 1/16 inch gap for a silicone seal.
- Verify that the toilet wax ring is not leaking by checking for any movement in the toilet base.
If you follow these steps, you will avoid the nightmare of a full bathroom gut job. It is about being proactive and understanding that water is always looking for a way out. I have seen guys try to hide their mistakes with extra thick trim and heavy caulk, but the water always wins in the end. It is about the chemistry of the bond and the physics of the gap. If you treat your bathroom like a structural engineering project instead of a weekend DIY hobby, your floors will last fifty years. If you don’t, I will see you in five years when I am pulling up your rotted subfloor. For more info on keeping your space right, check out baseboards makeover ideas to elevate your space. Just make sure you do it the right way the first time. Stop by and contact us if you have questions about your subfloor integrity. We have seen it all and we know how to fix it before it becomes a catastrophe.