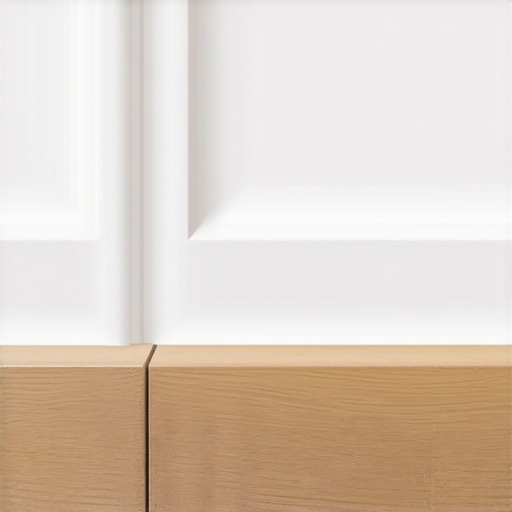
The Professional Way to Hide a Gap Between Baseboard and Tile
Most guys skip the leveling compound. They think the underlayment will hide the dip. It won’t. I spent three days grinding concrete on a job last month just so the floor wouldn’t click like a castanet. When you see a gap between your baseboard and your tile, you are looking at a failure of preparation. It is a structural misalignment disguised as an aesthetic nuisance. You can smell the oak dust and the damp concrete when you get down low enough to see it. That dark line of shadow is where spiders live and where floor wax goes to die. To fix it properly, you have to understand the physics of the house. You have to understand how the wood breathes and how the stone stays still. It is about chemistry and geometry. Nothing else matters. If you ignore the subfloor, the gap will return. It is a ghost that haunts your craftsmanship.
The 1/8 inch that ruins everything
To fix a gap between baseboards and tile, you must maintain a standard of 1/8 inch flatness over a ten foot span to ensure the trim sits flush. If the subfloor deflection exceeds this limit, the baseboard profile will bridge the dips and create unsightly shadows that ruin the visual transition. I have seen guys try to fill a half inch gap with grout. It cracks in a week. Grout has no tensile strength. It is a crystalline structure designed for compression. When the house settles, that grout line snaps. It falls out in chunks. Then you have a mess. You need to understand that the floor is a moving organism. The tile is rigid. The baseboard is wood or MDF. They have different coefficients of expansion. They are fighting each other every day. You are the mediator in that fight. You have to use the right materials to keep the peace. Sometimes that means scribing. Sometimes that means caulking. It always means measuring twice.
“A floor is only as good as the subfloor beneath it; deflection is the enemy of every joint.” – Master Flooring Axiom
The ghost in the expansion gap
An expansion gap is a necessary perimeter space of at least 1/4 inch left between the tile edge and the wall plate to allow for structural movement. This gap is covered by the baseboard, but if the floor is not level, the baseboard will not sit tight against the tile. This is where the physics of the house becomes your enemy. Think about the moisture. If you are in a place like Houston, the humidity is a constant weight. The wood expands. In Phoenix, the air is a desert. The wood shrinks. Your baseboards are moving even if you cannot see them. If you nailed your baseboards too tight during a dry spell, they will buckle when the humidity hits. If you leave them too loose, the gap grows. You need a solution that moves with the house. This is why we use shoe molding or specialized caulking techniques. We are hiding the movement of the building.
Shoe molding and the art of the cover up
Adding shoe molding or quarter round is the most common mechanical solution to hide a gap between baseboard and tile. This additional trim layer is flexible enough to follow the contours of an uneven tile floor while remaining nailed to the rigid baseboard above. I personally prefer a shoe mold over a quarter round. It has a thinner profile. It looks less like a cheap fix and more like an intentional design choice. You can find chic baseboard designs that transform rooms in 2025 that incorporate these layers. When you install shoe molding, do not nail it into the floor. Nail it into the baseboard. This allows the floor to slide underneath the trim as the seasons change. If you nail it into the floor, the trim will pull away from the wall. You will end up with a gap at the top instead of the bottom. That is a rookie mistake. I see it all the time in new builds where the contractors are rushing to get to the next job. They do not care about the long term. You should care.
Scribing the wood to the stone
To hide a gap without extra trim you must scribe the baseboard by using a compass to trace the floor profile onto the wood. This precision carpentry technique allows you to back-cut the baseboard so it sits perfectly flush against every high and low point of the tile surface. It is a slow process. It requires a jigsaw and a steady hand. You set your compass to the widest point of the gap. You run the metal point along the floor while the pencil marks the wood. Then you cut to that line. It is the only way to get a truly professional look without adding more wood. Most homeowners do not want to pay for the labor. It takes hours to do a single room properly. But if you want that zero-threshold look, scribing is the only path. It makes the baseboard look like it grew out of the tile. It is beautiful. It is also hard on the knees. I have spent thousands of hours on my knees doing this. My joints feel every minute of it. But when you stand up and see that perfect line, it is worth the pain.
Caulk is not a structural fix
Using siliconized acrylic caulk can effectively seal small gaps between baseboards and tile while providing the flexibility needed for thermal expansion. This material creates a waterproof bond that prevents moisture infiltration from reaching the subfloor or drywall. You need to choose the right caulk. Do not use cheap painter’s caulk. It has no solids. It will shrink as it dries. You will be back in six months to fix it. Use a high-quality sealant with at least 25 percent movement capability. This is vital in bathrooms and showers with a style where water is a constant threat. You also need to match the color. If your grout is a specific shade of gray, find a matching caulk. Many grout manufacturers make color-matched siliconized caulk. It blends the floor into the wall. It disappears. That is the goal. You do not want the fix to be visible. You want the gap to vanish. Use a wet finger or a profiling tool to smooth the bead. Keep it thin. A thick bead of caulk looks like a mistake. A thin bead looks like a shadow.
Technical metrics for tile and trim
When you are planning your installation, you need to look at the numbers. The industry has standards for a reason. They keep the floors from falling apart. Here is how the materials compare in the real world.
| Material Property | Porcelain Tile | Solid Wood Baseboard | MDF Baseboard | PVC Trim |
|---|---|---|---|---|
| Expansion Rate | Very Low | High | Moderate | Low |
| Moisture Resistance | Excellent | Poor | Very Poor | Excellent |
| Flexibility | None | Low | Medium | High |
| Ideal Gap Filler | Grout/Caulk | Caulk | Caulk | Silicone |
You can see that MDF is the worst choice for wet areas. It is basically a sponge. If it gets wet, it swells. It stays swollen. If you are doing baseboards makeover ideas to elevate your space, consider the environment. In a bathroom, use PVC or solid wood that has been back-sealed. Do not trust the factory primer on MDF. It is thin. It will not stop the rot. I have replaced miles of rotted MDF in my career. It is a waste of money in the long run. Stick to materials that can handle the moisture levels of your specific region.
Humidity and the regional floor shift
The local climate dictates the expansion and contraction of your baseboards and subfloors, requiring regional adjustments to your gap-hiding strategy. In high humidity regions like the Gulf Coast, wood baseboards will expand significantly, necessitating a larger expansion gap that must be hidden with wider trim. In the dry air of the Southwest, everything shrinks. You might install a floor in the winter that looks perfect, only to see gaps open up in the summer when the air conditioner pulls all the moisture out of the house. You have to account for this. Acclimation is the most ignored step in flooring. You cannot bring wood from a warehouse and nail it to a wall the same day. It needs to sit in the room for at least 72 hours. It needs to reach equilibrium. If you skip this, you are guaranteed to have gaps. No amount of caulk can save a floor that was not acclimated. It is a law of nature. You cannot fight it. You can only work with it.
“Tile installations must provide for movement joints to prevent stress build-up; the gap at the wall is a functional requirement, not a defect.” – TCNA Handbook Principles
Professional checklist for a gapless finish
If you want to do this right, you need a process. You cannot just wing it. Follow these steps to ensure your baseboards and tile look like they were made for each other.
- Check the subfloor for high spots using a 10 foot straightedge before laying tile.
- Use a self-leveling underlayment if the floor deviates more than 1/8 inch over 10 feet.
- Acclimate wood baseboards to the room temperature and humidity for 72 hours.
- Scribe the baseboard to the floor if you are not using shoe molding.
- Apply a high-quality color-matched caulk to the transition between tile and trim.
- Clean the tile surface with denatured alcohol before caulking to ensure a bond.
- Maintain your grout regularly to prevent moisture from getting under the trim.
By following this list, you avoid the common pitfalls of the weekend warrior. You are thinking like a pro. You are looking at the long term health of the home. If you notice your grout is looking rough, check out grout restoration secrets for long lasting results to keep the base of your wall protected. A clean floor is a stable floor. Dust and grime can actually hold moisture against your baseboards, accelerating rot. It is all connected. The tile, the grout, the trim. They are a system. If one part fails, the whole thing looks bad.
The contrarian truth about underlayment
While most people want the thickest underlayment, too much cushion actually causes the locking mechanisms on LVP to snap under pressure. This creates a vertical movement that will pull the caulk away from your baseboards every time you walk across the room. I have seen it a hundred times. People think soft is good. Soft is bad for flooring. You want stability. You want a firm foundation. If your floor has too much bounce, no amount of shoe molding or caulking will hide the gap. The gap will open and close with every footstep. It will act like a bellows, sucking dust into the wall cavity. Use a high-density underlayment with a low compression set. This keeps the floor flat. It keeps the trim tight. It keeps your reputation intact. It is the invisible details that make a floor last for thirty years instead of five.
Caulk versus grout at the transition
Choosing silicone caulk over cementitious grout at the wall-to-floor transition is necessary because planes of change require flexible joints to prevent stress cracking. Grout is too brittle to survive the differential movement between a vertical wall and a horizontal floor. When the house moves, the grout breaks. It is that simple. I always tell my clients that grout is for the middle of the floor and caulk is for the edges. It is a rule of the trade. If you use grout at the baseboard, you are just making more work for yourself later. You will be scraping it out with a multi-tool in two years. Save yourself the trouble. Use a high-quality sealant from the start. It might cost five dollars more per tube, but it is worth it. You are paying for the polymers. You are paying for the science that keeps the gap hidden. If you need help with the maintenance side, tile cleaning tips for a sparkling bathroom in 2025 can help keep those transition lines looking sharp. Dirt loves to hide in the corners. Don’t let it. Keep the lines clean. Keep the gap closed. That is how you win the game of flooring. It is a game of millimeters. It is a game of patience. If you have the patience to do the prep, the finish will take care of itself. If you rush the prep, you will spend the rest of your life looking at that gap. And it will drive you crazy. Trust me. I have been there.
Comments
One response to “The Best Way to Hide a Gap Between Baseboard and Tile”
This article highlights a lot of the details that often get overlooked in DIY or even professional flooring projects. I completely agree that rushing through the prep work—like neglecting proper leveling or not allowing materials to acclimate—can lead to unsightly gaps and future issues. I’ve found that investing time in scribing and using flexible caulks really pays off in the long run, especially in climate-variable regions. One challenge I’ve encountered is managing the transition in older homes where the framing has shifted over time. It seems like the principles you outlined, like measuring twice and using the right materials, are universal, but I wonder how you approach scribing in extremely uneven surfaces? Do you have a preferred method or tools for those cases? Understanding the physics behind the movement makes all the difference, but sometimes the surface irregularities demand more nuanced solutions. Would love to hear others’ strategies for those tricky situations.