Most guys skip the leveling compound. They think the underlayment will hide the dip. It won’t. I spent three days grinding concrete on a job last month just so the floor wouldn’t click like a castanet. That job was in a bathroom where the toilet was perched on a hump of old mortar. The gap was big enough to slide a deck of cards under. If I had just filled that gap with caulk, the first time a heavy guy sat down, the porcelain would have snapped the closet bolts or cracked the flange. This is the reality of floor prep that most homeowners never see. A floor is a performance surface, and the connection between the toilet and the tile is the most critical junction in the room. If you do it wrong, you end up with a rotting subfloor and a smell that no amount of air freshener can hide.
The hidden physics of the toilet base
To seal the gap between your toilet and the floor, you must first ensure the fixture is mechanically stable and the subfloor is perfectly level. Use plastic shims to eliminate any rocking, then apply a bead of 100 percent silicone sealant around the base, leaving a small gap at the rear.
When a toilet is bolted down, the closet bolts create a downward force measured in foot-pounds. This force compresses the wax ring, a blend of petroleum-based waxes and resins, until it forms a gas-tight seal. However, if the floor is uneven, the porcelain base acts as a lever. Every time someone sits, it exerts thousands of pounds of pressure per square inch on the high spots of the tile. This is why leveling the substrate is not optional. If the toilet rocks, the wax ring will eventually deform and fail, leading to slow leaks that destroy your subfloor. The gap you see isn’t just an eyesore; it is a symptom of a structural mismatch. You are dealing with two rigid materials, fired ceramic and often natural stone or porcelain tile, which do not like to play nice together without a buffer.
“A floor is only as good as the subfloor beneath it; deflection is the enemy of every joint.” – Master Flooring Axiom
The chemical choice between silicone and grout
Selecting the right sealant involves understanding the molecular bond between the porcelain and the surface energy of the tile glaze. 100 percent RTV silicone is the industry standard because it maintains elasticity and resists the alkaline environment of bathroom cleaning chemicals over long periods.
Many old-school installers still reach for grout to fill the gap. While grout looks consistent with the rest of the floor, it is a mistake on wood-framed houses. Wood subfloors flex. Concrete slabs move with thermal changes. Grout is rigid and brittle. Within a year, a grouted toilet base will develop hairline cracks. Those cracks use capillary action to suck up mop water and urine, leading to a disgusting mess under the porcelain. If you are dealing with a historic restoration, you might consider it, but for any modern home, you want the flexibility of silicone. If your grout is already looking rough in the rest of the bathroom, you should look into grout restoration secrets for long-lasting results before you focus on the toilet seal. The chemistry of silicone allows it to stretch up to 400 percent of its original size without losing its bond. That is what you need when the house settles.
Why your subfloor is lying to you
Subfloor deflection is the invisible movement that causes seal failure and cracked tiles in bathrooms. Even if a floor looks flat, it may have structural voids or insufficient joist spacing that allows the floor to dip under the weight of a water-filled toilet and a human occupant.
I have seen 3/4 inch plywood look solid until I put a 6-foot level on it. If there is a dip of more than 1/8 inch over 10 feet, your toilet will never sit right. In the swampy humidity of Houston, moisture under the tile is a constant threat. A poorly sealed toilet gap becomes a breeding ground for mildew that can rot out a plywood subfloor in three seasons. This is especially true in showers with a style where the moisture levels are consistently high. You must address the subfloor integrity before you worry about the aesthetic of the caulk line. If the subfloor is soft, no amount of silicone will save you. You need to pull the toilet, cut out the rot, and reinforce the joists. Only then can you achieve a seal that actually protects the home.
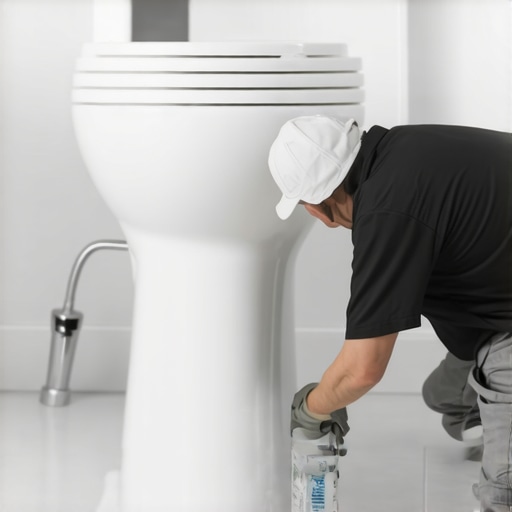
The mechanical procedure for a permanent seal
Applying the sealant requires a surgical cleaning of the porcelain and tile surfaces to remove all residual wax and biofilms. You must use a non-porous shim to stabilize the base before injecting the silicone polymer into the void for a structural bond.
- Clean the area with denatured alcohol. Avoid soapy cleaners which leave a residue that prevents silicone from sticking.
- Inspect the wax ring. If you have been rocking, the wax is shot. Replace it with a high-density wax ring or a foam gasket.
- Insert plastic shims into any gaps where the toilet base does not touch the tile. Do not use wood shims; they will rot.
- Trim the shims flush with a sharp utility knife once the closet bolts are snug. Do not over-torque the bolts or you will hear a loud crack that costs you $300.
- Apply a steady bead of silicone around the perimeter. Use a wet finger or a profiling tool to smooth the joint.
- Leave a 1-inch gap at the very back of the toilet. This is your leak indicator.
The safety gap at the rear
Leaving a weep hole at the back of the toilet is a professional requirement that allows you to detect a leak before it destroys the ceiling below. A 360-degree seal traps leaking water inside the base, forcing it down into the subfloor and joists instead of out onto the bathroom floor.
Amateurs seal the whole thing because they think it looks cleaner. They are wrong. If the wax ring fails and you have a 100 percent seal, the water has nowhere to go but through the subfloor. I have seen joists that looked like wet cardboard because a homeowner wanted a “seamless” look. If you leave that gap at the back, you will see water on the floor the moment there is a problem. That is your early warning system. While you are working on the floor level, take a look at your baseboards makeover ideas. The way the baseboard meets the floor near the toilet is just as important for moisture control as the toilet seal itself. Use a matching silicone bead there to prevent water from wicking into the drywall.
| Sealant Material | Shore A Hardness | Expansion Capacity | Recommended Use |
|---|---|---|---|
| 100% Silicone | 25-30 | High (25-50%) | All standard bathroom fixtures |
| Siliconized Latex | 40-50 | Moderate (10-15%) | Dry areas only |
| Sanded Grout | 90+ | Zero | Rigid tile joints only |
| Polyurethane | 35-45 | Very High | Industrial or exterior applications |
The chemistry of the bond
Adhesion promoters and the cross-linking of polymers are what differentiate a professional grade seal from a temporary fix. The silicone must transition from a viscous liquid to a solid elastomer while maintaining a molecular grip on the microscopic pores of the tile.
If you are working with high-end materials like those found in eco-friendly tile solutions, you need to be careful with your choice of chemicals. Some natural stones are porous and can be stained by the oils in cheap caulks. Always use a non-staining silicone on marble or limestone. The curing process of silicone involves the evaporation of acetic acid or a neutral cure byproduct. During this time, the bond is fragile. Do not use the toilet for at least 12 to 24 hours. If you sit on it too soon, you will break the chemical bond before it has fully cross-linked, and you will be back to square one within a week. While waiting for the cure, you can focus on other maintenance like tile cleaning tips to ensure the rest of the bathroom matches your new, perfect seal.
“True floor architecture is hidden in the details of the adhesive and the stability of the substrate.” – NWFA Technical Guidelines
Troubleshooting the rocking throne
Eliminating movement is the most critical step in the sealing process because mechanical stress will always overcome chemical adhesion. You cannot expect a bead of caulk to hold a 100-pound porcelain fixture in place if the subfloor is uneven.
If you find that the toilet still moves after shimming, your closet flange might be set too high or too low. A flange should sit 1/4 inch above the finished floor. If it is flush or below, you need a jumbo wax ring or a flange extender. If the flange is too high, the toilet will never touch the floor, and you will have a massive gap that silicone cannot bridge. In that case, you are looking at a major plumbing repair, not a simple sealing job. If you want to keep your bathroom looking sharp, you should also consider how to refresh grout without replacing it to keep the entire floor system integrated and waterproof. A stable toilet is the centerpiece of a functional bathroom, and the seal is its first line of defense against structural decay.