The physics of cleaning textured porcelain tiles that hold onto dirt
I spent three days grinding concrete on a job last month just so the floor wouldn’t click like a castanet. That is the level of obsession required to understand why your textured porcelain looks like a mud track. Most guys skip the leveling compound and think the underlayment will hide the dip. It won’t. The same logic applies to cleaning. You cannot just slap a damp mop across a textured surface and expect the microscopic pits to give up their cargo. I have spent 25 years on my knees with a moisture meter and a level, and I can tell you that a floor is a performance surface, not a decoration. When you choose a tile with a high Coefficient of Friction for safety, you are essentially buying a mechanical filter that traps every skin cell, grease molecule, and dust mite that enters the room. Cleaning these floors requires a deep dive into the chemistry of surfactants and the mechanical reality of nylon bristle agitation. Most homeowners treat their tile like a flat mirror when they should be treating it like a jagged mountain range that requires specialized equipment to scale. If you want a floor that stays clean, you have to stop thinking like a decorator and start thinking like a structural engineer.
The microscopic pits that eat your mop
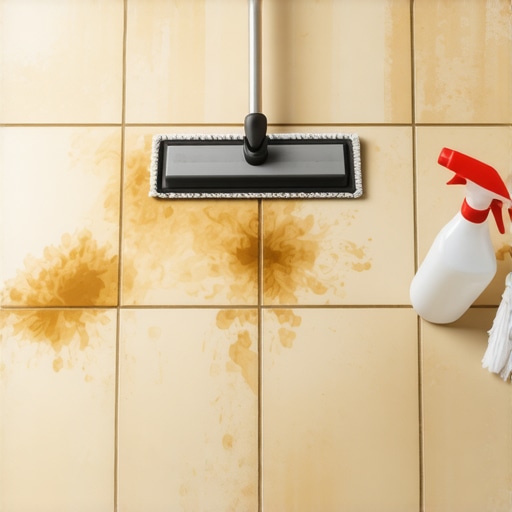
Textured porcelain tiles hold onto dirt because their surface topography consists of microscopic peaks and valleys designed to increase slip resistance. These depressions act as collection basins for dirty mop water. When you use a traditional cotton mop, you are merely moving suspended solids from one valley to the next. As the water evaporates, the dirt remains behind, concentrated in the deepest parts of the texture. This creates a grey or dingy haze that seems impossible to remove with standard household cleaners. You are dealing with a material fired at 2,200 degrees Fahrenheit, making it incredibly dense and non-porous, yet the surface is physically jagged. To clean this, you must break the surface tension of the liquid and mechanically lift the debris out of the valleys. This is why I always tell my clients that their tile cleaning tips for a sparkling bathroom in 2025 must include a two-bucket system. One bucket holds your cleaning solution while the other is for rinsing your scrub brush or mop. If you are dipping a dirty mop back into your clean solution, you are just painting your floor with diluted filth. It is a mechanical failure of the highest order.
“A floor is only as good as the subfloor beneath it; deflection is the enemy of every joint.” – Master Flooring Axiom
Why your subfloor is lying to you
Subfloor deflection and uneven joist spacing often cause tile to sit at slight angles that create shadows and trap dirt more aggressively. If your subfloor is bouncing even a fraction of an inch, it can lead to micro-cracks in the grout. These cracks are the perfect breeding ground for bacteria and the ultimate hiding spot for fine particulates. Most installers ignore the TCNA standards for subfloor stiffness, but those of us who have stayed in this business for decades know that a floor is a rigid system. When a homeowner complains that their textured tile is impossible to clean, I often look at the grout lines first. If the grout is failing, the dirt has a highway to the underside of the tile. This is why grout restoration secrets for long lasting results are so vital for a cleanable floor. You need a solid, non-porous transition between the porcelain units. If your grout is sandy and soft, it will shed its own material into the texture of the tile, making the floor look dirty no matter how much you scrub. It is a cycle of structural decay that manifests as a cleaning problem. I have seen million-dollar homes with floors that look like a gas station bathroom because the installer didn’t understand the chemistry of modified thin-set and the physics of load distribution.
| Cleaning Method | Mechanical Action | Effectiveness on Texture | Risk to Grout |
|---|---|---|---|
| Cotton Mop | Passive Swiping | Very Low | Low |
| Steam Cleaner | Thermal Expansion | Medium | High (if unsealed) |
| Nylon Scrub Brush | Vertical Agitation | Very High | Moderate |
| Pressure Washer (Indoor) | Hydraulic Displacement | Maximum | Extreme |
The 1/8 inch that ruins everything
Proper grout joint width and depth are essential for ensuring that cleaning tools can actually reach the dirt without being blocked by the tile edge. When an installer tries to get fancy with ultra-thin grout lines on a textured tile, they often leave high spots that catch the mop. This is especially true in showers that wow modern designs for 2025 where the water flow is constant. If the grout isn’t packed tight and struck at the right depth, you get a shelf that holds hair and soap scum. I always use a stiff nylon brush. A mop is for spills, but a brush is for cleaning. You need bristles that are longer than the depth of the texture. While most people want the thickest underlayment, too much cushion actually causes the locking mechanisms on LVP to snap under pressure, and in the world of tile, too much deflection makes the grout crumble. If you are cleaning a floor and notice the grout feels like sandpaper, it was likely mixed with too much water. That excess water evaporated and left behind a honeycomb of air pockets that now house the very dirt you are trying to remove. You might need to learn how to refresh grout without replacing it before the floor will ever truly look clean again.
- Vacuum the floor thoroughly to remove dry particulate before introducing liquid.
- Use an alkaline cleaner with a pH of 9 or higher to break down organic oils.
- Agitate the surface with a deck brush using a circular motion.
- Extract the dirty water using a wet-dry vacuum rather than a mop.
- Rinse with clean, deionized water to prevent mineral spotting.
- Dry the floor immediately with a microfiber towel to lift remaining residue.
The chemical war against grey grout lines
Breaking the ionic bond between the dirt and the porcelain surface requires a surfactant that reduces the surface tension of the water. This allows the cleaning agent to penetrate the microscopic pores of the tile. Most people reach for vinegar, but vinegar is an acid. While it can be useful for mineral deposits, it can also eat away at cementitious grout over time. If you live in a high-humidity area like Florida, the moisture in the air keeps your grout joints damp, which invites mold. In a dry climate like Arizona, the dust is so fine it acts like a polishing compound, dulling the finish of the tile. You have to adapt your strategy to the local environment. For textured tile, I recommend a professional-grade oxygenated cleaner. It bubbles into the texture and lifts the dirt to the surface. It is a chemical reaction that does the heavy lifting so your back doesn’t have to. You also need to consider the transition to your walls. I have seen beautiful floors ruined by ugly transitions. Using chic baseboard designs that transform rooms in 2025 can help cover the expansion gaps that are required by code. Those gaps are often where the most dirt hides because they are hard to reach with a vacuum. If you don’t seal those areas, you are just pushing the dirt under the baseboards where it will sit and rot.
The ghost in the expansion gap
Expansion joints are not a suggestion; they are a structural necessity that prevents tile tenting and grout failure. Every 20 to 25 feet, you need a movement joint. If your installer skipped this, the pressure in the floor will eventually cause the grout to pop. Once the grout pops, the floor becomes un-cleanable because the dirt falls into the cracks. I once walked into a house where a wide-plank walnut floor was cupping so bad it looked like a potato chip because the installer didn’t check the humidity, and the same thing happens with tile when the subfloor moves. The tile doesn’t bend, it breaks. When you are cleaning, pay attention to the sound of the floor. If it sounds hollow or clicks, you have a bond failure. No amount of cleaning solution will fix a floor that is structurally unsound. You have to maintain the integrity of the surface. This includes looking at your baseboards makeover ideas to elevate your space to ensure they aren’t trapping moisture against the edge of the tile. A clean floor is a dry floor. If you leave water sitting on your textured porcelain, you are just waiting for the next layer of dirt to cement itself to the surface. It is a constant battle against the elements and the physics of the home itself. Always finish with a dry pass. Use a clean microfiber pad and go over the floor one last time. This removes the last traces of cleaner residue that would otherwise act as a magnet for new dirt. It is the final step that separates the amateurs from the masters.