The marble test that reveals everything
Shower floor slope must achieve a minimum pitch of one quarter inch per vertical foot toward the drain to ensure gravity-fed drainage and prevent subsurface mold growth or efflorescence in your grout lines. If a standard glass marble placed on the shower tile does not immediately roll toward the drain grate, your pan liner or mud bed likely suffers from birdbaths or flat spots that will inevitably lead to structural rot. Most guys skip the leveling compound. They think the underlayment will hide the dip. It won’t. I spent three days grinding concrete on a job last month just so the floor wouldn’t click like a castanet. This is the reality of precision. If your floor is off by even a fraction of an inch, water wins. Gravity is a relentless boss and it never takes a day off. I have seen fifteen thousand dollar bathrooms destroyed by a two dollar mistake in the subfloor prep. You can have the most beautiful showers that wow in terms of aesthetics, but if the water stays put, you have a petri dish, not a bathroom.
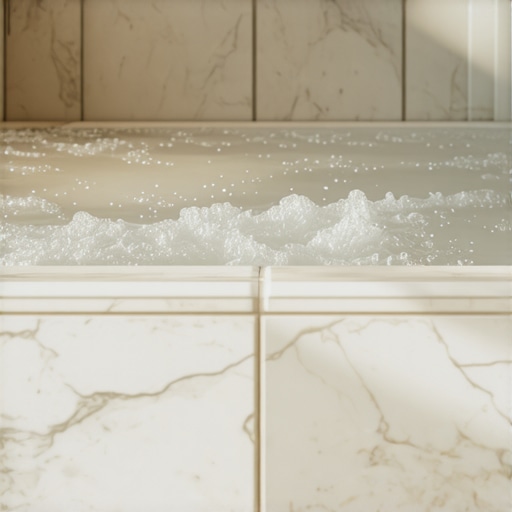
The physics of the standing puddle
Water follows the path of least resistance which is usually determined by the mechanical bond of your thin-set and the integrity of your pre-slope. When a shower is built, the plumber or the tile guy should install a pre-slope beneath the waterproof liner. This is a layer of sloped mortar that ensures any water reaching the liner travels to the weep holes in the drain assembly. Without this hidden slope, water sits in the pan forever. It turns into a stagnant swamp. This creates a foul odor that no amount of scrubbing will fix. People often think the tile and grout are the waterproof layer. They are wrong. Grout is a sieve. It is a porous network of cementitious material that allows moisture to pass through via capillary action. If the slope underneath that grout is flat, the moisture stays in the mud bed. It rots the framing. It wicks up into the baseboards and the drywall. This is how you get mushrooms growing out of your carpet in the master bedroom.
“A floor is only as good as the subfloor beneath it; deflection is the enemy of every joint.” – Master Flooring Axiom
Why your subfloor is lying to you
Subfloors are rarely level and even more rarely flat. A subfloor can be level but not flat, or flat but not level. In a shower, we want neither level nor just flat; we want a specific, intentional pitch. I have walked onto job sites where the framing was so bowed it looked like a ship hull. If you lay tile over that without a proper mud bed, you are asking for trouble. The physics of weight distribution come into play here. Large format tiles are the trend right now, but they are the enemy of a sloped shower floor. You cannot bend a 12 by 24 inch porcelain plank to follow a curve. This results in lippage, where the edge of one tile sticks up higher than the neighbor. This creates a trip hazard and stops water in its tracks. For a proper slope, you need smaller tiles or a linear drain system. Smaller tiles allow the floor to follow the contour of the mud bed like a mosaic skin. This is why many showers with a style suited for small spaces use hex tiles or pebbles. They handle the slope geometry without the jagged edges of larger planks.
| Feature | Required Pitch | Standard Tolerance | Impact of Failure |
|---|---|---|---|
| Primary Slope | 1/4 inch per foot | +/- 1/16 inch | Standing water and mold |
| Pre-Slope | 1/4 inch per foot | Fixed pitch | Liner saturation and odors |
| Drain Elevation | Flush with tile | 0.5mm recessed | Mechanical tripping and pooling |
The ghost in the expansion gap
Every floor needs to breathe, even a wet one. The expansion gap is the space left at the perimeter of the installation to allow for the natural movement of the building. Buildings are living things. They expand in the summer and contract in the winter. If you jam your tile tight against the wall studs without a gap, the floor will tent. It will heave. It will crack the grout lines. I always use a high-quality 100 percent silicone sealant at the change of plane. Never use grout in the corners where the floor meets the wall. Grout is rigid. It will crack the moment the house settles. Silicone is flexible. It acts as a shock absorber. This is particularly important if you are using eco-friendly tile solutions which can sometimes have different thermal expansion rates than traditional ceramics. A proper gap hidden behind your wall tile or baseboards is the secret to a floor that lasts thirty years instead of three.
Grout is not a waterproof shield
Homeowners are shocked when I tell them that grout is designed to be wet. It is a dense sand and cement mixture. While it provides structural stability to the tile assembly, it does not stop water. This is why the slope is the most important part of the engineering. If the water cannot escape the grout and move toward the drain, it will sit there and breed bacteria. This leads to the pink slime and black spots people see in their corners. You can try how to refresh grout with various cleaners, but if the slope is wrong, the problem will return in weeks. Proper tile cleaning tips only work if the underlying drainage is functional. If you suspect your grout is failing because of moisture retention, you might need grout restoration secrets that include deep drying and sealing, but none of that replaces a proper pitch.
“The TCNA Handbook emphasizes that the slope to drain must be maintained throughout the entire system, including the sub-surface waterproofing layers.” – Tile Council of North America Standard
The 1/8 inch that ruins everything
Precision is not a suggestion. It is a requirement. If your drain is 1/8 of an inch too high, you have created a permanent dam. Water will pool around the drain but never go in. This is usually the result of a lazy installer who didn’t want to cut the mud bed deep enough. They figure they can build up the tile with extra thin-set. This is a crime in the flooring world. Thin-set is an adhesive, not a leveling agent. When thin-set is applied too thick, it shrinks as it cures. This shrinkage can pull the tile down, creating an uneven surface and ruining the very slope you tried to build. You should always check your work with a level and a straight edge before a single piece of tile touches the floor. If the level shows a bubble that isn’t perfectly off-center toward the drain, rip it out and start over. It is cheaper to fix it now than to replace the floor in two years when the subfloor is rotten.
- Clear the shower floor of all soap and bottles.
- Dry the surface completely with a towel.
- Place a marble at each of the four corners.
- Observe if the marble rolls directly to the center.
- Check for any areas where the marble stops or rolls toward a wall.
- Mark the dead spots with a pencil for a professional to inspect.
The chemistry of the perfect bond
Modern mortars are marvels of chemical engineering. We use polymer-modified thin-sets that create a microscopic mechanical key into the tile and the substrate. But these chemicals require a clean surface. If there is dust, oil, or old adhesive on that concrete or backer board, the bond will fail. I have seen entire floors pop up like potato chips because someone didn’t vacuum before they started. The bond is also affected by the moisture in the slab. If you are tiling over green concrete that hasn’t fully cured, the moisture vapor will push the tile right off the floor. This is why I always use a moisture meter. I want to see less than three pounds of moisture emission per thousand square feet. Anything higher is a gamble I am not willing to take. You need to consider how your tile interacts with chic baseboard designs at the exit of the shower. If the floor is too high because of a thick mud bed, your transitions will look like a mess. Everything is connected. The slope, the bond, the height, and the trim. If you ignore one, the rest will suffer. If you are worried about your current installation, you should contact us for a professional evaluation. We look at the physics, not just the fashion. Understanding the privacy policy of your home means ensuring that the structural secrets stay protected by quality craftsmanship. Don’t let a bad slope turn your sanctuary into a repair bill.