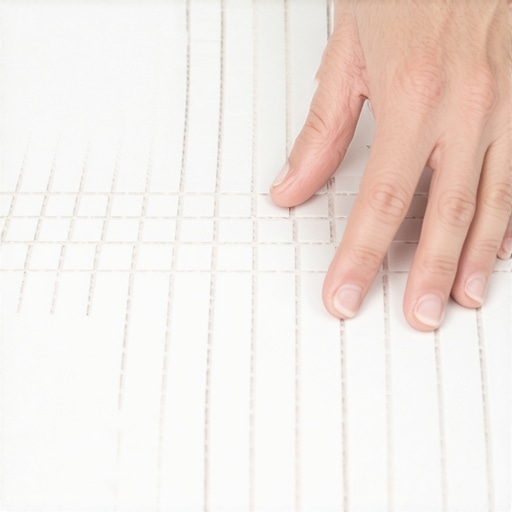
The grid of lies on a mesh sheet
Mosaic tile alignment depends entirely on the flatness of the substrate and the mechanical bond of the adhesive. Most installers assume the mesh backing provides a perfect 1/16 inch or 1/8 inch grout joint, but these sheets are often manufactured with slight dimensional variances that ruin a layout.
I spent three days grinding concrete on a job last month just so the floor would not click like a castanet. Most guys skip the leveling compound. They think the underlayment will hide the dip. It will not. When you are dealing with mosaics, particularly in showers, that dip becomes a lake of thin-set that swallows your tile. I have seen 25 years of floors fail because someone thought a 1/4 inch trowel could fix a 1/2 inch hole. It does not work that way. You need a substrate that is flat within 1/8 inch over 10 feet. Anything less and you are just decorating a disaster. My hands still vibrate from that grinder, but that floor is dead flat. That is the difference between a mechanic and a hobbyist. You have to respect the physics of the slab before you ever open a box of tile.
The physics of the hanging mesh
Mesh-backed tiles are prone to gravitational sag and thermal expansion during the curing process. To prevent sheet lines, you must use staggered joints and verify that the interlocking edges are not compressed or stretched beyond the factory spacer width. If the mesh is too loose, the tiles will wander. If it is too tight, the grout will crack. I have seen guys slap a sheet down and walk away. Three hours later, the whole wall has slid down half an inch. Use a premium thin-set with high sag resistance. Look for the ISO 13007 classification C2TE. The ‘T’ stands for thixotropic, which means it holds the weight. If you use cheap mud, you get cheap results. It is as simple as that. You want that tile to grab and stay put the moment it hits the wall.
“A floor is only as good as the subfloor beneath it; deflection is the enemy of every joint.” – Master Flooring Axiom
The chemistry of the bond
Modified thin-set contains polymer additives that increase shear strength and flexibility. For small mosaics, the open time of the adhesive is a primary factor in achieving a flush finish across multiple sheets. You are fighting the clock. If the mortar skins over, you lose your bond. I prefer a white thin-set for light-colored mosaics. Gray mud will bleed through and ruin your grout color. This is especially true with glass. Glass is transparent. If you use a notched trowel and do not knock down the ridges, you will see every single line through the face of the tile. It looks like a barcode. It is ugly. Knock those ridges down with the flat side of the trowel before you set the sheet. It creates a flat bed of mud that reflects light evenly. Details matter.
| Adhesive Type | Janka Compatibility | Typical Open Time | Best Use Case |
|---|---|---|---|
| Unmodified Mortar | Low | 15-20 mins | Saltillo and thick stone |
| Polymer Modified | High | 30-45 mins | Porcelain and Ceramic |
| Epoxy Grout/Adhesive | Extreme | 60 mins | Commercial kitchens |
The laser line method
Laser levels are the only way to ensure vertical and horizontal plumb when installing small format tiles. By projecting a crosshair grid, you can bypass the irregularities of the mesh and align individual tile chips to a fixed geometric coordinate. Do not trust the edge of the sheet. The edge of the sheet is a liar. It might be cut crooked at the factory. I always snap a chalk line or use a green beam laser. Green is easier to see on wet thin-set than red. Align the center of the sheet to your line. Then work outward. If you find a tile that is crooked on the mesh, cut it out. Tape it back in place manually. It takes five seconds to fix it now and five hours to fix it after the grout dries. Do the math.
For those looking to integrate these tiles into a full room design, consider how they meet the wall. You can find baseboards makeover ideas to elevate your space which help transition from a complex mosaic floor to a clean wall finish. Never let the tile just end. It needs a frame. A good baseboard covers the expansion gap. You need that gap. The house moves. The wood moves. The tile stays still. If they touch, the tile will tent and pop.
Managing the grout joint
Non-sanded grout is required for narrow joints typically found on mosaic sheets to avoid scratching delicate surfaces. The pigment density must be consistent to prevent shading issues in high-moisture areas like showers. When you are cleaning up, do not use a soaking wet sponge. You will wash the pigment right out of the joint. You will end up with splotchy grout. It will look like a zebra. Use a damp sponge. Change your water every 50 square feet. It is a pain in the neck but it is the only way to get a clean finish. If you have old grout that looks terrible, you can check out grout restoration secrets for long-lasting results to bring it back to life. But on a new install, get it right the first time. There are no shortcuts here.
- Check subfloor for 1/8 inch flatness.
- Use C2TE rated thin-set for vertical walls.
- Collapse trowel ridges to prevent air pockets.
- Maintain a 1/4 inch expansion gap at all perimeters.
- Use a rubber grout float at a 45-degree angle.
The expansion gap mystery
Expansion joints are essential components of a tile assembly as per TCNA EJ171 standards. Without these gaps, structural movement will cause localized debonding or compressive stress cracks in the tile field. People think a 1/8 inch gap is a waste of space. It is not. It is insurance. I have seen baseboards installed so tight against the tile that the whole floor buckled in the summer. The heat comes, the moisture rises, and that tile has nowhere to go but up. Use a color-matched 100 percent silicone caulk in the corners. Do not use grout in the corners. Grout is rigid. Silicone is flexible. Rigid things crack when the house settles. Flexible things don’t. It is basic engineering.
“Movement joints are not optional; they are the lungs of the tile system.” – TCNA Installation Guide
If you are working on a bathroom, you might want to see showers with a style trendy ideas for small bathrooms for layout inspiration. Mosaics are great for small spaces because they provide traction. The more grout lines you have, the less you slip. It is about safety as much as it is about looks. A slippery floor is a lawsuit waiting to happen. Use small tiles on the shower pan. Use big tiles on the walls. That is the rule of thumb. It keeps the drainage correct and the maintenance low. Speaking of maintenance, tile cleaning tips for a sparkling bathroom in 2025 will help you keep those hundreds of grout joints looking new. Do not use bleach. It eats the sealer. Use a pH-neutral cleaner. Your floor will thank you for it.