I have spent twenty five years on my knees with a moisture meter and a levels. I have seen things that would make a DIYer cry. Most guys skip the leveling compound. They think the underlayment will hide the dip. It will not. I spent three days grinding concrete on a job last month just so the floor would not click like a castanet. That level of obsession is what you need when you are working on a wet room where baseboards meet tile and moisture is always looking for a way in. When you are dealing with thick PVC baseboards, you are not just a carpenter. You are a chemical engineer and a geometrician.
“A floor is only as good as the subfloor beneath it; deflection is the enemy of every joint.” – Master Flooring Axiom
The geometry of a perfect corner
Mitered corners in a wet room require a precise 45 degree cut on a compound miter saw using a high tooth count blade. You must account for the fact that walls are rarely square, often requiring a 45.5 or 44.5 degree adjustment to ensure the face of the baseboards stays tight against the showers or wall tile. The thickness of the PVC means any slight deviation at the heel of the cut will result in a massive gap at the toe. This is where most people fail. They cut it like wood, but plastic has a different soul.
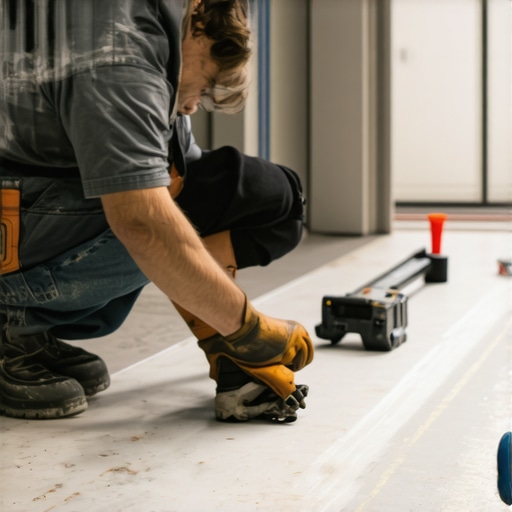
Why your subfloor is lying to you
Before you even touch a saw, you have to look at the transition where the wall meets the floor. In showers and wet rooms, the tile often has a slight pitch toward the drain. If your floor has even a 1/8 inch dip, your thick PVC baseboard will not sit flush. It will rock. I have seen installers try to force it down with trim screws, but PVC has memory. It will eventually pull those screws or crack the grout line. You must grind the high spots or use a self leveling underlayment before the tile goes down. If you missed that window, you are stuck scribing the bottom of the baseboard, which is a nightmare with thick cellular PVC.
Why plastic is not wood
The thermal expansion coefficient of polyvinyl chloride is much higher than pine or oak. While wood moves with humidity, PVC moves with temperature. In a bathroom where the shower turns the room into a sauna, that baseboard is going to grow. If you jam your miters tight without a solvent bond, they will open up the moment the room cools down.
| Material | Moisture Resistance | Expansion Type | Best Adhesive |
|---|---|---|---|
| PVC | 100% | Thermal | PVC Cement/Polyurethane |
| MDF | 0% | Hygroscopic | Wood Glue (Avoid) |
| Solid Oak | Low | Hygroscopic | Wood Glue |
The ghost in the expansion gap
Every wet room needs an expansion gap between the tile and the wall. Most guys think the baseboard is just there to hide a messy tile edge. It is not. It is a structural component of the moisture barrier. When you install thick PVC, you should be back-cutting your miters by about two degrees. This ensures the front edge touches first, leaving a small void in the back for a bead of high grade silicone. This silicone acts as a flexible gasket. If you want to see how this fits into a broader design, look at chic baseboard designs that transform rooms in 2025 for inspiration on scale and proportion.
The 1/8 inch that ruins everything
If your miter is off by just 1/8 of an inch, the eye will find it instantly. Thick PVC creates a deep shadow line. To prevent this, I use a technique called solvent welding. Instead of standard construction adhesive, I use a clear PVC cement on the miter faces. You have about thirty seconds to get it right. Once that chemical bond sets, the two pieces of plastic become one continuous unit. This is essential near showers where water can sit on the floor. A glued wood joint will fail, but a solvent welded PVC joint is forever.
How to cut thick PVC without melting it
PVC is a thermoplastic. If you use a standard 24 tooth framing blade, the friction will melt the plastic as it cuts, leaving a nasty burr and a deformed edge. You need a 10 or 12 inch blade with at least 80 teeth. I prefer a Triple Chip Grind (TCG) tooth geometry. It shears the plastic rather than tearing it. When you make the cut, do not stop halfway through. One smooth, steady motion prevents heat buildup. If you see smoke, you are going too slow. If the edge looks like it was chewed by a dog, your blade is dull or the tooth count is too low.
Integrating with tile and showers
The interface between the baseboard and the tile is where the real work happens. You should never rest the PVC directly on the tile. I use 1/16 inch spacers to lift the baseboard slightly. This allows for a clean bead of silicone to be injected under the board. This prevents capillary action from pulling water up behind the baseboard where it can rot the drywall or the studs. If your grout is looking rough before you start, you might need to check out grout restoration secrets to ensure the foundation is solid.
The chemistry of the bond
For the main run of the board, do not use water based adhesives. They do not stick to PVC. You need a high tack polyurethane adhesive. Apply it in vertical beads, not horizontal loops. Vertical beads allow air to circulate and moisture to drain if it ever gets behind the board. If you are working in a tight space, consider showers with a style for layout ideas that minimize the number of corners you have to miter.
- Check subfloor levelness with a 10 foot straightedge.
- Use a TCG blade with at least 80 teeth for all cuts.
- Solvent weld every miter joint for a waterproof seal.
- Leave a 1/16 inch gap at the floor for silicone.
- Back-cut miters to ensure tight face joints.
Managing the moisture transition
In a wet room, the baseboard acts as the final line of defense. The grout in your tile is porous unless it is epoxy based. Water will travel through it. By using thick PVC, you create a substantial dam. If you are doing a full renovation, you should look at showers that wow to see how modern installers are handling the transition from wet area to dry area.
“Deflection in the subfloor is the primary cause of miter failure in heavy trim applications.” – Structural Flooring Journal
Final adjustments and finishing
Once the baseboard is up and the solvent weld has cured, you will likely have a few micro-gaps if your walls are wavy. Do not use standard wood filler. It will shrink and fall out. Use a white acrylic caulk that is rated for high humidity. Wipe it with a damp rag immediately. If you ever need to clean the area, follow tile cleaning tips for a sparkling bathroom to keep the PVC and the tile looking pristine. Thick PVC baseboards are a lifetime solution if you respect the physics of the material and the reality of the subfloor.