I spent three days grinding concrete on a job last month just so the floor wouldn’t click like a castanet. Most guys skip the leveling compound. They think the underlayment will hide the dip. It won’t. I have seen the same laziness in shower builds where installers think the tile and grout are what keep the water out. They are dead wrong. A shower is a managed hydraulic system, and the corner is where most systems fail. If you do not treat the corner as a structural joint that is subject to movement, your tile will eventually crack and your studs will rot. You need to understand the molecular bond of the membrane to the cement board and how that rubberized skin handles the stress of a house settling. I smell like oak dust and WD-40 most days because I do the hard work that remains hidden behind the finish. This is about making sure your showers remain watertight for thirty years, not just three.
The ghost in the expansion gap
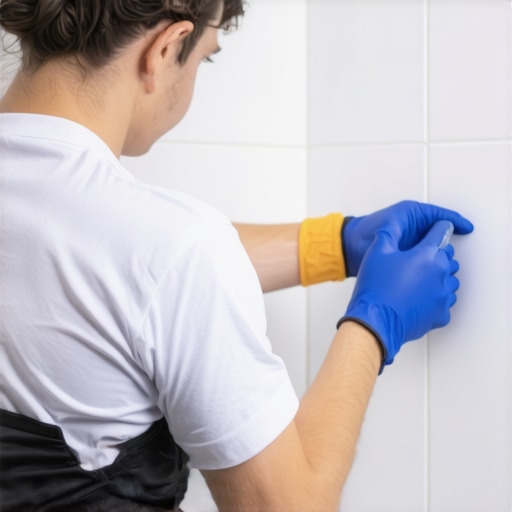
Applying liquid waterproofing to a shower corner involves cleaning the substrate, embedding reinforcing fabric, and applying two distinct coats of elastomeric membrane. This process ensures that structural movement does not result in a fracture that allows water to penetrate the subfloor and rot the wooden framing below. When two planes of cement board meet at a ninety degree angle, you have a cold joint. This joint moves differently on the X, Y, and Z axes. If you just slap some grout in there and hope for the best, the first time the temperature drops or the house settles, that joint will open up. You must bridge that gap with a material that has a high elongation percentage. This is not about aesthetics, it is about engineering a flexible bridge that can withstand the vibration of a heavy person stepping into the pan every morning. I have ripped out enough moldy drywall to know that a pinhole in a corner is all it takes to ruin a first floor ceiling. Check out these showers that wow for inspiration on what a properly waterproofed space can eventually look like once the structural work is done.
Why your subfloor is lying to you
Most installers assume that if a subfloor looks flat, it is ready for tile, but the reality is often a series of micro-dips and peaks. In a shower environment, these imperfections are magnified. If your walls are not plumb and your corners are not square, the liquid membrane will pool in some areas and thin out in others. Last month, I had to explain to a homeowner why their expensive marble was cracking. The previous contractor did not level the subfloor and skipped the corner reinforcement. I had to grind back the thin-set and start over. You cannot fix a bad foundation with a pretty surface. The chemistry of the waterproofing depends on a uniform thickness. If the membrane is too thin, it loses its tensile strength. If it is too thick in a single pass, the top skins over while the bottom stays wet, leading to a gummy mess that will never support the weight of a tile installation. This is why I insist on using a wet film gauge to measure the thickness as I go. It is the only way to be certain.
“A floor is only as good as the subfloor beneath it; deflection is the enemy of every joint.” – Master Flooring Axiom
The chemistry of the rubberized bond
Liquid waterproofing membranes are typically composed of styrene-butadiene rubber or advanced acrylic polymers that form a non-porous skin once cured. These molecules cross-link as the water evaporates from the emulsion, creating a barrier that is impermeable to liquid water but often allows for some vapor transmission. This is a critical distinction. A membrane that is too restrictive can trap moisture behind it, leading to the growth of anaerobic bacteria. When you apply the first coat, you are looking for mechanical adhesion. The liquid must penetrate the pores of the cementitious backer board. This is why I never use a dusty board. I wipe everything down with a damp sponge first. If there is dust, the membrane bonds to the dust, not the board. Once that first layer cures, the second layer chemically bonds to the first, creating a monolithic shield. This is the same logic used in high-end automotive gaskets. You want a single, cohesive unit that moves with the structure without tearing. If you are working on a remodel, you might also be looking at chic baseboard designs for the transition into the bathroom, but remember that the waterproofing must extend past those cosmetic elements.
The 1/8 inch that ruins everything
Precision in the corner requires a gap of approximately 1/8 inch between the wall boards to allow for expansion and the injection of a sealant or membrane. Many people jam the boards tight together, which leaves no room for the waterproofing to actually sit inside the joint. When the wood studs behind the board swell with seasonal humidity, those boards will push against each other and pop the tile right off the wall. I have seen it happen a hundred times. You need to fill that 1/8 inch gap with a high-quality sealant or the liquid membrane itself, reinforced with an alkali-resistant mesh tape. Do not use standard drywall mesh. The high pH of the cement and thin-set will eat through the fiberglass fibers in a matter of months, leaving your corner unprotected. You need the stuff designed for wet environments. While you are thinking about the longevity of your installation, you might consider eco-friendly tile solutions that pair well with these long-lasting waterproofing methods.
Comparing membrane technologies
Not all liquid membranes are created equal, and choosing the wrong one for your climate can be a disaster. In high-humidity areas, some products take forever to cure, which can stall a job for days. You need to look at the solids content and the recommended mil thickness. Here is a breakdown of what I look for when I am stocking my van.
| Feature | Standard Acrylic | Advanced SBR Rubber | High-Performance Hybrid |
|---|---|---|---|
| Cure Time | 24 Hours | 12 Hours | 4 Hours |
| Elongation | 150% | 300% | 400%+ |
| Color Change | No | Yes (Dries Darker) | Yes (Bright Vivid) |
| Crack Isolation | 1/16 inch | 1/8 inch | 1/4 inch |
While most people want the thickest underlayment or the thickest coat of membrane, too much cushion actually causes the locking mechanisms on LVP or the bond of a tile to snap under pressure. This applies to waterproofing too. You want the specified thickness, no more and no less. If you go over the manufacturer’s limit, the membrane becomes a soft, spongy layer that allows the tile to deflect, which will inevitably crack your grout lines.
The checklist for a dry home
Follow these steps to ensure your corner is the strongest part of the shower, not the weakest link. I follow this routine every single time because consistency is the only way to avoid callbacks.
- Vacuum all dust and debris from the corner and the floor-to-wall transition.
- Pre-fill the 1/8 inch gap with a compatible sealant or a heavy bead of the liquid membrane.
- Cut your reinforcing fabric to the exact length of the corner to avoid bunching at the top or bottom.
- Apply a liberal coat of liquid membrane six inches out from the corner on both sides.
- Embed the fabric into the wet membrane using a flat trowel to remove all air bubbles and wrinkles.
- Apply a second coat of membrane over the fabric immediately to saturate the fibers.
- Wait for the color change to indicate the first stage of curing before applying the final heavy coat.
Once the corner is secure, you can focus on the rest of the walls. If you are refreshing an old space instead of building new, you might find these grout restoration secrets helpful for those areas that do not require a full tear-out.
Integrating baseboards and tile
The transition from the waterproofed shower to the rest of the bathroom is where most amateurs lose the plot. You need to ensure that the waterproofing extends out onto the bathroom floor at least 12 inches to catch any splashes. This area is often where baseboards meet the tile. If water gets behind the baseboards, it will wick into the drywall. I always suggest a bead of 100% silicone where the tile floor meets the wall, even if you are installing decorative trim over it. For ideas on how to finish these areas, look into baseboards makeover ideas that can handle the moisture levels of a bathroom. It is also a good idea to know how to refresh grout because the perimeter joints are usually the first to show wear and tear from cleaning products.
“The waterproofing membrane shall be continuous and must be integrated with the drain assembly to ensure a watertight system.” – TCNA Handbook for Ceramic, Glass, and Stone Tile Installation
The final seal
After your liquid membrane has cured for the full duration recommended by the manufacturer, you should perform a flood test. Plug the drain and fill the shower pan with two inches of water. Mark the water line. If that line drops after 24 hours, you have a leak. It is better to find that out now than after you have laid $2,000 worth of designer tile. Most guys are too lazy to do a flood test. They just want to get paid and get out. But a master installer knows that the test is the only way to prove the integrity of the work. Once the test passes, you can proceed with tiling, and later, follow these tile cleaning tips to keep the finished product looking brand new. Remember, a dry house is a healthy house. Do not take shortcuts in the corners. If you have questions about specific products or need a consultation on a complex layout, feel free to contact us for expert guidance. Keep your levels calibrated and your moisture meters handy. The work you do in the corners defines the quality of the entire build.