The myth of the ninety degree corner
Cutting baseboard miters on out of square walls requires a digital protractor to find the actual angle and then dividing that number by two for the saw setting. Most residential walls are between 88 and 92 degrees. A standard 45 degree cut will fail because the drywall mud build up at the corner creates a deviation from the geometric ideal. You must measure the corner with a dedicated tool rather than assuming the house was built perfectly.
Most guys skip the leveling compound. They think the underlayment will hide the dip. It won’t. I spent three days grinding concrete on a job last month just so the floor wouldn’t click like a castanet. That same philosophy applies to your trim. If the floor is not level, your baseboards will never sit flush, and your miters will look like a hack job. I have seen fifteen thousand dollar wide plank walnut floors ruined because the installer ignored the subfloor humidity and the flatness of the slab. When the floor moves, the baseboard moves. When the baseboard moves, those pretty miters you spent hours on will open up like a hungry shark. You have to treat the wall and the floor as a single engineering unit. If the subfloor is undulating, your baseboard will follow that wave, making it impossible to get a tight fit on the vertical plane of the miter. This is not just about aesthetics. It is about the structural integrity of the finish work.
Why your subfloor is lying to you
A subfloor that is not flat within three sixteenths of an inch over a ten foot radius will force baseboards to twist during installation. This torsion pulls the miter joint apart at the top or the bottom. You must use a straightedge to identify high spots in the concrete or plywood before the first piece of trim is cut. Professional installers use self-leveling underlayment to create a datum line that ensures the baseboard sits at a true ninety degrees to the floor. When you are dealing with chic baseboard designs that transform rooms in 2025, you cannot afford to have the floor falling away from the wall. The physics of the wood will not allow it. Wood is a hygroscopic material. It wants to move. If you pin a piece of trim against a floor that is sinking, the tension will eventually snap the adhesive bond or pull the nails through the drywall studs.
“A floor is only as good as the subfloor beneath it; deflection is the enemy of every joint.” – Master Flooring Axiom
The chemical composition of your subfloor matters too. If you are working over a gypsum based underlayment, the dust can interfere with the bond of your baseboard adhesive. You need to vacuum and sometimes prime the bottom of the wall to ensure that the polyurethane construction adhesive actually bites. This is the difference between a floor that lasts decades and one that starts rattling after the first winter heating season.
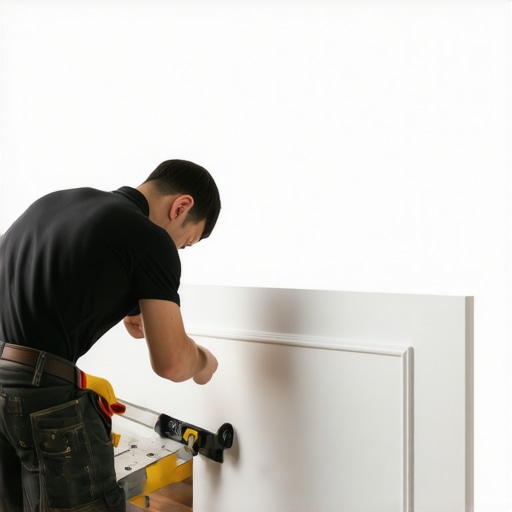
The geometry of a bad wall
Drywall corners are rarely square because the corner bead and the multiple layers of joint compound create a hump that pushes the baseboard away from the stud. To compensate, you must use a back cut on your miter saw, which involves tilting the blade slightly to remove material from the rear of the trim. This allows the front edge to make contact first. You are effectively creating a knife edge that can be compressed into the corner for a tighter fit. When looking for baseboards makeover ideas to elevate your space, remember that the most expensive wood in the world looks cheap if the corners have gaps wide enough to fit a nickel. The geometry is simple but the execution is hard. You are dealing with three axes of movement. The wall might be leaning in or out, the corner might be obtuse or acute, and the floor might be sloped. A digital angle finder is the only way to navigate this three dimensional mess.
| Tool Type | Precision Rating | Best Use Case |
|---|---|---|
| Plastic Miter Prototype | Low | DIY projects with painted trim |
| Digital Protractor | High | Stain grade hardwood installations |
| Manual T-Bevel | Medium | Transferring angles to the saw table |
| Laser Level | Very High | Establishing the datum line for long runs |
The secret of the back cut
The back cut is a technique where the saw blade is set at a one or two degree bevel away from the face of the board. This removes the bulk of the material from the hidden part of the joint, ensuring that the visible leading edge is the only part that needs to touch the corresponding piece. This is vital when the wall corner is filled with excess mud. If you try to force a full thickness 45 degree cut into a mudded corner, the back of the board will hit the wall first, leaving a massive gap at the front. By thinning the contact point, you allow the wood to flex slightly. This flex is what gives you that seamless look. It is not about being perfect. It is about being smart with the physics of the material. Solid oak has a high Janka rating, meaning it does not compress easily. If you are working with soft pine, you have more leeway, but with hardwoods, the back cut is mandatory.
Coping versus mitering for internal corners
Coping is the process of cutting the profile of one baseboard into the end of another so they overlap rather than meeting at a miter. This is the superior method for inside corners because it allows for the expansion and contraction of the wood without opening the joint. When the wood shrinks in the winter, a coped joint simply slides a fraction of a millimeter. A mitered joint, however, will pull apart and show the raw wood underneath. This is especially true in regions with high humidity fluctuations. If you are also looking into grout restoration secrets for long lasting results, you know that movement is the enemy of any rigid material. Whether it is grout or a wood joint, if it cannot handle the house settling, it will fail. Coping takes more time and requires a steady hand with a coping saw or a specialized grinding disc, but the results are permanent.
- Always measure the wall angle with a digital protractor before cutting.
- Back cut the miter by 1 to 2 degrees to ensure front face contact.
- Use a high quality polyurethane adhesive in addition to finish nails.
- Acclimate the trim in the room for at least 72 hours before installation.
- Test your cuts on scrap pieces of the exact same profile.
The one eighth inch that ruins everything
Most people want the thickest underlayment possible for their floors, but too much cushion actually causes the locking mechanisms on LVP to snap and baseboards to pull away. If the floor has too much vertical deflection, the baseboard cannot be nailed tightly to the wall without risking the floor buckling. You need a firm base. That one eighth of an inch of extra squish might feel good on your feet, but it is a death sentence for your trim. When the floor sinks under a footstep, it pulls at the baseboard. If the baseboard is nailed into the studs, the nails will eventually enlarge the holes in the wood, leading to squeaks and loose boards. You have to find the balance between comfort and structural rigidity. This is why I always recommend a high density underlayment with a high compression strength. It protects the floor and the trim simultaneously.
“Wood is a hygroscopic material, and its dimensions change with the absorption and desorption of moisture.” – NWFA Technical Standards
Why moisture destroys your joints
Wood cells act like tiny sponges that expand when they absorb water vapor from the air. If you install baseboards that have been stored in a damp garage, they will shrink once the air conditioning or heater is turned on. This shrinkage is what causes miters to fail. You must use a moisture meter to check that the wood is within 2 percent of the subfloor moisture content. This is not a suggestion. It is a requirement for professional work. In places with swampy humidity, you might need to use engineered cores for your trim because they are more stable than solid wood. If the moisture levels are not controlled, the wood will cup and twist, pulling your carefully cut miters apart regardless of how many nails you use. This is why acclimation is the most ignored yet most vital step in the process.
The physics of the expansion gap
Floating floors require a gap at the perimeter to allow for movement, and the baseboard must cover this gap without being pinned to the floor. If you nail the baseboard through the flooring and into the subfloor, you have created a dead point. The floor will eventually buckle or the joints will separate because it has nowhere to go. You must nail the baseboard only to the wall studs. This allows the floor to slide underneath the trim. It is a common mistake to try and close every gap with caulk or nails. Some gaps are there for a reason. The expansion gap is the lifeblood of a floating floor system. Without it, the floor will eventually fail, and it will take your baseboards with it when it does. Precision in cutting the miters is only half the battle. The other half is understanding how the whole system breathes.