I spent three days grinding concrete on a job last month just so the floor wouldn’t click like a castanet. Most guys skip the leveling compound. They think the underlayment will hide the dip. It won’t. I apply that same philosophy to the bathroom. Last week, I walked into a master suite where the homeowner had replaced their caulk three times in six months. They were using the expensive stuff, the high-end silicone that promises a lifetime of protection. Yet, there it was, pulling away from the tub rim like a peeling sunburn. The homeowner was ready to sue the manufacturer. I told them to save their lawyer fees. The caulk didn’t fail because it was bad. It failed because the physics of the room were ignored. Most installers treat caulk like a cosmetic finish. I treat it like a structural gasket. If you don’t account for the deflection of the joists and the chemistry of the substrate, you are just wasting a tube of goop. My name is on every job I touch, and I don’t like call-backs. Here is the reality of why your bathroom seal is failing and how we stop the cycle of rot.
The structural lie of the empty bathtub
Bathtub caulk fails because installers apply it to an empty tub which lacks the weight of a full water load. When you fill the tub and step inside, the weight causes the tub to settle and the joists to deflect. This movement stretches the caulk beyond its elastic limit.
Think about the math. A standard bathtub holds about 40 to 60 gallons of water. Water weighs roughly 8.3 pounds per gallon. Add a 180-pound human and you are looking at nearly 600 pounds of downward force hitting the subfloor in a concentrated area. If your subfloor has even a 1/16-inch dip, that tub is going to move. If you applied your caulk while the tub was empty and light, that 1/16-inch drop is a massive mechanical stress on a fresh bead of silicone. It pulls the material away from the tile before it has even reached full molecular cross-linking. I always tell people to fill the tub with lukewarm water before they even crack the seal on the caulk tube. You want the tub at its maximum displacement. You leave that water in there for at least twenty-four hours while the caulk cures. This ensures that the caulk is in a relaxed state when the tub is heavy. When the tub is empty and rises back up, the caulk compresses. Silicone handles compression much better than it handles tension. If you want showers that wow modern designs for 2025 to actually stay waterproof, you have to respect the gravity of the situation. I have seen guys try to shim tubs with scrap wood. It never works. The wood compresses or rots. You need a rock-solid bed of mortar or a perfectly level subfloor. Without it, you are just waiting for a leak.
“A floor is only as good as the subfloor beneath it; deflection is the enemy of every joint.” – Master Flooring Axiom
Chemical warfare in the shower joint
Caulk adhesion fails due to residual soap scum and mineral deposits that prevent the silicone from wetting the surface. Modern cleaners often leave behind a microscopic film of surfactants or oils. These contaminants act as a release agent, ensuring that the new caulk never actually touches the tub.
Most people think a quick wipe with a damp rag is enough. It is not. You have to understand the molecular reality of the surface. Porcelain and ceramic are high-energy surfaces that want to bond, but they are often coated in body oils, hair conditioner, and calcium carbonate from hard water. If you don’t use a dedicated solvent like denatured alcohol or 100 percent isopropyl alcohol, you are bonding your caulk to a layer of filth. I have seen DIYers use mineral spirits. That is a disaster. Mineral spirits leave an oily residue behind. If you put silicone over an oily residue, it will slide right off. You need a surface that is chemically clean. I use a two-step process. First, I use a mechanical scraper to get every last bit of the old stuff off. Then, I scrub with a stiff brush and an abrasive cleaner to kill the soap scum. Finally, I do three passes with denatured alcohol. If the rag doesn’t come back white, the surface isn’t ready. This is especially true when dealing with grout restoration secrets for long-lasting results. If you are caulking a change of plane where tile meets the tub, that grout must be bone dry. If there is moisture trapped in the grout pores, the caulk will trap it. That moisture eventually turns into mold, which eats the bond from the inside out. You see those black spots under the clear silicone? That is the sound of your seal failing.
The 1/8 inch that ruins everything
The size of the gap determines the longevity of the seal because caulk requires a specific volume of material to handle expansion. If the gap is too thin, the material cannot stretch. If the gap is too wide, the weight of the bead causes it to sag.
I see it all the time. People try to jam a tiny sliver of caulk into a tight joint. They think it looks cleaner. In reality, they are setting themselves up for a break. Every material has an elongation rating. Quality 100 percent silicone can usually handle 25 percent movement. If your joint is only 1/16 of an inch wide, a 1/32-inch movement is a 50 percent stretch. The caulk will snap. You need a minimum of an 1/8-inch gap to allow the material to flex without tearing. This is why the transition from the tub to the floor or the tub to the wall is so sensitive. If the house settles, that gap changes. I use backer rod in any gap larger than 1/4 inch. The backer rod prevents three-sided adhesion. You only want the caulk to stick to the tub and the tile. If it sticks to the back of the wall as well, it loses its ability to stretch like a rubber band. It becomes a rigid plug. Rigid plugs crack. When we talk about tile cleaning tips for a sparkling bathroom in 2025, we often focus on the surface, but the integrity of these expansion joints is what keeps the water out of your crawlspace. I have seen entire subfloors rotted out because someone thought a thin smear of caulk was enough to bridge a structural gap.
| Material Type | Elasticity Rating | Cure Time | Best Use Case |
|---|---|---|---|
| 100% Silicone | High (25-50%) | 24-48 Hours | Non-porous surfaces like tubs and glass |
| Siliconized Latex | Medium (12%) | 4-12 Hours | Baseboards and dry area trim |
| Polyurethane | Very High | 72 Hours | High-traffic floor expansion joints |
| Acrylic Caulk | Low | 2 Hours | Paintable interior molding only |
Why your subfloor is lying to you
Subfloor deflection occurs when the floor joists are undersized or the subfloor material is too thin for the weight of the tile and tub. Even if the floor feels solid to your feet, the concentrated weight of a filled bathtub creates a microscopic bow. This bow pulls the tub away from the wall tile.
I don’t trust a floor just because it doesn’t creak. I look at the span charts. If you have 2×8 joists spanning 12 feet, that floor is a trampoline. You can put the best tile in the world on it, but the grout will crack and the caulk will pull. I have spent years telling homeowners that their bathroom remodel needs to start in the basement. We need to sister those joists or add a mid-span beam. If the tub can move independently of the walls, no caulk in the world will save you. This is why we see so many issues where the tub meets the chic baseboard designs that transform rooms in 2025. If the floor drops under the weight of the water, the baseboard stays put on the wall, and the gap opens up. It looks terrible and it lets moisture into the plate of the wall. I always check for levelness across the entire footprint of the tub. If I find a dip, I pour a self-leveling underlayment. I don’t care if it takes an extra day. I want that tub sitting on a dead-flat, non-compressible surface. If the foundation is moving, the finishes are just a countdown to failure.
- Check joist span and L/360 deflection ratings before installing heavy tubs.
- Use a moisture meter to ensure the subfloor is below 12 percent moisture content.
- Verify that the tub flange is properly secured to the studs with stainless steel screws.
- Apply a waterproof membrane behind the tile that overlaps the tub flange.
- Ensure the tile is installed with a 1/8 inch gap above the tub rim for the caulk bead.
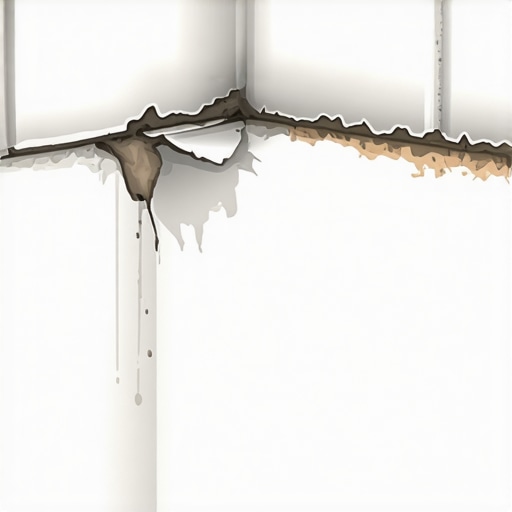
The ghost in the expansion gap
Expansion gaps are often mistakenly filled with rigid grout, which inevitably cracks as the tub and wall expand at different rates. This creates a hidden channel where water seeps behind the tub. The only solution is a 100 percent silicone transition that matches the grout color.
Builders love to grout the joint where the tile meets the tub. It looks great for a week. Then the house breathes. Temperature changes cause the acrylic or cast iron tub to expand. The ceramic tile stays relatively stable. The grout, which has zero flexibility, shatters. You end up with a hairline crack that sucks water in through capillary action. It is a ghost because you can’t always see the leak, but the mold behind the wall knows it is there. I always rake out the grout at those change-of-plane locations. I want a clean, deep channel for the silicone. Matching the color of the grout is easy now. Most manufacturers make a color-matched silicone. This maintains the aesthetic while providing the necessary movement capability. If you are looking at baseboards makeover ideas to elevate your space, remember that the same rule applies. Where the baseboard meets the floor, you need a flexible seal, not a rigid one. The house is a living thing. It moves. It settles. It reacts to the seasons. If you fight that movement with rigid materials, you lose every time.
“A floor is only as good as the subfloor beneath it; deflection is the enemy of every joint.” – Master Flooring Axiom
Regional climate factors and adhesive cure
Humidity and temperature significantly alter the curing process of acetoxy and neutral cure silicones. In humid environments, the moisture in the air speeds up the skin-over time, which can lead to a weak bond if the installer is too slow.
If you are in a swampy area, the air is thick with moisture. Silicone needs that moisture to cure, but if it cures too fast, it doesn’t have time to bite into the surface of the tub. You get a surface skin but no root. Conversely, in a dry climate, the caulk can stay tacky for days, picking up dust and hair. I always monitor the ambient temperature. If the room is below 50 degrees, the chemical reaction slows to a crawl. If it is too hot, the silicone becomes runny and difficult to tool. I have seen guys use dish soap and water on their finger to smooth the bead. Stop doing that. The soap gets between the caulk and the tub, killing the bond at the edges. Use a dry tool or a gloved finger. You want maximum contact. If you are working on showers with a style trendy ideas for small bathrooms, space is tight and ventilation is often poor. This keeps the humidity high and extends the cure time. Don’t let the homeowner use that shower for at least forty-eight hours. If they steam it up too early, the caulk will blush and fail. I tell them to go to a gym or use the other bathroom. My reputation is worth more than their convenience. If they want a floor that lasts, they have to follow the physics of the cure.