
The subfloor secret that prevents shower wall failure
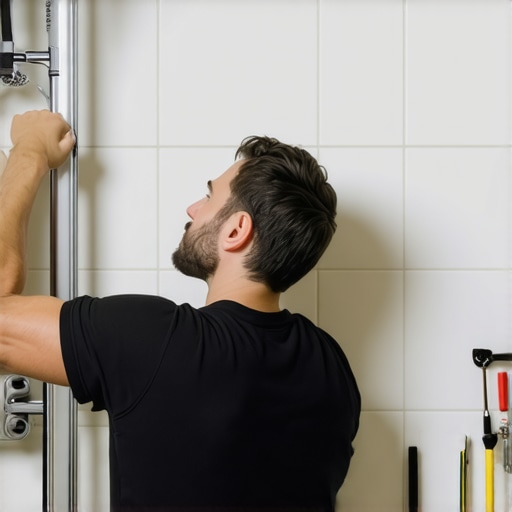
Installing heavy grab bars requires structural blocking or specialized toggles because ceramic tile and cement board cannot support shear force alone. Relying on the tile surface leads to cracked grout and structural failure under the weight of an adult. Most guys skip the leveling compound. They think the underlayment will hide the dip. It won’t. I spent three days grinding concrete on a job last month just so the floor wouldn’t click like a castanet. That same laziness applies to shower walls. I once walked into a bathroom where a homeowner had used plastic expansion anchors to mount a rail. The first time they slipped, the rail didn’t just come off the wall. It took four pieces of custom-cut porcelain with it and left a hole that exposed the raw 2×4 studs to a gallon of water. The rot had already started by the time they called me. You cannot trust the veneer. You have to trust the skeleton. When you are looking at showers that wow modern designs for 2025, you must realize that the beauty is secondary to the pull-out strength of your fasteners. A grab bar is a safety device, not a towel rack. It must withstand a minimum of 250 pounds of force. In reality, it needs to handle a dynamic load of a 200 pound person falling. That force is massive. It will rip through drywall like wet paper. It will snap brittle ceramic. Only the wood or a specialized steel toggle can stop it.
“A floor is only as good as the subfloor beneath it; deflection is the enemy of every joint.” – Master Flooring Axiom
The reason shower walls fail under dynamic pressure
Shower wall failure occurs when lateral tension exceeds the tensile strength of the tile adhesive or the compressive strength of the backer board. When a user pulls on a grab bar, the force is distributed across the mounting plate, but the screws bear the shear stress. Most people think the tile is the strength. It is not. Tile is essentially a thin sheet of glass. It is hard but brittle. If the screw moves even a fraction of a millimeter, the tile will crack. This is why the gap between the screw and the tile must be precise. If the screw touches the edge of the tile hole, the vibration of the drill or the weight of the user will cause a spider crack. That crack allows water to enter the wall cavity. Once water is in, the grout fails. You should check out grout restoration secrets for long lasting results to see how moisture destroys the bond. The chemistry of the wall is complex. You have the studs, then the vapor barrier, then the cementitious backer unit, then the thin-set, and finally the tile. Every layer has a different density. When you drive a screw through them, you are connecting disparate materials with different expansion rates. This is why a solid connection to the framing is the only way to ensure the rail never moves.
The physics of the diamond bit and hole creation
Drilling through porcelain tile requires diamond-encrusted hole saws and constant water lubrication to manage the thermal energy generated during the abrasion process. If you use a standard carbide bit on modern porcelain, you will burn the bit in ten seconds. Porcelain is fired at higher temperatures than ceramic, making it much denser. You need to keep the bit cool. I use a spray bottle and a slow RPM. If the bit gets too hot, the metal expands and the diamonds flake off. The hole must be slightly larger than the screw. This prevents the screw from binding against the tile. I prefer a 1/4 inch diamond bit for a #10 screw. This gives you a tiny bit of wiggle room. You want the screw to pass through the tile without touching it, sinking deep into the wood behind. If you are working on showers with a style trendy ideas for small bathrooms, space is tight. You might be tempted to rush. Don’t. A single slipped drill bit will ruin a tile that might be part of a discontinued batch. I always use a template. A piece of scrap plywood with a hole in it can be taped to the wall. This keeps the bit from walking across the polished surface. It is a simple trick that saves thousands in repairs.
| Fastener Type | Substrate Material | Maximum Load Rating | Failure Mechanism |
|---|---|---|---|
| #10 Stainless Screw | 2×4 Douglas Fir | 500 lbs | Fastener Shear |
| Winged Toggle Bolt | 1/2 Inch Cement Board | 150 lbs | Board Fracture |
| Plastic Plug Anchor | Ceramic Tile | 30 lbs | Total Pull-out |
| Structural Lag Bolt | Double Blocking | 800 lbs | None |
Why blocking remains the only structural truth
Solid wood blocking installed between wall studs provides the necessary anchorage for safety rails by creating a continuous load path. If you are building a new shower, you have no excuse. You install 2×10 blocks between the studs at the height where the grab bar will go. I use heavy duty deck screws to secure the blocking. This creates a target that you cannot miss. Even if the bar position shifts an inch, you still hit solid wood. For a retrofit where the walls are already closed, life gets harder. You have to use a stud finder. But a stud finder often struggles through thick tile and cement board. I use a neodymium magnet to find the screws in the backer board. That tells me exactly where the studs are. If there is no stud where the bar needs to go, you must use a specialized hollow wall anchor designed for grab bars. These are not your hardware store toggles. These are heavy gauge steel plates that flip open behind the backer board. They are rated for high weight, but they still rely on the strength of the board itself. If the board is old and water-damaged, it will fail. You should always check the integrity of the wall. If the grout is refreshed without replacing it but the underlying board is soft, the grab bar is a trap. It gives a false sense of security until it rips out.
“All surfaces must be structurally sound and free of any contaminants that might inhibit a bond between the substrate and the tile.” – TCNA Standards Handbook
The chemistry of the waterproof seal
Waterproofing grab bar penetrations involves 100 percent silicone sealant and compression gaskets to prevent capillary action from drawing moisture into the wall cavity. Every hole you drill is a potential leak. You must fill the hole with silicone before you drive the screw. This creates a plug. Then, you put a bead of silicone around the base of the grab bar flange. But here is the secret. Leave the bottom of the flange open. If you seal the entire circle, any moisture that gets in can never get out. It will sit there and rot the screw. By leaving a small weep hole at the bottom, you let the wall breathe. Use 100 percent silicone, never acrylic caulk. Acrylic will shrink and crack within a year. Silicone stays flexible. It handles the movement of the wall. If you are also updating the floor, look at baseboards makeover ideas to elevate your space to ensure the entire room is watertight. The transition from the wall to the floor is where most leaks happen. A grab bar leak is insidious. It happens behind the wall where you can’t see it. By the time you see a stain on the ceiling below, the damage is done. The studs are black with mold. The insulation is a sponge. I’ve seen it happen in six months on a poorly sealed job in humid environments like New Orleans or Miami.
Regional moisture impacts on shower integrity
Regional humidity levels dictate the evaporation rate of moisture trapped behind tile assemblies, necessitating different vapor barrier strategies. In the swampy heat of Houston, a shower wall stays wet. The humidity in the air prevents the wall from drying out through the grout lines. In these areas, a vapor barrier behind the backer board is non-negotiable. If you don’t have one, and you drill a hole for a grab bar, you are inviting disaster. In the dry heat of Phoenix, the wood studs tend to shrink. This can cause the screws in your grab bar to loosen over time. I always recommend checking the torque on your grab bar screws once a year in desert climates. The wood pulls away from the fastener as it loses its internal moisture. If the rail feels even slightly loose, it is because the wood has retreated. You might need to go to a larger diameter screw to re-establish the grip. This is the reality of building with natural materials. Wood moves. Tile does not. The fastener is caught in the middle. If you keep the tile cleaning tips for a sparkling bathroom in 2025 in mind, you will notice these small changes early. A clean shower is easier to inspect.
- Locate studs with a high-density sensor or magnets.
- Mark the tile with masking tape to prevent bit wander.
- Lubricate the diamond bit with a continuous water stream.
- Vacuum the dust out of the hole to ensure adhesive bond.
- Inject 100 percent silicone into the hole before the screw.
- Hand-tighten the screws to avoid cracking the tile.
Maintenance of the grout and tile interface
Maintaining the interface between grab bar flanges and grout lines requires annual inspections for hairline fractures or sealant degradation. The grout is the weakest link. Even if your installation is perfect, the house will settle. When the house settles, the shower moves. The grab bar, being anchored to the studs, moves with the frame. The tile, being bonded to the backer board, might move differently. This differential movement creates stress. If you see the grout cracking around the bar, you need to act. Don’t just smear more grout on it. Grout is not waterproof. You need to remove the old sealant, clean the area with denatured alcohol, and apply fresh silicone. This is the only way to keep the water out. If you are looking for eco-friendly tile solutions for sustainable homes in 2025, remember that longevity is the most sustainable choice. A shower that lasts fifty years is better for the planet than one that needs to be ripped out in five because of a rotten stud. Take the time to do it right. Use stainless steel hardware. Never use zinc-plated screws. They will rust in the high-humidity environment of a shower. Rust expands, and expanding metal will shatter your tile from the inside out. It is a slow-motion explosion that ruins beautiful work. Stick to the standards. Don’t cut corners on the anchors. Your safety depends on the invisible work behind the porcelain.