
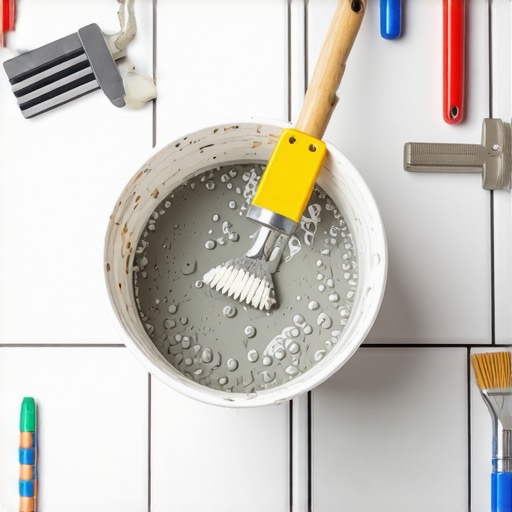
Most guys skip the leveling compound. They think the underlayment will hide the dip. It won’t. I spent three days grinding concrete on a job last month just so the floor wouldn’t click like a castanet, and that same level of obsessive prep is exactly what you need when you are moving from the floor to the walls. If your thinset is too runny, your tiles will sag and drift. If it is too thick, you will never get the proper coverage, and your beautiful ceramic will eventually pop off the wall like a cheap sticker. I have spent twenty five years with my hands in a bucket, and I can tell you that the chemistry of your mortar is more important than the pattern of your tile. We are talking about a structural bond that has to fight gravity every single second of its life.
The subfloor secret that ruins tile
To achieve the perfect thinset consistency for wall tiles you must achieve a heavy peanut butter texture that stays on a trowel without dripping. This involves specific water ratios, a five minute slaking period, and high shear mixing to activate the polymers and ensure vertical grab. Most installers fail because they treat mortar like a recipe rather than a chemical reaction. When you are working on showers, the margin for error is zero. You are dealing with hydrostatic pressure, heat expansion, and the sheer weight of the stone or ceramic. If the subfloor or the wall substrate is not perfectly flat, your thinset will have to work harder to fill those voids. I have seen guys try to use thinset as a leveler. That is a recipe for disaster. Thinset is meant to be a thin bond coat, not a structural filler. When you build it up too thick, it shrinks as the water evaporates. That shrinkage creates tension. That tension causes cracks. In my years on the job, I have learned that the bond begins at the molecular level where the Portland cement crystals grow into the pores of the tile and the substrate.
“A floor is only as good as the subfloor beneath it; deflection is the enemy of every joint.” – Master Flooring Axiom
The chemistry of the vertical bond
Modified thinset contains liquid latex or dry polymer additives that increase the bond strength and provide the flexibility needed for wall applications. These polymers allow the mortar to resist the downward pull of gravity while the cementitious components hydrate and harden over twenty four hours. When you mix your bag, you are not just getting things wet. You are initiating a process called hydration. Water molecules react with the calcium silicates in the cement. This creates a crystalline structure. If you add too much water, those crystals are too far apart. The bond is weak. If you add too little, the hydration is incomplete. The mortar becomes brittle. For walls, we usually look for an ANSI A118.4 or A118.15 classification. These are high performance mortars. They have a high polymer content. This is what gives the thinset its creamy, sticky nature. It feels different than floor mortar. It has more tack. It grips. When you push a tile into it, you should feel a suction. That suction is the air being displaced and the polymers grabbing the back of the tile. This is especially vital when working on showers with a style that require precision alignment. You cannot have tiles slipping even a sixteenth of an inch once they are set.
Why water always goes first
Adding water to the bucket before the powder is the only way to ensure a lump free mix and prevent dry pockets at the bottom. This method allows the powder to saturate evenly as it is introduced, reducing the physical strain on the mixing paddle and ensuring chemical consistency. I see rookies do it backwards all the time. They dump a bag in and then pour water on top. Then they spend twenty minutes fighting a dry ring at the bottom of the bucket. That dry ring is wasted material and a source of lumps. Lumps are the enemy of a flat wall. If a lump gets behind a large format tile, it creates a high point. You press on one side, the other side kicks out. Now you have lippage. You cannot fix lippage easily once the set begins. You want a clean, five gallon bucket. Use cool, clean water. Do not use water from a hose that has been sitting in the sun. Warm water accelerates the set time too fast. You will be fighting the bucket within fifteen minutes. Start with about three quarters of the water the bag calls for. You can always add more, but taking it out is impossible once the powder is in.
The ten minute wait that saves the job
Slaking is the mandatory rest period after the initial mix where the dry polymers and chemicals fully hydrate before a final brief stir. Skipping this five to ten minute window results in a mortar that loses its stickiness and hardens prematurely in the bucket. This is the step everyone wants to skip. They are in a hurry. They want to get the tile on the wall. But if you skip slaking, the chemicals in the thinset do not fully activate. You will finish mixing and the bucket will look great. Five minutes later, it will be stiff as a rock. You will be tempted to add more water to loosen it up. This is called re-tempering. It is a sin in the tile world. Adding water after the initial set breaks the chemical bonds. It ruins the strength of the mortar. You might as well be using mud. Let it sit. Let the chemistry work. After the ten minutes, give it a quick spin with the mixer. It will turn back into that creamy peanut butter consistency. That is the only way to ensure it stays workable for the full pot life mentioned on the bag.
| Mortar Type | Primary Benefit | Best Application | Mix Ratio (Approx) |
|---|---|---|---|
| Unmodified | Cost effective, stable | Over cement board | 5-6 qts per 50lbs |
| Modified (Polymer) | High bond, flexible | Large format wall tile | 5.5-6.5 qts per 50lbs |
| Large Heavy Tile (LHT) | Non-sag, supports weight | Heavy stone walls | 5-5.5 qts per 50lbs |
Peanut butter and the notch test
The perfect thinset consistency for walls should mimic thick, creamy peanut butter that holds a sharp ridge when combed with a notched trowel. It must be stiff enough to support the weight of the tile but fluid enough to collapse and provide full coverage when pressed. If the ridges slump or flatten out on their own, the mix is too thin. If the ridges break or look furry, it is too thick. When you are working around baseboards or finishing an edge, the consistency determines how clean your lines are. You need to pull the trowel at a consistent forty five degree angle. For wall tiles, I often recommend a quarter inch by three eighths inch square notch trowel. This gives enough depth for the mortar to grab but not so much that it oozes out of the joints. If you are doing tile cleaning later, you will thank yourself for not having thinset squeezed into every grout line. Clean joints are the sign of a pro. Messy joints are the sign of a hack who didn’t mix his mud right.
The physics of suction and vertical grab
Gravity is a constant force. When you place a tile on a vertical surface, the weight of the tile wants to shear the bond. Thinset is designed to resist this through suction. If your mix is too dry, there is no suction. The tile will just fall off. If it is too wet, the tile will slide down the wall. This is why non-sag mortars were invented. They have additives that create a thixotropic effect. The mortar is fluid when you move it with a trowel, but it becomes stiff the moment you stop. This allows you to set a heavy tile and have it stay exactly where you put it. This is essential when you are trying to align patterns or work with intricate showers designs. I once saw a guy try to set twelve by twenty four inch tiles with cheap, runny thinset. By the time he reached the third row, the bottom row had slid down an inch. He had to tear the whole thing down. It was a fifteen hundred dollar mistake. He should have used an LHT (Large Heavy Tile) mortar and mixed it to a stiff peak.
Mixing equipment checklist
- High torque, low RPM drill mixer
- Spiral mixing paddle designed for thinset
- Two clean five gallon buckets (one for mixing, one for water)
- Margin trowel for scraping the bucket sides
- Accurate measuring cup for water
- Microfiber rag for cleaning the bucket rim
Regional climate and pot life
The weather in your area changes how you mix. If you are in the humid heat of Florida, your thinset will skin over fast. The surface dries out while the middle is still wet. This prevents a good bond. You might need to mix in smaller batches. If you are in the dry air of Arizona, the water will evaporate out of the bucket before you can use it. You might need to use a slightly wetter mix or keep the bucket covered with a damp towel. I always tell people to watch the bucket, not the clock. The bag might say it has a four hour pot life, but in ninety degree heat, you might only get forty five minutes. Once the thinset starts to form a crust or feels gritty, throw it out. Do not try to save it. The cost of a new bag of thinset is nothing compared to the cost of replacing a failed wall. This is especially true when working near chic baseboard designs where precision is paramount. You want every element to be perfect.
The importance of back buttering
Even with a perfect mix, you should still back butter your wall tiles. This involves spreading a thin, flat layer of mortar onto the back of the tile before you set it. This ensures one hundred percent coverage. It fills any voids in the tile texture. For wall applications, TCNA standards require at least eighty percent coverage in dry areas and ninety five percent in wet areas like showers. You cannot hit those numbers without a good mix and back buttering. If you leave air pockets behind the tile, you are creating weak spots. In a shower, those pockets can collect moisture. This leads to mold, mildew, and eventual bond failure. When I am done with a wall, I want it to be a solid, monolithic structure. I want it to last fifty years, not five. If you are looking to update your space, consider looking into baseboards makeover ideas to complement your new tile work. The transition between the floor and the wall is where the real craftsmanship shows.
“Consistency is the soul of the bond; without it, the stone is just a weight waiting to fall.” – Master Flooring Axiom
The final verification of the mix
Before you commit to the wall, do a smear test. Take a scrap piece of tile. Apply your thinset to the wall. Press the tile in. Pull it back off. Look at the back of the tile. Is it completely covered in mortar? Are the ridges collapsed? If you see dry spots on the tile or ridges that are still standing tall, your mix is too dry or your trowel is too small. If the mortar is oozing out and the tile feels like it is floating, your mix is too wet. This simple ten second test will tell you everything you need to know. It is the difference between a job that stays and a job that fails. Once you have the consistency dialed in, keep your tools clean. Dried thinset on your trowel will ruin the ridges of your next batch. Keep a bucket of water and a sponge handy. A clean pro is a fast pro. And a fast pro with the right mix is the one who gets the referrals. If you ever have issues with old installations, you can learn about how to refresh grout without replacing it to keep things looking new. But for new work, start with the bucket. It all starts in the bucket.