
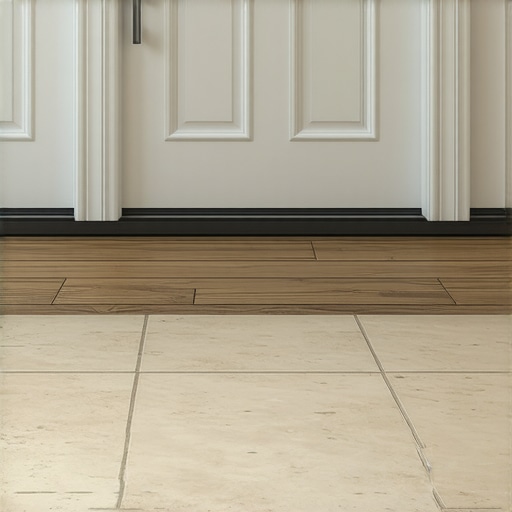
I spent three days grinding concrete on a job last month just so the floor wouldn’t click like a castanet. Most guys skip the leveling compound. They think the underlayment will hide the dip. It won’t. I was in a high-end condo where the owner wanted a flush transition between the kitchen tile and the living room walnut. The previous installer just slapped a fat T-molding over it and called it a day. It looked like a speed bump. I had to tear up the first three rows of hardwood, grind the slab down to a tolerance of one eighth of an inch, and reset the whole entry. If you do not respect the subfloor, the subfloor will humiliate you. Transitions are the true test of an installer. Anyone can lay field tile, but making two different materials meet at a doorway without creating a trip hazard requires more than a saw. It requires an understanding of structural deflection and material expansion.
The mechanics of the perfect threshold
A successful transition between tile and hardwood at a door requires matching the heights of both finished surfaces to within one eighth of an inch. This is achieved by calculating the combined thickness of the subfloor, underlayment, and the flooring material itself, then using self-leveling compounds or plywood shims to create a flat plane. Most people assume the transition strip is just a cover, but it is actually a bridge that manages the expansion of the wood while providing a rigid edge for the tile. When you are moving from a hallway into showers with a style or bathrooms, the moisture barrier becomes a primary concern at this junction. You cannot simply butt the wood against the tile grout. Wood is hygroscopic. It breathes. It expands and contracts with every change in humidity. Tile is rigid and brittle. If you lock them together without a movement joint, the wood will eventually crack the tile or pop the grout right out of the floor.
Why your subfloor is lying to you
Subfloor levelness is the single most ignored factor in flooring failures because installers rely on the visual finish rather than the structural reality. To fix a transition, you must measure the deflection and the flatness of the wood or concrete base using a ten foot straightedge. I have seen slabs that look flat to the naked eye but have a half inch dip right at the bedroom door. If you install tile over that dip, the mortar bed will be too thick, leading to shrinkage cracks. If you install hardwood over it, the boards will flex every time someone walks through the door. This flex puts immense pressure on the transition strip. Eventually, the nails or track system holding that strip will fail. I always use a digital moisture meter before I even think about bringing wood into the house. If the subfloor moisture is more than four percent different from the hardwood, you are asking for a disaster. You need to let that wood acclimate in the room where it will be installed for at least seven days, even if the box says it is pre-finished. Ignoring the physics of the site is the fastest way to ruin a high-quality product.
“A floor is only as good as the subfloor beneath it; deflection is the enemy of every joint.” – Master Flooring Axiom
The physics of the expansion gap
The expansion gap is a mandatory space left between the flooring and any vertical surface or adjacent material to allow for natural movement. For hardwood, this gap must be at least one half of an inch, which is typically covered by a transition strip or baseboards. If you fail to leave this gap at the doorway, the wood will expand during the humid months and push against the tile. This creates a force called ‘tenting’ where the boards lift off the subfloor. I have seen entire floors buckle because a guy thought he could do a ‘seamless’ look without a transition. There is no such thing as a truly seamless transition between two different materials with different expansion coefficients. Even with eco friendly tile solutions for sustainable homes in 2025, the physics remains the same. The tile is glued down tight. The wood is floating or nailed. They move at different rates. A Schluter strip or a metal L-angle can provide a clean, thin profile, but you still need to leave room for the wood to breathe behind that metal edge.
The 1/8 inch that ruins everything
Height variance of more than one eighth of an inch between tile and wood creates a significant trip hazard and leads to premature wear on the flooring edges. Professionals use reducers or specific underlayment thicknesses to ensure the transition is flush or gradually sloped. When I am planning a layout, I calculate the height of the tile plus the thin-set. Standard thin-set with a half inch notched trowel usually results in a layer about three sixteenths of an inch thick after the tile is embedded. If my hardwood is three quarters of an inch thick, I might need to add a layer of one quarter inch luan under the hardwood area to bring it up to meet the tile. Or, if the tile is higher, I have to use a reducer strip. Never trust a builder to have the subfloors at the right height. They almost never do. You have to be the one to check the math before the first piece of tile is buttered.
| Transition Type | Height Difference Allowed | Best Use Case | Durability Rating |
|---|---|---|---|
| T-Molding | Zero (Equal heights) | Bridge between wood and tile | High |
| Reducer Strip | 1/4 inch to 1/2 inch | Transitioning to lower surfaces | Medium |
| Schluter Deco-S | Zero (Flush) | Modern minimalist look | High |
| Threshold Block | 1/2 inch plus | Main entry doors | Very High |
The chemistry of the bond
The bond between the transition strip and the subfloor must be stronger than the force of foot traffic and material movement. This requires the use of high-grade construction adhesives or mechanical fasteners that penetrate deep into the joists. I don’t trust the little plastic tracks that come with some laminate or LVP kits. They are flimsy. I prefer to drill into the concrete and use Tapcon screws or use a high-tack urethane adhesive that stays flexible. If you use a rigid glue, the vibration of the house will eventually snap the bond. It is the same principle I apply to grout. If the grout is too brittle, it cracks. If you are dealing with old, cracked joints, you should learn how to refresh grout without replacing it before you try to install a new transition over a failing base. The chemistry of the mortar matters too. A polymer-modified thin-set provides the flex needed to handle the micro-movements of a doorway.
“Standard subfloor thickness for ceramic tile must meet a combined L/360 deflection rating to prevent grout failure.” – TCNA Technical Standard
A checklist for a flush transition
- Measure the thickness of the tile plus the compressed mortar bed.
- Compare this to the hardwood thickness plus the underlayment.
- Identify any height discrepancy exceeding 1/16 of an inch.
- Install a moisture barrier that overlaps the transition point by 6 inches.
- Leave a 1/4 inch expansion gap for the wood side.
- Use a level to ensure the subfloor does not slope at the door frame.
- Secure the transition strip to the subfloor, never to the flooring itself.
The vertical finish with baseboards
Baseboards act as the final anchor for a transition, covering the expansion gaps where the flooring meets the wall at the door jamb. Proper installation requires back-cutting the baseboard to sit flush against the transition strip. I see people hack their baseboards all the time. They leave a giant gap where the wood meets the casing. You need a sharp miter saw and a coping saw to do this right. If you want to elevate the look, you should look into chic baseboard designs that transform rooms in 2025. A tall, clean baseboard can hide a lot of sins, but it can’t hide a poorly cut transition strip. The transition should tuck under the door casing. I always undercut the door jambs with a oscillating saw so the flooring can slide underneath. This creates a clean, professional look that doesn’t rely on gobs of caulk to hide gaps. If you are doing a full room update, consider baseboards makeover ideas to elevate your space to match the new floor height.
The importance of grout integrity
Grout at a transition point is the most likely area to fail because it is subject to the most structural stress. Using a color-matched 100 percent silicone caulk instead of cementitious grout at the hardwood interface allows for movement without cracking. Hardwood moves. Grout does not. If you put grout right against the wood, the wood will crush it when it expands in the summer. Then, in the winter, the wood shrinks and leaves a gap filled with crumbled grout. I always leave a small gap and fill it with a high-quality siliconized caulk that matches the grout color. This keeps the look consistent but provides a flexible cushion. If your existing grout is already failing, you might need grout restoration secrets for long-lasting results to get the floor back in shape. A doorway transition is only as beautiful as the maintenance you put into it. Dust and grit get trapped in those joints and act like sandpaper. Regular cleaning and checking the seal at the transition will extend the life of your floor by years. Always remember that a floor is a moving, living part of the house architecture. Treat it with the respect that physics demands and it will stay flat and quiet for decades. Skip the prep, and you will be calling me in six months to rip it all out.