
The Easiest Way to Seal Grout Lines in One Afternoon
Most guys skip the leveling compound. They think the underlayment will hide the dip. It won’t. I spent three days grinding concrete on a job last month just so the floor wouldn’t click like a castanet. That same philosophy of skipping the hard work applies to grout. People think grout is just the stuff that fills the gaps, but it is actually the most vulnerable part of your floor. If you do not seal it, you are basically leaving a wide-open door for moisture to rot your subfloor from the inside out. My hands smell like WD-40 and oak dust today, and I am here to tell you that grout sealing is not a suggestion. It is a structural requirement for any tile assembly that intends to last more than a few years. When we talk about showers or baseboards, we are talking about the integrity of the home. This guide breaks down the molecular reality of sealing those lines in a single afternoon without making a mess of your weekend.
The porous reality of your bathroom floor
Grout is a cementitious product that functions like a hard sponge, meaning it naturally contains thousands of microscopic voids that pull in water through capillary action. Sealing these lines creates a hydrophobic barrier that prevents liquid penetration, mold growth, and deep staining in showers or high-traffic kitchen areas. To understand why your grout gets disgusting, you have to look at it under a lens. Cement-based grout is a mixture of Portland cement, sand, and water. As that water evaporates during the curing process, it leaves behind a network of tiny tunnels. These tunnels are the perfect highway for dirty mop water, spilled wine, or shower mildew to travel deep into the center of the joint. Once the moisture is inside, it stays there. This is why you see tile popping off walls in old showers with a style that looked great ten years ago but now smell like a swamp. The water got behind the tile because the grout was thirsty. Sealing is the only way to plug those holes. You are essentially using a chemical resin to fill the pores so nothing else can get in. It is a game of displacement. If the sealer occupies the space, the mold cannot.
“A floor is only as good as the subfloor beneath it; deflection is the enemy of every joint.” – Master Flooring Axiom
Why most sealers fail before they dry
Most grout sealers fail because the applicator does not account for the surface tension of the grout or the presence of latent moisture within the cement matrix. If the grout is even slightly damp or dusty, the sealer will sit on top and eventually peel away rather than penetrating. I have seen homeowners buy the most expensive bottle at the big-box store and wonder why their grout is still turning black after six months. Usually, they did not clean it properly first. You cannot seal dirt. If there is a layer of soap scum or skin oil on that grout line, the sealer just glides over it. You need a clean, open pore. This is where tile cleaning tips for a sparkling bathroom in 2025 come into play. You have to use an alkaline cleaner to strip the grease and a stiff brush to agitate the surface. If you use an acid-based cleaner, you might etch the tile or weaken the cement bond. I always tell my apprentices that the prep takes four hours and the sealing takes twenty minutes. If you flip those numbers, you are doing it wrong. You also have to consider the type of sealer. A topical sealer stays on the surface, which is fine for some stones, but for grout, you want a penetrating sealer. These use silanes or siloxanes to soak into the grout and bond with the cement at a molecular level. It is like the difference between painting a piece of wood and staining it. The stain becomes part of the wood. The penetrating sealer becomes part of the grout.
The invisible clock of grout curing
Curing is a chemical reaction known as hydration where cement particles form crystalline structures to create strength, and sealing too early traps unreacted water that weakens the grout. You must wait at least 48 to 72 hours after initial installation before applying any sealant to ensure the moisture has escaped. I have walked onto jobs where the GC wanted the floor sealed the morning after the tile was set. I walked off those jobs. If you seal wet grout, you are trapping the water inside. That water will eventually try to get out, and since it cannot go through the sealer, it will push the sealer off in a process called delamination. Or worse, it will cause efflorescence, which is that white, crusty salt that grows on grout lines. It looks like the floor is sweating salt. That is just minerals being carried to the surface by escaping moisture. To do this in one afternoon, we are assuming your floor is already cured. If you are doing a how to refresh grout without replacing it project, your grout is likely years old, which is perfect for sealing. The older and drier it is, the more sealer it will drink up. You just have to make sure it is bone dry after you clean it. I usually tell people to run a dehumidifier in the bathroom for two hours after cleaning before they even touch the sealer bottle. Moisture is the enemy of adhesion.
| Sealer Type | Longevity | Application Method | Best Use Case |
|---|---|---|---|
| Topical Acrylic | 1-2 Years | Brush/Roller | Decorative Stone |
| Penetrating Siloxane | 3-5 Years | Applicator Tip | Standard Grout Lines |
| Fluorinated Resin | 5-10 Years | Spray/Wipe | High-Moisture Showers |
Preparing the surface for a permanent bond
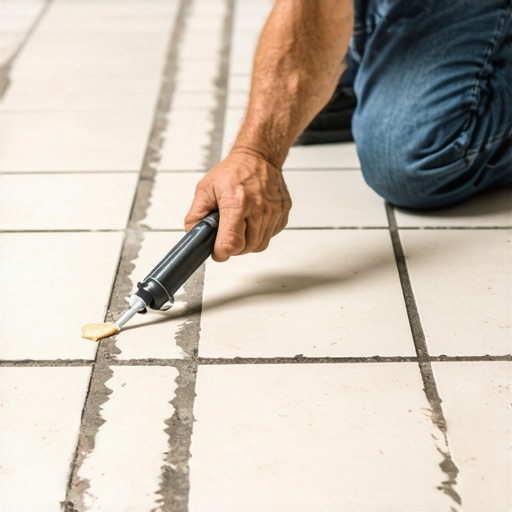
Surface preparation for grout sealing requires a neutral pH environment and the total removal of any existing waxes, oils, or silicate deposits that would block the absorption of the sealer. A vacuum with a HEPA filter is often better than a mop for removing fine dust from the deep crevices. Once you have cleaned the lines, you need to inspect them. Are there cracks? If there are cracks, sealing is a waste of time. You need to fix the structural issue first. Sometimes the floor is flexing because the subfloor is too thin. I have seen guys try to grout over 1/2 inch plywood and wonder why the joints are crumbling. If the grout is solid, you are ready. I like to use a small applicator bottle with a roller wheel. It keeps the mess off the tile. Even if you are working with eco-friendly tile solutions for sustainable homes in 2025, the grout is still the weak link. You apply the liquid, let it sit for about five to ten minutes, then wipe the excess off the tile face. Do not let it dry on the tile. If it dries on the tile, you will spend the next three days with a razor blade scraping off a hazy film. The goal is to get the liquid into the grout, not onto the glaze. This is especially true for textured tiles that like to grab onto every bit of liquid. Work in small sections, maybe three square feet at a time. It keeps you focused and prevents the sealer from flash-drying on the surface.
“Cement-based grout is essentially a liquid stone that remains porous throughout its entire lifespan unless chemically altered.” – Master Flooring Axiom
Tooling the sealant into the microstructure
Tooling the sealer involves ensuring that the liquid fully saturates the grout joint to the point of refusal, meaning the grout can no longer absorb any more chemistry. Using a brush to agitate the sealer while it is wet helps break the surface tension and forces the liquid deeper into the sand matrix. Most people just spray and pray. They mist the floor and think they are done. That is not sealing. That is just making the floor wet for a minute. You want to see the grout change color. It should look dark and wet. That means the sealer is actually in there. If you have very wide joints, you might need two coats. The first coat fills the big voids, and the second coat seals the microscopic ones. You can check your work with a drop of water after it dries. If the water beads up like it is on a freshly waxed car, you win. If it soaks in and turns the grout dark, you failed. Go back and do it again. This is the difference between a floor that lasts and one that requires grout restoration secrets for long-lasting results in two years. I have seen showers that wow modern designs for 2025 fail in six months because the installer was too lazy to spend two hours with a bottle of sealer. It is a cheap insurance policy for your home.
The friction between baseboards and tile
The junction where the tile meets the baseboard is a critical expansion point that should be filled with color-matched caulk rather than hard grout to accommodate the natural movement of the house. Sealing the grout lines up to this transition prevents moisture from wicking into the wall plate or the bottom of the baseboard trim. Houses move. They breathe. They expand in the summer and shrink in the winter. If you put hard grout in the corner where the floor meets the wall, it will crack. I don’t care how good your subfloor is. You need a flexible joint there. When you are sealing your floor, pay close attention to these edges. If you have been looking at baseboards makeover ideas to elevate your space, remember that wood and tile do not play well together when water is involved. If you seal your grout but leave the edge open, water will just run to the lowest point and soak into your baseboards. This leads to rot and peeling paint. I always pull the baseboards if I am doing a high-end job, but if you are just doing a quick refresh, at least make sure the sealant reaches the very edge. If you are updating to chic baseboard designs that transform rooms in 2025, use the opportunity to check the gap. A 1/8 inch expansion gap is standard. Fill it with a high-quality 100 percent silicone caulk that matches your grout color. It looks better and it actually works as a waterproof barrier.
- Clean the grout thoroughly with an alkaline-based cleaner.
- Rinse the area with clean water to remove residue.
- Dry the surface for at least two hours or use a fan.
- Apply penetrating sealer using a roller-tip applicator.
- Wait 10 minutes for the sealer to absorb into the pores.
- Wipe away all excess sealer from the tile surface with a microfiber cloth.
- Allow the floor to cure for 24 hours before heavy foot traffic.
Maintaining the molecular barrier
Maintaining a sealed grout line requires the avoidance of harsh acidic or bleach-based cleaners that chemically strip the sealer and degrade the cement binder. Routine maintenance with a pH-neutral cleaner preserves the integrity of the hydrophobic layer and extends the life of the sealant for several years. People think that once a floor is sealed, they can use whatever they want on it. Wrong. If you go in there with a heavy bleach solution, you are eating the sealer for breakfast. Bleach is an oxidizer. It breaks down the resins in the sealer. Use a dedicated tile and stone cleaner. It costs a few dollars more, but it saves you from having to re-seal every six months. I usually tell my clients to re-seal their showers every year and their floors every three to five years. If you notice the grout getting dark when you mop, the sealer is gone. It is time to get back on your knees. It is not a fun job, but it is better than replacing a subfloor because of a slow leak you didn’t see. If you have questions or need professional advice on specific materials, you can always contact us or check our privacy policy for how we handle your project data. Just remember, a floor is a machine. It has moving parts and chemical requirements. Treat it like a tool, not a piece of art, and it will serve you well for decades. The 1/8 inch that ruins everything is usually the 1/8 inch you didn’t bother to protect.