The subfloor secret that professionals never skip
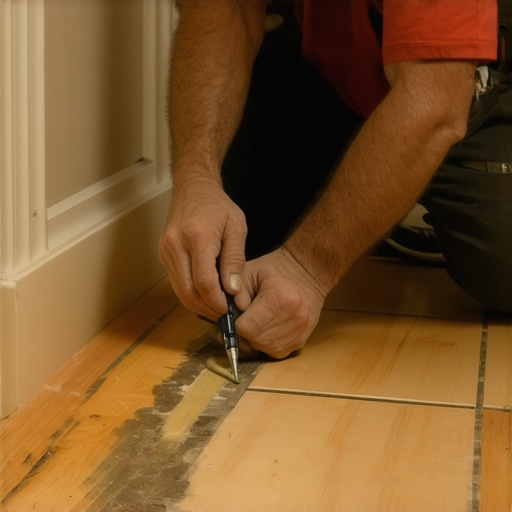
Scribing baseboards to a wavy tile floor is the professional method of transferring the unique profile of a floor onto a piece of trim. This technique eliminates unsightly gaps and the need for excessive caulking by physically shaping the wood to match the rise and fall of the tile surface precisely. Most guys skip the leveling compound. They think the underlayment will hide the dip. It won’t. I spent three days grinding concrete on a job last month just so the floor wouldn’t click like a castanet. When you are dealing with a wavy floor, the subfloor is the primary culprit. If the concrete slab or the wooden joist system has a deflection beyond the standard 1/8 inch over ten feet, your baseboard will never sit flat. I have seen installers try to force a straight piece of MDF down into a valley with a nail gun. All that does is create tension that will eventually pull the nails right out of the studs or cause the baseboard to crack at the scarf joints. Understanding the structural engineering of the floor is the first step toward a perfect finish. You have to respect the physics of the wave before you can defeat it with a scribe. When you look at chic baseboard designs that transform rooms in 2025, they all share one thing in common. They sit tight to the floor because someone took the time to map the topography of the room. [IMAGE_PLACEHOLDER_1]
Why your subfloor is lying to you
A subfloor may appear flat to the naked eye but often contains micro-deviations caused by settling, poor pouring techniques, or moisture-induced swelling. These deviations translate through the tile and grout, creating a surface that mimics the rolling hills of a landscape rather than a flat plane for your trim. Most homeowners think their tile is the problem. In reality, the tile is just a thin skin over a deeper structural issue. When we talk about thin-set mortar, we are talking about a chemical bond that can shrink during the curing process. If the installer used a large format tile without a proper self-leveling underlayment, those minor dips in the slab become magnified. This is why you need baseboards makeover ideas to elevate your space that prioritize fit over mere aesthetics. You are fighting against the L/360 deflection limit, which is the industry standard for floor stiffness. If your floor has more flex than that, no amount of scribing will save you from future cracking. We have to look at the chemistry of the grout as well. Grout is a porous material that can vary in height depending on how it was struck during installation. These variations of even 1/32 of an inch will show up as a gap under your baseboard if you do not scribe.
“A floor is only as good as the subfloor beneath it; deflection is the enemy of every joint.” – Master Flooring Axiom
The physics of the scribe and the back-cut
The scribe involves using a compass or a specialized scribing tool to trace the floor profile onto the baseboard material while it is held perfectly level. By cutting at a slight inward angle, known as a back-cut, the front edge of the baseboard makes a sharp, clean contact point with the tile. When you start this process, you are essentially performing a topographic survey of your wall. You must use a level to ensure the baseboard is plumb. If you just lay the board on the floor and trace, you are tracing a crooked line. You have to hold the board at the highest point of the floor and then set your compass to the width of the largest gap. As you drag the compass across the floor, the metal point follows the tile while the pencil transfers the wave to the wood. This is where the molecular zooming comes in. If you are using a hardwood like oak, you have to account for the Janka hardness. Cutting a scribe in oak requires a sharp jigsaw blade with a high tooth count to prevent splintering the lignin fibers. For those interested in eco-friendly tile solutions for sustainable homes in 2025, remember that natural stone often has more surface variation than ceramic, making the scribe even more vital. The back-cut is the secret. By beveling the cut at 5 or 10 degrees toward the back, you ensure that the very tip of the wood is the only thing touching the tile. This creates a microscopic compression fit that looks like the wood grew right out of the floor.
Tools and materials for a flawless execution
Professional scribing requires a specific kit including a high-quality compass, a block plane, a jigsaw with a scrolling blade, and a various assortment of sandpaper. Each tool serves a purpose in refining the raw cut into a finished edge that mirrors the floor topography. You cannot do this job with a standard utility knife and hope for the best. The mechanical advantage of a compass allows for a consistent gap measurement. When you are working around showers that wow modern designs for 2025, you often deal with waterproof membranes that add thickness near the wall. You have to be careful not to puncture these membranes when you are setting your trim. I prefer a block plane for the final fitting. It allows me to shave off thousandths of an inch at a time. It is like surgery for wood. You are removing the high spots of the scribe until the entire board drops into place. If you are working in a bathroom, you should also consider tile cleaning tips for a sparkling bathroom in 2025 before you install, because once that baseboard is scribed and caulked, you do not want to be digging dirt out of that joint.
“The National Wood Flooring Association recommends acclimating wood to the site environment for at least 72 hours to prevent post-installation shrinkage.” – NWFA Guidelines
| Material Type | Scribing Difficulty | Expansion Coefficient | Recommended Tool |
|---|---|---|---|
| Solid Oak | High | 0.0036 | Power Plane |
| Primed Pine | Low | 0.0028 | Block Plane |
| MDF Trim | Medium | 0.0015 | Jigsaw / Sanding |
| PVC Trim | Low | 0.0045 | File / Rasp |
The 1/8 inch that ruins everything
A gap of just 1/8 inch is enough to catch the eye and ruin the visual continuity of a high-end flooring installation. While many amateurs use caulk to fill these voids, caulk is a fluid that eventually shrinks, cracks, and attracts dust, making the gap visible again. Scribing is the only permanent solution. When you are looking at showers with a style trendy ideas for small bathrooms, the transition from the wet area to the dry floor is where most failures occur. If the baseboard is not scribed perfectly, water can wick up into the end grain of the wood, causing rot and mold. Most people want the thickest underlayment, but too much cushion actually causes the locking mechanisms on LVP to snap under pressure, which in turn moves the baseboard. This movement is the enemy. By scribing, you are creating a mechanical fit that resists movement. We also need to talk about grout restoration. If the floor is old, you might want to look into grout restoration secrets for long-lasting results before you install your new trim. A clean, stable grout line provides a much better surface for the compass to glide across. If the grout is crumbling, your scribe line will be jagged and inaccurate. You have to treat the entire floor system as a single unit. If one part is failing, the whole thing is failing. If you have questions about specific materials, you can always contact us for technical advice.
- Ensure the baseboard is acclimated to the room humidity.
- Check the floor for high spots using a six-foot straight edge.
- Level the baseboard using shims before marking the scribe.
- Use a sharp 2H pencil for a fine, visible line.
- Always cut on the waste side of the line.
- Test fit and use a block plane for fine-tuning.
Humidity and regional climate factors
Regional climate plays a massive role in how a scribed baseboard behaves over time because wood is a hygroscopic material that expands and contracts with atmospheric moisture. In humid regions like Houston, wood will swell, while in dry climates like Phoenix, it will shrink away from the scribe line. If you are in a high-humidity area, you need to scribe your boards slightly tighter than you think. The wood will expand, and if there is no room, it will cup. Conversely, in the desert, you might scribe a board perfectly in the winter, only to find a gap in the summer when the wood dries out even further. This is why acclimation is not optional. It is a structural requirement. You are dealing with the cellular structure of the timber. When the moisture content changes, the cells actually change size. This is also why I suggest how to refresh grout without replacing it as a prerequisite for trim work. If the grout is absorbing moisture, it is transferring that moisture directly into the bottom of your baseboard. By sealing the grout and scribing the wood, you are creating a barrier system that protects the integrity of the home. Always remember to check our privacy policy if you are using our online calculators for moisture rates. The physics of the room will always dictate the success of the installation. No amount of paint or caulk can fix a poor mechanical fit. You have to put in the work on your knees, with your tools, and get the scribe right the first time. Final success is measured in fractions of a millimeter. When you stand up and look down at a wall where the wood seems to melt into the tile, you know you have done it right.