
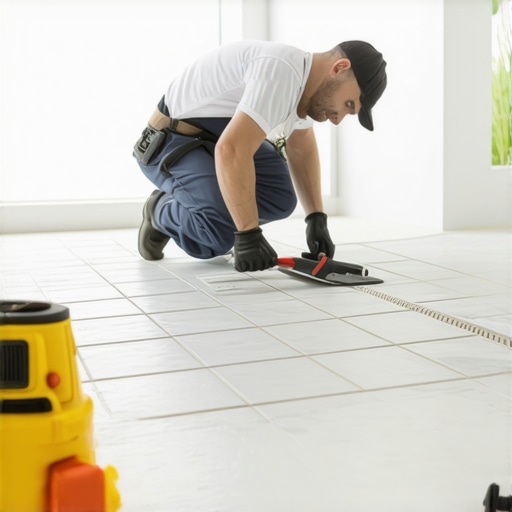
Most guys skip the leveling compound. They think the underlayment will hide the dip. It won’t. I spent three days grinding concrete on a job last month just so the floor wouldn’t click like a castanet. That is the reality of professional flooring. You are either a mechanic or a magician, and magic does not hold up under 400 pounds of water and glass. When I walk into a bathroom renovation, I do not look at the pretty marble or the gold faucets. I look at the drain. I look at the plane of the subfloor. I look for the inevitable failure points where water will sit and rot the joists. A shower floor is not a surface. It is a hydraulic system. If you get the physics wrong, the chemistry of your grout will not save you. Most homeowners believe that waterproof LVP or glazed porcelain makes a shower bulletproof. This is a lie. Water is a persistent solvent. It finds the path of least resistance through every microscopic void in your thin-set. If your slope is not perfect, that water sits. It stagnates. It breeds bacteria. Then your expensive remodel smells like a swamp within six months.
The subfloor secret that kills most projects
Perfectly level shower floors require a rigid substrate with zero deflection and a precise 2 percent slope toward the drain assembly. Achieving this involves grinding high spots in the concrete or sistering joists in wood-frame construction to ensure the floor is structurally sound before any waterproofing membrane or mortar bed is applied to the surface. Failure to address subfloor levelness leads to pooling water and cracked grout lines. I have seen guys try to level a floor with extra thin-set. That is a crime. Thin-set is an adhesive, not a filler. When it cures, it shrinks. If it is too thick, it pulls at the tile and creates tension. This tension leads to the dreaded clicking sound when you walk across the floor. You must use a self-leveling underlayment or a traditional mud bed. I prefer the mud bed. It gives me control over the density. I mix it dry, like wet sand at the beach. You pack it. You pound it. You screed it until it is a perfect plane. If your screed board is not hitting the drain flange exactly, you start over. There are no shortcuts in the mud. Check out some showers that wow modern designs for 2025 to see how a flat plane allows for those high-end finishes.
“A floor is only as good as the subfloor beneath it; deflection is the enemy of every joint.” – Master Flooring Axiom
The physics of the pre slope and liner
A pre slope is the primary layer of mortar installed beneath the waterproof liner to ensure that any water penetrating the tile moves toward the weep holes. Many installers place the liner directly on the flat subfloor, which traps stagnant water under the mud bed and causes foul odors and mold growth in the bathroom. The liner is the last line of defense. If the water gets to the liner and cannot move, it stays there. It turns the mud bed into a sponge. This is why you see dark grout lines that never seem to dry out. The water is literally trapped underneath. You need a 1/4 inch per foot slope. Not 1/8 inch. Not 1/2 inch. One quarter. This is the sweet spot of gravity versus surface tension. If the slope is too aggressive, you will struggle with the tile layout. If it is too shallow, the water will linger. I always tell apprentices to imagine a marble. If you drop a marble anywhere on that shower floor, it should end up in the drain. If it stops, your floor is a failure. You also need to consider the type of drain. A linear drain requires a single-plane slope, while a center drain requires a four-way envelope cut. Both require surgical precision with the trowel.
Why your drain height dictates everything
Setting the drain height relative to the tile thickness is the most critical measurement in preventing lippage and ensuring a flush finish. You must calculate the thickness of the thin-set, the tile body, and the protective sealant to ensure the drain grate sits exactly level with the finished floor surface. If the drain is too high, you have a puddle. If it is too low, you have a toe-stubbing hazard. I use a laser level for this. I do not trust bubbles. Bubbles can be interpreted. A laser is a binary truth. It tells you exactly where the horizon is. For those looking to integrate their floors with the rest of the room, consider how baseboards makeover ideas to elevate your space can hide the transition between the waterproof shower area and the dry zones. The drain is the anchor of the entire room. If the drain is off by 1/16 of an inch, the entire tile grid will look crooked. It is a geometric cascade. You start at the drain and work out. Never start at the door and work toward the drain.
| Metric | Standard Requirement | Pro Recommendation |
|---|---|---|
| Slope Gradient | 1/4 inch per foot | 1/4 inch per foot (Consistent) |
| Subfloor Deflection | L/360 for ceramic | L/720 for natural stone |
| Mortar Bed Thickness | 1.5 inches minimum | 2 inches with wire mesh |
| Thin-set Open Time | 20 to 30 minutes | 15 minutes in high heat |
| Acclimation Time | 48 hours | 72 hours for high humidity |
The chemistry of modified thin set mortar
Modified thin-set contains liquid latex or powdered polymers that increase bond strength and flexibility across various substrates. These chemical additives allow the mortar to withstand the thermal expansion and contraction cycles found in steam showers and heated floors without debonding from the tile. Standard unmodified thin-set is just portland cement and sand. It is brittle. In a shower, the temperature fluctuates. The materials expand. If the adhesive cannot flex, it snaps. I have seen entire floors pop off the substrate because someone used the wrong bag. You need a high-polymer content for large format tiles. The weight of the tile requires a non-sag formula. If the tile slides even a fraction of a millimeter during the curing process, your level is gone. You also need to back-trowel. This is not optional. You apply a thin layer to the back of the tile to ensure 100 percent coverage. Any air pocket under that tile is a reservoir for water. Water in an air pocket leads to mold. Mold leads to lawsuits. I do not like lawsuits.
Master the envelope cut for large format porcelain
The envelope cut involves diagonal miter joints that allow large, flat tiles to follow the four-way slope of a center-drain shower pan. This technique prevents lippage at the corners and maintains a continuous aesthetic pattern across the floor while ensuring proper drainage toward the plumbing fixture. Large tiles are trendy. Everyone wants 12 by 24 inch planks in their shower. But physics says you cannot bend a flat piece of ceramic. If you try to force it into a slope, the corners will stick up. This is lippage. It is ugly and dangerous. The envelope cut is the solution. You cut the tile from the corner of the drain to the corner of the shower wall. It creates a seam that allows the tile to tilt. It looks like the back of an envelope. It takes a steady hand on the wet saw. If you are off by a degree, the grout line will be uneven. For more styling ideas, see showers with a style trendy ideas for small bathrooms. Small bathrooms are actually harder because the slopes are steeper in a confined space. You have less room to hide your mistakes.
Grout restoration and the myth of waterproof tiles
Grout is a porous material that requires specialized sealing or epoxy-based formulas to resist moisture penetration and staining. Regular cementitious grout will eventually absorb water through capillary action, which is why grout restoration and maintenance are essential for the longevity of the shower floor assembly. People think grout is the waterproof layer. It is not. Grout is the filter. Most of the water goes down the drain, but some goes through the grout. That is why the subfloor and the liner are so important. If you want a floor that lasts, use epoxy grout. It is a nightmare to install. It is sticky. It cures fast. You have to wash it off with a specific vinegar solution. But once it is in, it is like plastic. It does not stain. It does not leak. It is the gold standard. If you are dealing with an old floor, you might need grout restoration secrets for long-lasting results or even how to refresh grout without replacing it to save the installation. But remember, if the subfloor is moving, the grout will crack regardless of what it is made of.
“Cement is a thirsty stone; it will drink every drop of water you give it until it is saturated or sealed.” – TCNA Handbook Wisdom
Baseboard design for wet environments
Baseboards in bathrooms must be constructed from moisture-resistant materials like PVC or high-density polymers to prevent warping and rot. Installing wood baseboards near a shower leads to wicking moisture, which destroys the wall cavity and encourages the growth of toxic mold behind the finished surfaces. I hate seeing MDF baseboards in a bathroom. It is essentially cardboard. One splash from the shower and it swells like a marshmallow. You need to use a solid material. You also need to caulk the bottom of the baseboard where it meets the tile. But do not use cheap painter’s caulk. You need 100 percent silicone. Silicone stays flexible. It does not crack when the house settles. If you want to see some better options, look at chic baseboard designs that transform rooms in 2025. A good transition from the floor to the wall is the hallmark of a professional. It should be tight. No gaps. No globs of caulk hiding a bad cut. I spend a lot of time on my miter saw for these details.
The final checklist for shower floor success
Before you ever mix a bag of mortar, you need to go through this list. If you skip one, the whole thing is a waste of time. I have seen guys lose thousands because they forgot to check the moisture content of the slab. Don’t be that guy.
- Check subfloor for deflection using a 10 foot straight edge.
- Verify drain flange is level and set to the correct height for tile.
- Ensure pre-slope is 1/4 inch per foot toward the weep holes.
- Test the waterproof liner with a 24-hour flood test.
- Verify tile acclimation to the room’s temperature and humidity.
- Use a 95 percent minimum mortar coverage for wet areas.
- Apply silicone sealant to all change-of-plane joints.
Precision is everything. I once walked into a house where the tile was so poorly sloped that the water flowed out of the shower and into the hallway. The homeowner was crying. The contractor was gone. I had to rip out the whole thing. It was a $10,000 mistake that could have been avoided with a $20 level and a bit of patience. Keep your tools clean. Keep your lines straight. And for heaven’s sake, keep your grout clean with tile cleaning tips for a sparkling bathroom in 2025. A dirty floor hides damage until it is too late. If you can see the dirt, you can see the cracks. If you can see the cracks, you can stop the leak. That is how you build a floor that outlives the house. Use eco-friendly tile solutions for sustainable homes in 2025 if you care about the planet, but make sure they are installed with the same level of mechanical intensity. There are no excuses for a bad slope. Only bad installers. If you have questions, go to the contact us page, but don’t ask me how to fix a floor that’s already buckling. The answer is always the same. Rip it out and do it right.