I spent three days grinding concrete on a job last month just so the floor wouldn’t click like a castanet. Most guys skip the leveling compound and think the underlayment will hide the dip. It won’t. I see the same laziness in shower floors. People see a hole in their grout and think they can just smear some new paste over the top. That is a lie that leads to rot. A shower floor is a high pressure environment where water is constantly trying to find a path to your subfloor. If you do not treat a grout hole as a structural breach, you are just waiting for a mold explosion. I have seen 25 years of failed pans because someone thought a quick fix was enough. You need to understand the physics of the bond and the chemistry of the mix to make a repair that actually lasts. We are not just making it look pretty. We are engineering a waterproof barrier that has to withstand thermal expansion and constant saturation.
The real reason shower grout falls out
Grout failure in shower floors usually stems from subfloor deflection or poor mixing ratios that compromise the crystalline structure of the cement. When the mortar bed underneath the tile flexes even a fraction of an inch, the rigid grout lines cannot absorb the movement. This causes the bond to snap, leading to large chunks of grout dislodging during routine cleaning or use. Moisture then enters the void and further degrades the surrounding material. For those interested in the bigger picture of bathroom maintenance, you should check out tile cleaning tips for a sparkling bathroom in 2025 to prevent buildup that hides these structural issues.
“A floor is only as good as the subfloor beneath it; deflection is the enemy of every joint.” – Master Flooring Axiom
Anatomy of a structural void in wet areas
A large hole in shower grout is rarely a surface issue and typically indicates a hollow spot in the thin-set or a localized area of high moisture. If you poke a screwdriver into the hole and it feels soft, you have a bigger problem than just missing grout. You are looking at a saturated mud bed. Before you patch anything, the area must be bone dry. I use a moisture meter to ensure the substrate is below 3 percent moisture content. If you trap water under new grout, the vapor pressure will pop the new patch out within weeks. This is why professional grout restoration secrets for long lasting results always start with a dry and stable base.
Choosing between sanded and epoxy resins
Selecting the right grout chemistry depends on the width of the gap and the amount of water exposure the floor receives daily. Sanded grout uses fine silica as a filler to prevent shrinkage in joints wider than 1/8 inch. Unsanded grout is for thin joints but lacks the compressive strength for floor traffic. Epoxy grout is the gold standard for showers because it is non-porous and chemically resistant, though it is a nightmare to work with if you are not fast. If you are aiming for showers that wow modern designs for 2025, you need to match the material to the performance needs of the tile. Below is a comparison of the materials you might consider for your patch job.
| Material Type | Max Joint Width | Water Resistance | Cure Time |
|---|---|---|---|
| Sanded Grout | 1/2 inch | Moderate | 24-48 Hours |
| Unsanded Grout | 1/8 inch | Low | 24 Hours |
| Epoxy Grout | Unlimited | High | 24 Hours |
| Polymer Modified | 3/8 inch | High | 48 Hours |
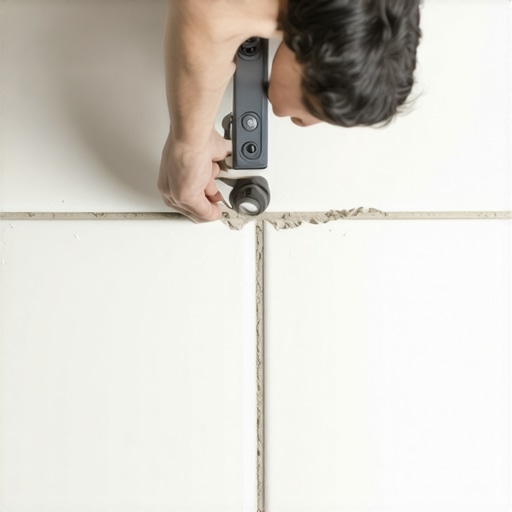
Preparing the crater for new material
Preparation for a grout patch requires removing at least two thirds of the depth of the tile to ensure a mechanical lock. You cannot just skim coat. I use an oscillating tool with a diamond grit blade to carefully grind out the old, compromised grout. You have to be steady. One slip and you are replacing a tile. Once the old material is gone, I use a shop vac with a HEPA filter to suck every microscopic grain of dust out of the joint. Dust is a bond breaker. If there is dust, the new grout will sit on top of it like a scab rather than becoming part of the floor. This precision is what separates a master from a handyman. It is the same attention to detail required when installing chic baseboard designs that transform rooms in 2025, where every cut must be perfect.
“Ensure that all grout joints are clean and free of foreign matter to allow for maximum adhesion of the repair material.” – TCNA Handbook Standards
The hydration phase and why it matters
The chemical process of grout curing is a hydration reaction where water molecules become part of the crystal lattice of the cement. If you add too much water during the mixing phase, you create a weak, porous structure. I mix my grout to the consistency of peanut butter. Then I let it slake. Slaking is the most skipped step. You let the mixed grout sit for ten minutes to allow the polymers to fully hydrate, then you stir it one last time without adding more water. This ensures the chemical bond is at its peak strength. If you are in a high humidity area like Houston, this process takes longer. In dry climates like Phoenix, you might need to mist the joints to prevent the grout from drying too fast and cracking.
Grout application checklist for homeowners
Follow this checklist to ensure your patch job meets the standards of a professional floor architect.
- Remove old grout to a depth of at least 3 millimeters using a diamond blade tool.
- Vacuum the joints thoroughly to remove all debris and loose particles.
- Mix the grout with a margin trowel to avoid introducing air bubbles.
- Allow the mixture to slake for 10 minutes before the final stir.
- Press the grout into the hole at a 45 degree angle using a rubber float.
- Wait 15 to 20 minutes before performing the first wipe with a damp, not dripping, sponge.
- Buff the remaining haze with a microfiber cloth after 2 hours.
Finishing the edge against baseboards and walls
Never use grout where the shower floor meets the wall or the baseboards because these are change of plane joints. These areas must be filled with a 100 percent silicone caulk that matches the grout color. Grout will crack at the corners because walls and floors move independently. I have seen beautiful bathrooms ruined because someone grouted the perimeter and the house settled. If you are looking for baseboards makeover ideas to elevate your space, remember that the transition between the tile and the wood or trim is a critical moisture barrier. Using the wrong material here leads to water wicking into your drywall.
The final word on shower floor integrity
Maintaining a shower floor requires a proactive approach to small cracks before they become structural failures. If you see a tiny fissure, fix it now. Waiting until there is a large hole means you are already dealing with subsurface moisture. For those who want to avoid the mess of full replacement, learning how to refresh grout without replacing it can save you thousands in the long run. Keep your joints sealed and your moisture levels low. A floor is a machine. If you do not maintain the parts, the whole system fails. Take the time to do it right. Use the right chemistry. Respect the cure times. Your subfloor will thank you.