The moisture trap behind your walls
The best type of paint for bathroom baseboards and trim is a high-performance semi-gloss or high-gloss urethane alkyd enamel designed to create a non-porous moisture barrier. These coatings use advanced synthetic resins and antimicrobial additives to resist vapor transmission, mildew growth, and hydrostatic pressure generated in the humid environment of showers. I once walked into a house where the baseboards were literally sprouting mushrooms. The homeowner had just finished a beautiful remodel with expensive tile, but they used a cheap flat latex paint on the baseboards. Within six months, the moisture from the daily steam had penetrated the paint film, soaked into the MDF core, and turned the entire perimeter of the room into a sponge. The baseboards were swelling and pushing the grout right out of the floor joints. It was a $4,000 mistake that could have been avoided with a $30 gallon of the right stuff. I spent the next four days ripping out soggy wood and scrubbing spores off the studs. When you spend twenty-five years looking at the intersection of walls and floors, you realize that paint is not just a color. It is a structural gasket. It is the only thing standing between your framing and rot.
Why MDF is a ticking time bomb in wet zones
Medium Density Fiberboard or MDF is a composite material made of wood fibers and resin that acts like a hydraulic pump when exposed to bathroom humidity. If you must use it, it requires a total encapsulation strategy involving oil-based primers and alkyd topcoats to prevent thickness swelling and delamination. Most builders love MDF because it is cheap and perfectly straight. I hate it. In a bathroom, MDF is a liability. The moment the factory seal is broken by a miter cut or a nail hole, you have opened a gateway for water. If you do not seal every single edge, including the bottom that sits against the tile, the board will suck up water from the floor. This leads to the ‘alligator skin’ texture where the paint starts to flake off in chunks. For a real architectural solution, I always point clients toward chic baseboard designs that transform rooms in 2025 that utilize solid wood or PVC composites. Solid poplar or pine is far superior because wood fibers have some natural resilience, whereas MDF just disintegrates into wet cardboard. If you are stuck with MDF, you have to treat it like a chemistry project. You need a primer that blocks tannin bleed and seals the microscopic pores of the fiberboard before the finish coat even touches the surface.
The chemical bond of urethane alkyd enamels
Urethane alkyd enamel combines the durability of traditional oil paint with the ease of water-based cleanup to provide a superior hard-shell finish. These paints undergo oxidative cross-linking, a process where the polymer chains chemically bond as they dry to create a surface tension high enough to shed water like a duck. Traditional latex paint is too soft. It has a high ‘tack’ even when dry, which means dust and hair stick to it. In a bathroom, that dust turns into a nutrient source for mold. Urethane alkyd enamels, often called ‘water-based oils,’ are different. They flow out smooth, leveling the brush marks until the surface looks like factory-finished plastic. This is vital for baseboards because they take a beating from vacuum cleaners and mops. You want a finish that scores high on the Shore D hardness scale. When water splashes from showers or sinks, it should bead up and sit on top of the film rather than soaking in. The resin in these paints is engineered to be brittle enough to be hard, but flexible enough to move with the natural expansion and contraction of the wood as the bathroom cycles from 20 percent to 90 percent humidity twice a day.
“A floor is only as good as the subfloor beneath it; deflection is the enemy of every joint.” – Master Flooring Axiom
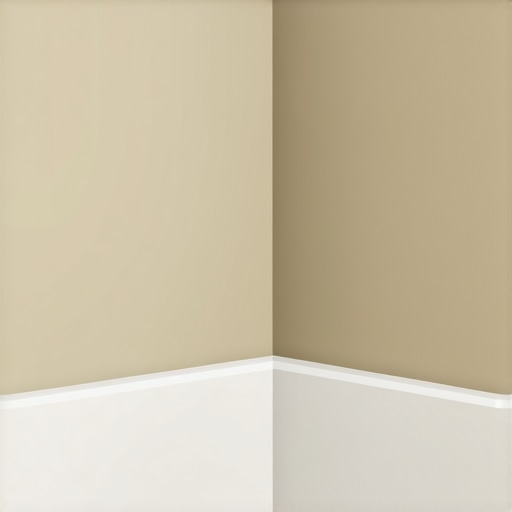
The physics of the baseboard expansion gap
The 1/8 inch expansion gap between the bottom of the baseboard and the floor surface is a critical ventilation and movement joint that must be managed with siliconized sealants. Leaving this gap open allows the tile or hardwood to breathe, but it also creates a capillary suction point where water can be pulled under the wall. I see this error on every other job. Someone installs beautiful new floors and then slams the baseboards down tight against the surface. When the floor expands, it hits the baseboard and starts to cup. Or worse, when you mop the floor, the water gets trapped in that tiny crack and stays there for days. You need a small gap. Use a 1/8 inch spacer during installation. Then, you fill that gap with a high-quality caulk. This creates a flexible bridge. If you are dealing with old grout, you might need grout restoration secrets for long-lasting results to ensure the transition is stable. The paint on the trim should wrap around the bottom edge of the board. I tell people to paint the bottom of the baseboard before they install it. It sounds like overkill. It is not. That hidden layer of paint is your last line of defense against a flooded bathroom floor.
| Paint Type | Durability Rating | Moisture Resistance | Dry Time | VOC Level |
|---|---|---|---|---|
| Standard Latex | Low | Poor | 1 Hour | Low |
| Acrylic Enamel | Medium | Good | 2 Hours | Low |
| Oil-Based Alkyd | High | Excellent | 24 Hours | High |
| Urethane Alkyd | Very High | Excellent | 4-6 Hours | Medium |
The ghost in the expansion gap
A properly sealed expansion gap prevents the accumulation of stagnant water and the growth of anaerobic bacteria behind the trim. This is the ‘ghost’ that causes that musty bathroom smell even when the tile looks clean. When I rip out old bathrooms, the area behind the baseboards is usually the grossest part. It is a graveyard of hair, dust, and moisture. To prevent this, your paint job must be integrated with your caulking strategy. Use a 100 percent silicone or a high-performance siliconized acrylic. Never use cheap painter’s caulk in a bathroom. It will shrink and crack within a year. You need something that can handle 25 percent joint movement. Apply the caulk after the first coat of paint but before the final coat. This ‘sandwiches’ the caulk between layers of enamel, creating a unified barrier. If you are working in a small space, check out showers with a style trendy ideas for small bathrooms to see how clean lines and proper sealing can make a room feel larger and cleaner. The goal is to create a monolithic surface where water has nowhere to hide.
- Use a 2.5-inch angled sash brush for precise lines.
- Sand between every coat with 220-grit sandpaper.
- Clean the surface with TSP or a deglosser before starting.
- Apply at least two topcoats over a dedicated primer.
- Do not use the shower for 48 hours after painting to allow for full cure.
How to prep for a lifetime bond
Surface preparation for bathroom trim involves removing all existing soap scum, body oils, and mineral deposits using a trisodium phosphate solution. Paint will not stick to a dirty surface, and bathrooms are surprisingly greasy places. People think the steam cleans the walls. It does the opposite. It carries oils from soaps and shampoos and deposits them on the baseboards. If you paint over that, your new expensive enamel will peel off in sheets. I use a red scuff pad and a strong cleaner to break the surface tension of the old finish. Then I rinse with clean water twice. If the old paint is high-gloss, you have to sand it until it is dull. You are creating a ‘mechanical key.’ The new paint needs microscopic grooves to grab onto. I have seen guys try to skip this by using ‘self-priming’ paint. There is no such thing as a shortcut in a bathroom. If you want the finish to last, you have to do the work. This applies to the floors too; if you want a clean look, follow these tile cleaning tips for a sparkling bathroom in 2025 before you start your trim project. A clean environment ensures that no dust nibs settle into your wet paint film, which is especially important for high-gloss finishes that show every single flaw.
The 1/8 inch that ruins everything
A failure to account for the vertical movement of the wall assembly can lead to horizontal cracking at the top of the baseboard. Houses breathe. They move with the seasons. In the winter, the air is dry and the wood shrinks. In the summer, the humidity rises and everything swells. If you use a rigid, low-quality paint, it will crack at the seam where the baseboard meets the wall. This crack is more than an eyesore. It is an entry point for moisture. This is why I insist on urethane-modified coatings. They have just enough elongation to stretch without breaking. While most people want the thickest underlayment for their floors, too much cushion actually causes the locking mechanisms on LVP to snap under pressure, and similarly, too much paint build-up in the corners can lead to brittle failures. You want thin, even coats. Three thin coats are always better than one thick, gloopy coat. It allows the solvents to evaporate properly and the resin to harden into a dense matrix. If you find your trim is already failing, you might consider baseboards makeover ideas to elevate your space to start fresh with better materials. Remember, the baseboard is the transition between the vertical plane of the wall and the horizontal plane of the floor. It is a high-stress zone that demands high-stress chemistry.