Most guys skip the leveling compound. They think the underlayment will hide the dip. It won’t. I spent three days grinding concrete on a job last month just so the floor wouldn’t click like a castanet. That same philosophy applies to penny tiles. If the foundation is flawed or the maintenance is aggressive, you are just waiting for a structural failure. Penny tiles are a unique beast in the flooring world because they represent a massive ratio of grout to surface area. While a standard twelve by twenty four inch plank has minimal joints, a sheet of penny rounds is nearly fifteen to twenty percent grout by surface area. This means your cleaning strategy cannot be an afterthought. It must be a precise chemical and mechanical process that respects the integrity of the bond. I have seen too many homeowners take a wire brush to their bathroom floor, thinking they are being thorough, only to find they have literally scraped away the thin-set bond underneath the porcelain. When you dig into grout, you are not just removing dirt. You are removing the very material that keeps the assembly rigid. If that grout disappears, moisture finds its way into the subfloor, and that is where the real nightmares begin. Moisture leads to rot, and rot leads to a full tear out that will cost you thousands. We are going to look at how to maintain these floors without turning your bathroom into a construction zone.
The geometry of the grout problem
To clean penny tiles without digging grout out you must use pH neutral cleaners and soft bristled nylon brushes that dissolve surface tension rather than mechanically abrading the grout lines. Avoid acidic solutions like vinegar or lemon juice which eat away at the calcium carbonate structure of the cementitious grout. This chemical reality is why penny tiles fail more often than larger formats. Because there are so many small joints, the cumulative effect of using the wrong cleaner is magnified. Every time you use an acidic cleaner, you are performing a microscopic excavation of the joint. Over time, the grout becomes porous and sandy. Once it reaches that state, it acts like a sponge, pulling in dirty mop water and holding onto it. This is called capillary action. The moisture moves deep into the grout bed where it cannot evaporate. This creates a breeding ground for mold and mildew that no amount of surface scrubbing will ever reach. You have to treat the grout as a structural component, not just a filler. It is the bridge between the tiles that prevents lateral movement and protects the subfloor from topical water infiltration.
“A floor is only as good as the subfloor beneath it; deflection is the enemy of every joint.” – Master Flooring Axiom
The chemistry of mineral deposits and soap scum
Soap scum and hard water minerals bind to the porous surface of grout through a process of evaporation and chemical bonding that requires alkaline cleaners to break. Acidic cleaners might brighten the grout temporarily but they weaken the internal lattice of the cement which leads to cracking. When you see that orange or black tint on your penny tiles, it is usually a combination of skin oils, soap fats, and calcium carbonate from your water. These substances are non polar, meaning water alone will not move them. You need a surfactant that can get under the grime and lift it to the surface. I always recommend starting with the gentlest method possible. Steam is often the best tool because it uses heat to lower the viscosity of the oils without introducing harsh chemicals that might strip your sealer. If you have been sealing your grout every six months as you should, the dirt should be sitting on top of the sealer, not inside the grout itself. If you haven’t sealed it, the dirt is now part of the floor’s molecular structure.
The danger of mechanical abrasion
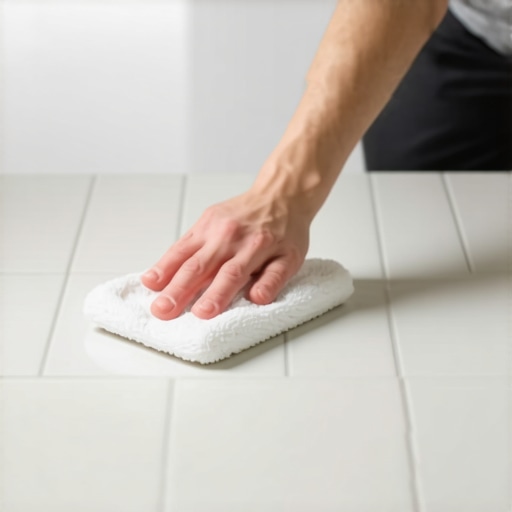
Mechanical abrasion from stiff brushes or metal tools physically removes the top layer of grout which exposes a fresh and more porous surface that absorbs stains faster. Maintaining penny tiles requires a low impact approach that relies on dwell time for chemical cleaners rather than elbow grease. Many people think that if they don’t see suds, it isn’t working. That is a myth pushed by big box retailers. Some of the most effective professional cleaners are low foam. You apply them, let them sit for ten minutes, and let the chemistry do the heavy lifting. This dwell time allows the cleaner to emulsify the oils. If you start scrubbing immediately, you are just moving the dirt around. You need to give the cleaner time to break the bond between the grime and the tile surface. This is especially true for penny tiles because the circular edges of the tile create little pockets where dirt likes to hide. A flat mop often misses these transitions, which is why a soft round brush used in a circular motion is the only way to get deep into those valleys without damaging the grout peaks.
| Cleaner Type | pH Level | Impact on Grout | Recommended Frequency |
|---|---|---|---|
| Distilled Vinegar | 2.5 | Destructive | Never |
| Neutral Cleaner | 7.0 | Safe | Weekly |
| Alkaline Degreaser | 10.0 | Aggressive | Quarterly |
| Steam Vapor | N/A | Safe | Monthly |
The proper sequence for deep cleaning
A successful deep clean involves dry vacuuming to remove loose particulates followed by a controlled application of a pH neutral detergent and a thorough freshwater rinse to prevent residue buildup. Residue left behind by cleaners acts as a magnet for new dirt which accelerates the staining process. I see this in high end showers with a style where the tile looks dull after just a month. It is usually because the homeowner is using too much soap and not enough rinse water. The soap dries on the tile and creates a sticky film. When you walk on that film with bare feet, you are depositing oils that get locked into the soap layer. It becomes a vicious cycle. You must rinse until the water runs clear. This is why having a handheld shower wand is a necessity for any bathroom with penny tiles. You need the mechanical force of the water to flush the joints. For those looking for tile cleaning tips for a sparkling bathroom, the secret is always in the rinse.
- Vacuum the floor with a soft brush attachment to remove grit that can scratch the tile glaze.
- Apply a professional grade neutral cleaner to the surface and let it sit for seven to ten minutes.
- Agitate the grout lines gently with a soft nylon brush using circular motions to reach all sides of the penny tiles.
- Extract the dirty solution using a wet dry vacuum or a highly absorbent microfiber mop.
- Rinse the entire area with clean warm water twice to ensure no chemical residue remains.
- Dry the floor immediately with a clean towel to prevent water spots and mineral deposition.
Why your subfloor is lying to you
Subfloor deflection causes microscopic cracks in grout that allow water to bypass the tile and saturate the wood or concrete beneath which eventually pushes stains upward from the bottom. This upward staining is often mistaken for surface dirt but it cannot be cleaned without addressing the moisture problem. If you notice that specific areas of your penny tile grout are always darker than the rest, you might have a subfloor issue. When a subfloor flexes too much, the grout, which is brittle, develops hairline fractures. Water from your shower or cleaning bucket seeps into these cracks. It hits the plywood or the thin-set and stays there. This moisture then wicks back up through the grout, bringing tannins from the wood or minerals from the concrete with it. This is why grout restoration secrets often involve more than just a new coat of colorant. You have to ensure the assembly is stiff enough to support the tile. In many cases, adding chic baseboard designs can hide the expansion gaps at the edges, but it won’t fix a bouncy floor in the middle of the room.
“Grout is not waterproof; it is a filter. The waterproofing must happen behind the tile for the system to survive.” – TCNA Handbook Principles
The role of vapor transmission in tile health
Vapor transmission through the grout joints is essential for the longevity of the installation as it allows the thin-set to breathe and prevents the buildup of hydrostatic pressure. Blocking this transmission with topical wax or improper sealers can lead to tile delamination. People love the look of a high gloss finish, but putting a topical sealer on penny tiles is a mistake I see too often. A topical sealer creates a plastic film over the floor. This film eventually scratches and turns cloudy. More importantly, it traps moisture underneath the tile. When that moisture tries to evaporate, it pushes against the sealer, causing it to peel. You should always use a penetrating sealer. These products sink into the grout and bond with the pores at a molecular level, leaving the surface breathable but hydrophobic. This is the gold standard for eco friendly tile solutions because it extends the life of the floor indefinitely without the need for harsh stripping chemicals later on.
The 1/8 inch that ruins everything
The depth of the grout joint determines the strength of the bond and if you scrub too deep you reduce the surface area of the bond between the grout and the tile edge. Once this bond is compromised the tile will eventually pop loose under foot traffic. Penny tiles are thin, often only one quarter of an inch thick. This means your grout joint is only as deep as the tile. If you dig out even an eighth of an inch of grout during cleaning, you have removed fifty percent of the lateral support for that tile. This is why maintaining the level of the grout is so critical. If the grout is flush with the edge of the tile, the tile is protected. If the grout is recessed, the edges of the porcelain are exposed to impact and chipping. If your grout is already low, you may need to look into how to refresh grout without replacing it rather than continuing to scrub a failing joint. You can often apply a high quality epoxy grout colorant which acts as both a sealer and a structural reinforcement. It is a tedious job on penny tiles because of the sheer number of joints, but it is better than a full demolition.
The ghost in the expansion gap
Expansion gaps at the perimeter of the room are often filled with grout by lazy installers which leads to tenting and grout cracking as the house shifts with seasonal humidity. These gaps should be filled with 100 percent silicone caulk that matches the grout color to allow for movement. If you see your grout crumbling specifically around the edges of the room, it is likely because the floor has no room to breathe. Houses are dynamic. They expand and contract with the weather. If the tile is locked tight against the walls, that pressure has to go somewhere. It usually goes into the grout joints, causing them to crush and turn to powder. When you clean these areas, you aren’t just removing dirt, you are removing the debris of a structural failure. When updating your space with baseboards makeover ideas, take the time to scrape out any hard grout from the perimeter and replace it with a flexible sealant. This simple fix can stop the constant shedding of grout dust that makes your floors look dirty no matter how much you scrub.
A technical perspective on modern showers
Modern shower designs often utilize linear drains and large format tiles but the penny tile remains a favorite for shower pans due to its slip resistance and ability to conform to complex slopes. Maintaining these surfaces requires a deep understanding of water shed and drainage physics. In a shower pan, the grout is almost always wet. If the pre slope under the liner was not done correctly, water sits in the mortar bed forever. This creates a constant upward pressure of moisture through the grout. You can clean the surface every day, but the grout will still look dark and dingy because it is saturated from below. This is why I always check the weep holes in the drain before I start a cleaning regimen. If the weep holes are clogged, the shower pan cannot dry out. No amount of scrubbing will fix a drainage problem. For more on high performance bathroom layouts, you can check out showers that wow. Proper installation is the best cleaning tip I can ever give you. If you need professional advice on a failing installation or a complex remodel, you should contact us to discuss the structural requirements of your project. For more information on how we handle your data, please see our privacy policy.