
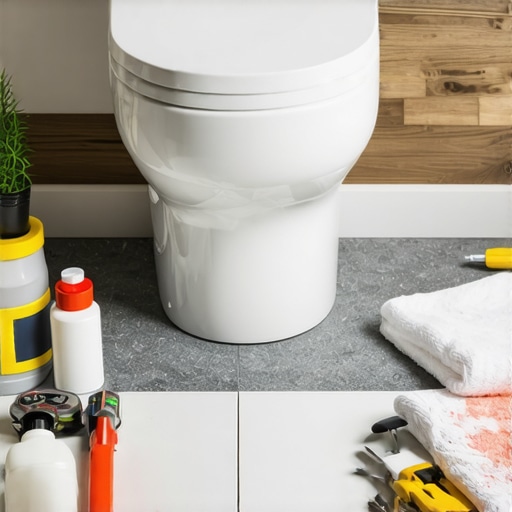
I have spent twenty-five years on my knees with a moisture meter in one hand and a level in the other. I have smelled enough wet subfloors and sawdust to know that a floor is never just a surface. It is a structural engineering system. Most people look at the gap between their toilet and their tile and see a minor cosmetic detail. I see a critical failure point. I see a place where capillary action can pull dirty bath water under your tile and rot your subfloor from the inside out. Last month I spent three days grinding concrete on a job just so the floor wouldn’t click like a castanet. The homeowners thought a bit of underlayment would hide the dip. It did not. They learned the hard way that deflection is the enemy of every joint. When it comes to the toilet base, the stakes are just as high. You are choosing between a rigid crystalline structure and a flexible polymer. One of them will crack under the pressure of a 200-pound human sitting down every morning. The other will move with the house. If you get this wrong, you are inviting mold to live under your expensive porcelain throne.
The legal requirement for a sanitary seal
Plumbing codes and sanitary requirements demand that the base of a toilet be sealed to the finished floor to prevent the accumulation of liquid or debris. Most International Plumbing Code (IPC) sections mandate a watertight seal to ensure hygiene and prevent odors. This seal is the primary defense against moisture infiltration into the subfloor structure. This is not about aesthetics. It is about biology. Without a proper seal, every time someone misses the bowl or a shower overflows, that water finds the path of least resistance. It travels straight into the gap between the porcelain and the tile. It sits there. It creates a petri dish for bacteria. I have pulled up toilets where the homeowner skipped the seal and the smell of the rotted plywood underneath was enough to make a seasoned plumber gag. You need a barrier that stops the migration of fluids. Whether that barrier is made of sand and cement or high-grade silicone is the technical question we need to solve.
The physics of the rigid grout joint
Grout for toilet bases consists of a mixture of Portland cement, sand, and pigments that forms a rigid, non-flexible bond. While grout matches the tile lines in your bathroom, it lacks the elasticity needed to handle the micro-movements of a toilet. Over time, the weight distribution on the toilet will cause hairline fractures in the grout. Grout is beautiful. It looks uniform. But grout is brittle. Think about the physics involved here. A toilet is a heavy porcelain fixture. It rests on a wax ring or a foam gasket. Every time a person sits down, there is a slight shift in weight. Even a fraction of a millimeter is enough to shatter the bond of a cementitious grout. Once that bond breaks, you have a crack. That crack is a highway for water. If you insist on using grout, you are basically creating a ticking time bomb for your subfloor. It might look good for a month, but eventually, the vibrations of the house and the usage of the fixture will turn that grout into dust. I have seen floors where the grout was so cracked it was actually scratching the surface of the tile as the toilet wobbled. It is a mess that no professional should endorse.
The molecular advantage of silicone caulk
Silicone caulk is a flexible polymer designed to maintain a watertight bond while allowing for expansion and contraction. In the context of a bathroom floor, 100 percent silicone sealant provides the tensile strength and elongation properties required to bridge the gap between tile and porcelain without cracking. This stuff is engineered at the molecular level to be a rubberized gasket. Unlike grout, silicone does not care about your house settling. It does not care if the floor joists flex slightly under the weight of a full bathtub nearby. It stretches. It compresses. It holds its seal. Many guys will try to use cheap latex caulk because it is easier to clean up with water. Do not do that. Latex caulk shrinks. It dries out and pulls away from the edges within a year. You want the high-solids silicone that smells like vinegar when you apply it. That smell is the acetic acid curing the bond. It creates a chemical attachment to the glazed porcelain and the vitrified tile that is almost impossible to break without a razor blade. This is the difference between a temporary fix and a permanent architectural solution.
“A floor is only as good as the subfloor beneath it; deflection is the enemy of every joint.” – Master Flooring Axiom
The 1/8 inch that ruins everything
Expansion gaps and joint width are the most overlooked aspects of flooring installation near plumbing fixtures. A gap wider than one-eighth of an inch requires a sealant with high gap-filling capacity and low shrinkage rates to ensure the structural integrity of the sanitary barrier. If the gap is too tight, the material cannot move. If it is too wide, the material will sag before it cures. I always tell my apprentices that the prep work is where the money is made. You have to clean that gap. If there is dust, old wax, or debris in that 1/8 inch space, the caulk will fail. It will bond to the dust instead of the tile. You also need to consider the levelness of the floor. If your tile job is uneven, you might have a massive gap on one side and no gap on the other. This is why I spent those three days grinding concrete on my last big job. You cannot hide a bad subfloor with a bead of caulk. You have to start with a flat plane. Once you have that, a consistent bead of silicone becomes a professional finish that protects your modern shower designs and the rest of your bathroom investment.
Material Comparison Matrix
| Feature | Sanded Grout | 100% Silicone Caulk | Siliconized Latex |
|---|---|---|---|
| Flexibility | Zero | High | Moderate |
| Water Resistance | Porous | Hydrophobic | Moderate |
| Adhesion to Porcelain | Mechanical | Chemical | Weak |
| Longevity | Cracks easily | 20+ Years | 3-5 Years |
| Ease of Removal | Difficult | Moderate | Easy |
Plumbing codes and the weep hole mystery
Plumbing regulations often debate the full perimeter seal versus leaving a weep hole at the rear of the toilet. Leaving a small unsealed gap allows for leak detection if the wax ring fails, preventing water from being trapped and causing unseen rot in the subfloor. This is a point of contention among old-timers. Some guys say seal the whole thing because it looks better and keeps the smell out. I disagree. I always leave a half-inch gap at the very back of the toilet base. If that wax ring starts to fail, I want the homeowner to see a little water on the floor. I want them to know there is a problem before the water eats through the subfloor and the toilet falls into the basement. If you seal the whole thing tight, the water has nowhere to go but down. It will follow the bolts. It will soak into the plywood. It will create a disaster that costs ten times more to fix than a simple wax ring replacement. Be smart. Leave the weep hole. It is the early warning system your house deserves.
The chemistry of the bond
Adhesion science dictates that the surface energy of glazed porcelain requires a sealant with specific wetting characteristics to form a durable bond. Proper surface preparation involves removing all contaminants like soap scum and old grout residue to ensure the molecular adhesion of the silicone. When you apply silicone, you are looking for a specific type of failure. You want the material to fail cohesively, meaning it rips in the middle, rather than adhesively, where it peels off the tile. To get that, you need a clean surface. I use denatured alcohol. I wipe the base of the toilet and the tile until the rag comes back white. Only then do I run my bead. If you are worried about the look of your tile, you should look into how to refresh grout without replacing it for the rest of the room, but for the toilet base, keep it clean and keep it silicone. The chemistry does not lie. Cement cannot bond to a smooth glass surface like porcelain. Silicone was born for it.
“Every square inch of a bathroom floor must be treated as a potential flood zone; moisture management is the only path to longevity.” – Tile Council Standards
Step-by-step professional installation checklist
- Clean the gap between the toilet and the tile using denatured alcohol and a stiff brush.
- Ensure the toilet is bolted down tight and does not rock or shift.
- Apply a continuous bead of 100 percent silicone caulk around the front and sides.
- Leave a small half-inch gap at the rear center for leak detection.
- Tool the bead with a soapy finger or a caulking tool for a smooth finish.
- Allow the sealant to cure for at least 24 hours before using the bathroom.
- Check the seal every year for signs of peeling or mold growth.
Beyond the toilet base
Bathroom moisture management extends beyond the toilet seal to the baseboards and shower transitions. Using water-resistant baseboard designs and high-performance grout in wet areas ensures that the entire flooring system remains structurally sound for decades. While you are sealing the toilet, look at your walls. Are your baseboards swelling? If so, you might have a moisture issue that a bead of caulk cannot fix. You might need chic baseboard designs that can handle the humidity. A bathroom is a high-stress environment for building materials. Between the steam from the shower and the potential for leaks, everything needs to be top-tier. Do not buy the cheap stuff at the big-box stores. Go to a flooring wholesaler. Get the professional grade sealants. Your house is likely your biggest asset. Why would you protect it with a five-dollar tube of mystery goo? Think like an architect. Think about the physics. Seal that toilet with silicone and leave the grout for the walls where it belongs.