
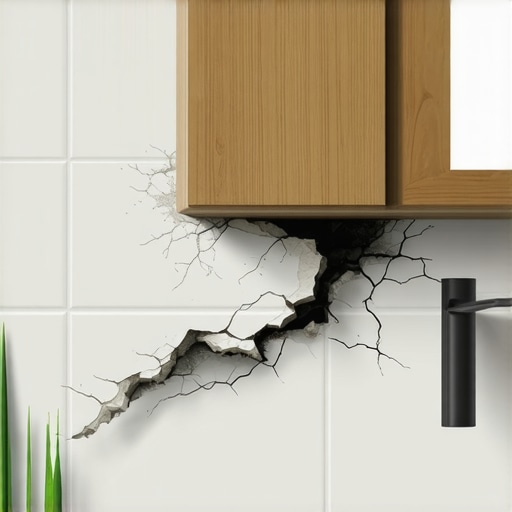
Most guys skip the leveling compound. They think the underlayment will hide the dip. It won’t. I spent three days grinding concrete on a job last month just so the floor wouldn’t click like a castanet. I have seen it a thousand times where a high-end bathroom renovation starts to show its flaws within six months. You walk in, and there it is, a hairline gap between the vanity backsplash and the tile wall. You try to caulk it, but the gap just grows. This is not a cosmetic issue. It is a structural failure born from a lack of respect for the physics of subfloors and the chemistry of adhesives. A floor is not just a surface to walk on, it is a foundation for everything sitting on it. When a vanity pulls away, it tells a story of deflection, moisture imbalances, and improper anchoring. I have spent twenty-five years on my knees with a moisture meter and a six-foot level, and I can tell you that the vanity is not the problem, the structure beneath it is. [IMAGE_PLACEHOLDER]
The physics of floor deflection and joist movement
Bathroom vanity movement is typically caused by floor deflection, which occurs when the subfloor or joists flex beyond the L/360 industry standard. When the floor bows downward under the weight of a heavy stone-topped vanity, the vertical alignment of the unit shifts, causing the top edge to pull away from the wall. This movement is often invisible to the naked eye until the grout or caulk lines snap. In the world of the Tile Council of North America, we look at the deflection rating. For ceramic tile, you need a rating of L/360. For natural stone, it is L/720. This means the span of your joist divided by 360 or 720. If your joists are 2×8 lumber spanning twelve feet, your floor is essentially a trampoline. When you place a two-hundred pound double vanity with a quartz top on that floor, the joists compress. This compression is not uniform. The center of the room might dip while the edges stay rigid, creating a rotational force on the vanity cabinet. As the vanity tilts forward even a fraction of a degree, the top pulls away from the wall. This is why I always check the basement or crawlspace before I ever lay a single tile in a bathroom. If the framing is weak, the tile will crack, the grout will crumble, and your vanity will never stay flush. Speaking of grout, you can find grout restoration secrets for long-lasting results to fix the visual damage, but it won’t stop the movement.
“A floor is only as good as the subfloor beneath it; deflection is the enemy of every joint.” – Master Flooring Axiom
The hygroscopic nature of bathroom framing and stud twist
Vanity separation is frequently a result of hygroscopic changes where wood studs and subfloors expand or contract based on ambient humidity levels. In bathrooms, high moisture cycles cause the wood framing to move independently of the rigid tile and stone surfaces, leading to mechanical separation at the joints. Wood is a living material in the sense that it never stops reacting to its environment. When you run a hot shower, the humidity in the room spikes. The wood studs behind your tile wall absorb that moisture and expand. When the room dries out, they shrink. Over time, this constant cycling causes the studs to twist. If your vanity is anchored into a stud that is twisting or bowing, it will physically pull the cabinet away from its original position. I have seen cases where the moisture content of the framing was eighteen percent during installation and dropped to eight percent in the winter. That ten percent difference represents a massive physical shift in the wood fibers. This is particularly problematic in new construction where the lumber is still green. As the house seasons, the wood settles, and the vanity, which is a rigid box, cannot follow that movement. This creates a shear force on the screws holding the vanity to the wall. If those screws are not heavy-duty cabinet screws, they can actually bend or pull through the thin plywood back of the vanity.
The chemical bond of modified thinset and adhesive failure
Adhesive failure at the wall-to-floor interface occurs when the polymer-modified thinset lacks the necessary shear strength to resist the lateral forces of a shifting cabinet. Improperly mixed mortar or the absence of a mechanical bond between the tile and the vanity carcass leads to separation. Many installers use standard thinset without high-polymer additives. These polymers are what give the mortar its flexibility. Without them, the bond is brittle. When the floor moves, a brittle bond snaps. The chemistry of Portland cement is fascinating but unforgiving. It creates a crystalline structure as it cures. If that structure is disturbed by movement before it reaches full tensile strength, it fails. Furthermore, I see guys who think they can just glue a vanity to a tile wall. That is a recipe for disaster. Tile is meant to be a floating surface in many ways, separated from the structural wall by a moisture barrier or cement board. If the vanity is only bonded to the tile and not the studs, any movement in the tile layer will carry the vanity with it. If you are cleaning up the mess from a failed installation, these tile cleaning tips for a sparkling bathroom in 2025 will help you prep the surface for a proper fix.
| Subfloor Material | Modulus of Elasticity | Moisture Resistance | Best Use Case |
|---|---|---|---|
| Plywood (CDX) | Medium | High | Standard residential tile |
| OSB (Advantech) | High | Very High | Heavy stone installations |
| Concrete Slab | Very High | Moderate | Ground floor bathrooms |
| Cement Board | Low (Structural) | Excellent | Wall backing only |
The ghost in the expansion gap and perimeter joints
An expansion gap is a mandatory 1/8 inch space left at the perimeter of a tile floor to allow for the natural movement of the building envelope. If this gap is filled with rigid grout rather than flexible 100% silicone, the floor will exert pressure on the vanity. People hate seeing gaps. They want everything tight. But a floor needs to breathe. If you push your tile tight against the wall and the vanity, when the house expands in the summer, the tile has nowhere to go. It will tent or it will push against the vanity legs. This pressure can be enough to lift a vanity off the floor or shove it away from the wall. I always leave a gap and cover it with baseboards. If you are looking for ways to finish that gap, look at chic baseboard designs that transform rooms in 2025. Using 100% silicone caulk in these corners is the only way to handle this. Grout has zero movement capability. Silicone can stretch and compress. If your installer used grout in the corner where the vanity meets the wall, that grout will crack within weeks. It is inevitable. The expansion gap is the insurance policy for your bathroom floor.
Why your subfloor is lying to you about levelness
Subfloor levelness is not the same as flatness, and a subfloor that is not flat within 1/8 inch over 10 feet will cause a vanity to sit on a high point and rock. This rocking motion eventually pulls the top anchor points out of the wall as the cabinet settles into the low spots. I have walked onto jobs where the contractor said the floor was level. I put my spirit level on it and found a quarter-inch dip. That might not sound like much, but over the thirty-inch width of a vanity, it is a disaster. If the vanity sits on a hump, it will act like a seesaw. Every time you lean on the vanity to brush your teeth, you are putting leverage on the wall screws. Eventually, those screws fail. I use self-leveling underlayment on almost every bathroom I do. It is an added cost, but it creates a perfectly flat plane. A flat plane ensures the vanity weight is distributed evenly across the floor, rather than being concentrated on two or three points. This prevents the twisting of the cabinet box that leads to that ugly gap at the wall. If you are re-doing the whole room, consider eco-friendly tile solutions for sustainable homes in 2025 to keep things modern and stable.
“Deflection is not a suggestion; it is a mathematical certainty that will destroy a rigid installation.” – NWFA Installation Guidelines
The 1/8 inch that ruins everything and how to fix it
Precision in the final 1/8 inch of installation, specifically the use of shims and structural screws, determines the long-term stability of a bathroom vanity. Skipping the shimming process on an uneven floor creates internal tension in the cabinet that forces it to pull away. When I install a vanity, I spend more time shimming than I do screwing. I use plastic shims because they don’t rot or compress like wood. I slide them under the corners until the vanity is perfectly plumb and level. Only then do I drive the screws into the studs. And I don’t use those cheap screws that come in the box. I use No. 10 or No. 12 cabinet screws with a wide washer head. These screws have a high shear strength. They won’t snap when the house moves. If you have a gap now, the fix is to remove the screws, shim the vanity until it’s tight against the wall again, and re-anchor it into fresh wood. If the grout is messed up from the movement, you might want to know how to refresh grout without replacing it once the structure is stabilized. Keeping your bathroom in top shape also involves maintenance, so don’t forget tile cleaning tips for a sparkling bathroom in 2025 to keep that new grout looking sharp.
- Check floor deflection using a string line or laser level.
- Verify that subfloor moisture is within 2% of the hardwood or cabinet material.
- Use only 100% silicone in the transition between vanity and tile.
- Anchor vanities into at least two studs using structural cabinet screws.
- Always use a moisture-rated backer board behind tile in wet areas.
The relationship between a vanity and a tile wall is a delicate balance of forces. You have the downward force of gravity, the lateral force of wood expansion, and the rigid resistance of the tile itself. If you ignore any of these, the system fails. I have seen guys try to hide these gaps with extra thick baseboards or crown molding around the vanity, but that is just putting a bandage on a broken leg. The real solution is to build from the joists up. Ensure the floor is stiff, the wall is straight, and the vanity is anchored with the right hardware. If you do that, you won’t be calling me in six months to ask why your bathroom is falling apart. It’s about doing it right the first time, even if it means three days of grinding concrete. If you need help with a project that has gone south, you can always contact us for expert advice on flooring and bathroom structural integrity.