
The physics of cleaning soap scum from textured slip-resistant tile
I spent three days grinding concrete on a job last month just so the floor wouldn’t click like a castanet, and that same level of obsessive detail is what you need for your bathroom surfaces. Most guys skip the leveling compound and most homeowners skip the chemistry of their shower. I once walked into a house where a client was ready to rip out a five thousand dollar slip-resistant porcelain floor because it looked like a grey, muddy mess. They thought the tile was defective. In reality, it was just three years of soap scum trapped in the microscopic grip of the high-friction surface. If you do not understand the bond between calcium stearate and textured ceramic, you will never have a clean floor. You are not just washing a surface, you are performing a mechanical extraction from a microscopic landscape of peaks and valleys. Slip-resistant tiles are designed with a high Dynamic Coefficient of Friction, which means they have a surface profile that bites into footwear to prevent falls. That same profile bites into body oils and mineral deposits. To get this right, you have to stop thinking like a janitor and start thinking like a chemical engineer. You need to understand how the fatty acids in your bar soap react with the magnesium and calcium in your water to create a wax that is nearly impervious to standard water-based cleaning. This is not a decorative issue, it is a structural maintenance challenge that determines the longevity of your grout and the safety of your home.
The microscopic trap for bathroom grime
Textured slip-resistant tile relies on a high Dynamic Coefficient of Friction or DCOF to provide safety in wet areas. This texture creates microscopic valleys where soap scum, a mixture of animal fats and hard water minerals, becomes mechanically anchored. Standard mopping fails because it cannot reach the bottom of these depressions. When you walk across a wet bathroom floor, you want those ridges to hold you steady. However, as you shower, the paraffin waxes found in many soaps melt and flow into those same ridges. As the water evaporates, the minerals stay behind, locking the wax into a hard, white or grey film. This film is what we call soap scum. It is not just sit-on-top dirt, it is a chemically bonded layer that fills the texture of your tile until the surface becomes smooth and, ironically, more slippery than the tile was intended to be. If you want to maintain the integrity of your [showers that wow modern designs for 2025](https://elegantfloorz.com/showers-that-wow-modern-designs-for-2025), you have to address this buildup before it petrifies. The bond is so strong that a simple spray-and-wipe method will only remove the top five percent of the material. You are left with a dull finish that looks perpetually dirty no matter how much effort you put into it.
The chemical reality of calcium stearate
Soap scum is technically a metallic soap, specifically calcium or magnesium stearate, formed through a precipitation reaction. This substance is hydrophobic, meaning it repels water, making standard water-based cleaners almost entirely ineffective without the addition of a proper surfactant or acidic breaker. You have to break the mineral bond first. If you live in an area with high mineral content in the water, this process happens twice as fast. The minerals act like the aggregate in a concrete mix, and the soap fats act like the cement. Together, they create a biological plastic that coats your tile. To dissolve this, you need a cleaner with a pH that can either emulsify the fats or dissolve the calcium. Many people reach for bleach, but bleach is a disinfectant, not a degreaser. It will kill the mold, but it will leave the soap scum structure intact. This is why you see people scrubbing until their arms hurt with no results. You are fighting a chemical battle with the wrong weapons. You need an acidic cleaner to attack the minerals or a high-alkaline degreaser to attack the oils. Using [tile cleaning tips for a sparkling bathroom in 2025](https://elegantfloorz.com/tile-cleaning-tips-for-a-sparkling-bathroom-in-2025) will help you identify the right balance for your specific tile type.
“A floor is only as good as the subfloor beneath it; deflection is the enemy of every joint.” – Master Flooring Axiom
Why your mop makes the problem worse
Traditional string mops or flat microfiber pads often skip over the surface of textured tiles, only touching the peaks of the slip-resistant profile. This action pushes the liquefied soap scum and dirty water deeper into the valleys of the tile and into the porous grout lines. I hate seeing people use a dirty mop on a textured floor. It is like trying to clean a cheese grater with a paper towel. All you are doing is shredding the towel and leaving the cheese. To actually clean a high-friction surface, you need mechanical agitation that can penetrate the profile. This means brushes, not pads. The bristles of a scrub brush must be stiff enough to move the debris but soft enough not to scratch the glaze of the tile. If you are dealing with [chic baseboard designs that transform rooms in 2025](https://elegantfloorz.com/chic-baseboard-designs-that-transform-rooms-in-2025), you also have to be careful not to splash these acidic cleaners onto your wood or MDF trim. The runoff from cleaning textured tile is highly concentrated with suspended solids and chemicals. If you do not rinse and extract that slurry immediately, it will settle back into the texture and dry even harder than before. This is a common failure point in residential cleaning. Extraction is just as important as agitation. You need a wet vacuum or a highly absorbent microfiber cloth to lift the emulsified scum off the floor entirely.
| Chemical Agent | pH Level | Effect on Textured Porcelain | Effect on Cementitious Grout |
|---|---|---|---|
| Phosphoric Acid | 1.0 to 2.0 | Dissolves minerals quickly | Erodes grout if left too long |
| Neutral Cleaner | 7.0 | Safe for daily maintenance | No impact on deep stains |
| Alkaline Degreaser | 11.0 to 12.0 | Breaks down organic oils | Effective for body oils |
| Vinegar (Acetic Acid) | 2.4 | Weak on heavy scum | Gradually dissolves grout binder |
The mechanical solution for high friction surfaces
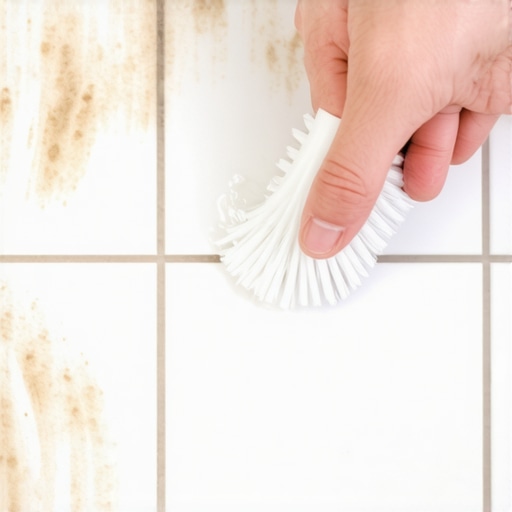
The most effective way to clean soap scum from textured tile involves a four-step process: dry soil removal, chemical dwell time, mechanical agitation, and pressurized extraction. Skipping any of these steps results in a partial clean that will attract new grime within days. First, you must remove any loose hair or skin cells that have dried on the surface. Next, apply your chosen cleaner and let it sit for at least ten minutes. This is called dwell time. It allows the chemistry to do the heavy lifting. I see so many guys spray and immediately start scrubbing. That is a waste of energy. Let the surfactant penetrate the waxy layer. After the dwell time, use a nylon deck brush. Move in circular motions to ensure the bristles hit the tile ridges from every angle. Finally, rinse with clean water. If you see the water beading, the soap scum is still there. Water should sheet off a truly clean tile. If your grout is looking particularly rough after this process, you may need to look into [grout restoration secrets for long-lasting results](https://elegantfloorz.com/grout-restoration-secrets-for-long-lasting-results) to seal the pores and prevent future penetration.
- Use a pH-neutral cleaner for daily maintenance to avoid damaging grout seals.
- Select a nylon bristle brush with a varying height profile to reach into tile valleys.
- Apply an alkaline cleaner once a month to strip body oils and skin cells.
- Always rinse with distilled or filtered water if you live in a hard water area.
- Dry the surface with a high-speed fan or microfiber towel to prevent mineral spotting.
Grout lines and the myth of waterproof surfaces
Grout is the most vulnerable part of any tile installation because it is naturally porous and acts as a capillary system for moisture and dissolved soap scum. Even if your tile is waterproof, your grout is a sponge that can harbor bacteria and minerals. Many people think that because they have tile, their bathroom is a sealed box. It is not. If your grout is not properly sealed, the soap scum you scrub off the tile will just soak into the grout lines. This leads to permanent staining and the breakdown of the grout structure. I have seen grout turn to mush because of improper cleaning chemicals and constant moisture saturation. If your grout is already compromised, you might need to learn [how to refresh grout without replacing it](https://elegantfloorz.com/how-to-refresh-grout-without-replacing-it). A floor is a system. The tile, the grout, the thin-set, and the subfloor all work together. If you let the surface fail, the moisture will eventually find its way to the subfloor. I have replaced entire plywood subfloors because a homeowner let the grout in their shower fail, allowing water to wick under the tile. Cleaning is not just about aesthetics, it is about protecting the structural integrity of your home. You need to maintain that barrier with the same intensity you use to clean the tile itself.
“The Tile Council of North America states that slip resistance is a function of the texture and the cleanliness of the surface; even the best tile fails if coated in biofilm.” – Master Flooring Axiom
The 1/8 inch that ruins everything
The transition between your tile and your baseboards is often the place where soap scum and moisture accumulate the most, leading to mold growth and wood rot. This 1/8 inch gap must be maintained with high-quality silicone caulk rather than rigid grout to allow for expansion. When you are deep cleaning your textured tile, pay close attention to the perimeter. If you are using heavy water and aggressive chemicals, ensure your baseboard protection is solid. If you have [baseboards makeover ideas to elevate your space](https://elegantfloorz.com/baseboards-makeover-ideas-to-elevate-your-space), the last thing you want is to ruin them with acidic runoff. The physics of the room dictate that water will always run to the lowest point, which is usually the corner where the floor meets the wall. This is where the thickest layers of soap scum develop. Use a small detail brush for these areas. Do not assume the mop will get it. It won’t. You have to get down on your knees and ensure that the junction is clear of biofilm. If the caulk is peeling or discolored, it is time to remove it and replace it. A clean floor is useless if the edges are rotting out. This is the difference between a handyman and a master installer. We look at the corners. We look at the chemistry of the bond. We ensure the system holds up for twenty years, not just twenty minutes.