
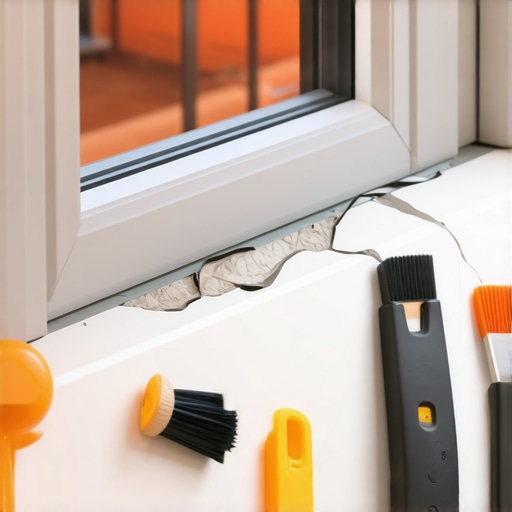
The hidden structural failure in bathroom tile
To repair cracked grout around a bathroom window, you must remove the failing cementitious material and replace the junction with 100% silicone caulk designed for wet environments. Cement grout is rigid and cannot withstand the thermal expansion and contraction of window frames. Using a carbide-tipped grout saw or an oscillating tool with a diamond blade ensures a clean channel for the new sealant to bond properly without future cracking.
Most guys skip the leveling compound. They think the underlayment will hide the dip. It won’t. I spent three days grinding concrete on a job last month just so the floor wouldn’t click like a castanet. That same mindset applies to your bathroom window. People think a little extra grout will fix a crack. It is a lie. If the substrate is moving, or if you have two different materials meeting at a ninety-degree angle, grout will fail every single time. It is basic physics. I have seen beautiful tile installations ruined because the installer treated the window frame like it was part of the wall. It is not. It is a moving part. It vibrates when the wind hits. It expands when the sun beats on it. It shrinks when the winter air chills the glass. If you do not account for that movement, your grout will turn to dust within six months.
The physics of the window joint
The junction between a window frame and a tile installation is technically a movement joint. In the world of the TCNA, we call this a change of plane or a change of material. These areas require flexibility. A standard bathroom window is often made of vinyl, wood, or aluminum. Each of these materials has a different coefficient of linear thermal expansion than the ceramic or porcelain tile surrounding it. When the temperature in your bathroom rises during a hot shower, the window frame expands at a faster rate than the tile. This creates shear stress on the grout line. Because grout has zero tensile strength, it snaps.
“A floor is only as good as the subfloor beneath it; deflection is the enemy of every joint.” – Master Flooring Axiom
The moisture in a bathroom aggravates this. High humidity levels, often exceeding sixty percent in a poorly ventilated space, allow water vapor to penetrate those tiny hairline cracks. Once water gets behind the tile, it begins to rot the backer board or the plywood framing. This leads to more movement, which leads to bigger cracks. It is a cycle of destruction that ends with a moldy wall and a massive repair bill. You have to stop the water at the surface by using materials that can actually handle the stress. This is why grout restoration secrets for long lasting results always focus on the integrity of the seal rather than just the color of the filler.
Mechanical removal of failed material
You cannot simply smear new grout over the old stuff. That is a rookie mistake that will last about a week. You need to get down into the joint. I use an oscillating multi-tool with a vacuum attachment. Dust is the enemy of a good bond. If there is a layer of pulverized grout dust in the crack, your new sealant will just peel off. You need to clear out at least one-eighth of an inch of depth. This creates a channel where the new material can actually bite into the sides of the tile and the window frame.
| Tool Type | Use Case | Risk Level |
|---|---|---|
| Carbide Grout Saw | Manual removal of soft grout | Low |
| Oscillating Diamond Blade | Fast removal of hard grout | Medium |
| Rotary Tool | Precision corner work | High |
| Vacuum with HEPA filter | Dust mitigation | Zero |
While you are working, keep a close eye on the tile cleaning tips for a sparkling bathroom in 2025 to ensure you are not scratching the glaze of your tiles. A slip of the hand with a diamond blade will leave a permanent scar on a porcelain surface. I always tape off the window frame with blue painter tape before I start. It protects the finish and gives me a clean line to work with. If the window is vinyl, be especially careful. Heat from a power tool can melt the plastic, creating a mess that is nearly impossible to fix.
Molecular reasons why grout turns to dust
Traditional grout is a hydraulic cement product. It cures through a chemical reaction called hydration. When you mix grout with water, it forms a crystalline structure that is incredibly hard but very brittle. If you add too much water during the mixing phase, you create microscopic voids in that structure as the water evaporates. This results in a soft, chalky grout that has no structural integrity. In a bathroom, where steam is constant, these voids become pathways for mold. This is why many modern showers that wow modern designs for 2025 are moving toward epoxy or high-performance pre-mixed grouts. These materials use resins instead of cement, making them much more resistant to moisture and movement.
- Remove all loose debris from the joint using a stiff brush.
- Clean the area with denatured alcohol to remove soap scum.
- Ensure the joint is completely dry before applying sealant.
- Select a color-matched 100% silicone caulk.
- Apply the bead with a steady hand and tool it with a finger dipped in soapy water.
The chemistry of the bond is everything. Silicone does not just sit in the crack. It forms a covalent bond with the surface of the tile. However, silicone will not stick to old grout or soap residue. This is why the cleaning phase is the most important part of the job. I have seen guys spend hours perfectly tooling a joint only to have it fail because they didn’t wipe the area down with alcohol first. The oils from your skin or the residue from your shampoo will prevent the silicone from sticking. It will look good for a month, then it will pull away from the wall, leaving a gap for water to enter.
The chemical reality of modern sealants
When you are at the store, you will see tubes labeled siliconized acrylic and tubes labeled 100% silicone. Do not buy the acrylic. It is easier to clean up with water, but it shrinks. As the water in the acrylic caulk evaporates, the bead gets smaller and pulls away from the edges. In a high-movement area like a window, that is a death sentence. You want the stuff that smells like vinegar. That is the acetic acid being released as the silicone cures. It is messy, it is hard to work with, but it is the only thing that will actually stay flexible for twenty years. If you are worried about the look, many manufacturers now make color-matched silicone that perfectly mimics the look of their grout lines.
“Consistency in the mix leads to longevity in the bond; never eye-ball your water ratios.” – Master Flooring Axiom
The thermal bridge at the window is another factor. In cold climates, the window frame acts as a heat sink. It pulls warmth out of the bathroom and transfers it outside. This creates a localized cold spot right at the grout line. When warm, moist air from a shower hits that cold spot, it condenses into liquid water. This constant cycle of wetting and drying will break down the chemical bonds of standard grout. By using silicone, you are creating a thermal break that can handle those temperature fluctuations without cracking or losing adhesion. This is the same logic used in high-performance eco friendly tile solutions for sustainable homes in 2025 where thermal efficiency is a priority.
The importance of the expansion gap
In every tile job I do, I leave a gap. Whether it is where the tile meets the chic baseboard designs that transform rooms in 2025 or where it hits a window, there must be room for the building to move. Houses are not static objects. They breathe. They settle. If you butt your tile tight against a window frame and fill it with grout, the tile has nowhere to go. It will either crack the grout or, worse, it will pop the tile off the wall. This is called tenting. I have seen entire walls of tile bulge out because the installer didn’t leave a perimeter expansion gap. Around a window, a one-eighth inch gap is the standard. It is large enough to allow for movement but small enough to be covered by a neat bead of caulk.
If you find that your grout is cracking even after you have used silicone, you might have a deeper structural issue. Check the framing around the window. If the wood is rotting or if the window wasn’t flashed correctly from the outside, the substrate might be moving too much for even silicone to handle. No amount of surface repair will fix a rotten 2×4. You have to fix the skeleton before you can fix the skin. This is the part most homeowners hate to hear, but it is the truth. I have walked away from jobs where the owner refused to fix the framing. I won’t put my name on a repair that I know will fail because the house is shifting under its own weight.